Showing posts with label living room. Show all posts

Monday, June 9, 2014

A glass door, sorta kinda

Hello to you! Hope you had a great weekend! Ours was lovely – lots of time outside, a date night with my hubby and family time as well. So happy that summer is here!

So a couple years ago I wrote a post that got a huge response – I never imagined talking about glass doors would be so interesting. :) I spoke of my desire to add some glass to our front door. We have a transom window above the door and five windows in the living room/foyer, but because we face north the foyer especially can feel dark.

It got even worse when I painted the inside of the door black years ago:

black front door

I LOVE my black doors though, so that was staying. :)

So many of you agreed with the desire to have that natural light coming in as well. Those of you who already have glass sidelights or doors were mixed – some loved it and some hated it. Because a lot of you are in the one percent like me:

Ninjas!

So the years passed and I still couldn’t get over how much I wanted some natural light up there. And the boy got older and I really wanted to be able to easily see where he was at outside. One day I realized I was going to just do what I said I would never do – get a storm door:

glass storm door

I’m going to be honest here – I used to be a storm door snob. I mean, in my defense, there are some that aren’t great looking. I have just always preferred the look of just the plain door.

But my mind changed. It happens. I’m growing, changing, all that stuff.

We got it from Lowe’s and it was actually a long wait to get it installed. It was about six weeks, maybe more, from start to finish. The last two weeks were the hardest – it was getting nice out and the Bub was outside all the time and I wanted that glass door so bad!

When it was installed I instantly felt very mom-like and very suburban. You know how I feel about suburban – some think it’s a bad word but it’s me. Proud of it.

I’m not totally obsessed with the way it looks from outside, but it’s not horrible at all. I went with a cranberry color (there weren’t a ton of options) because I figured it would work best with our front door. When I got home from ordering it I realized how much more rust our door is than cranberry, but I really don’t mind it:

glass storm door

For a hot second I thought about painting the door again but I think this is fine as is.

We ALL love it. It’s open all day, everyday. LOVE love love. The animals are obsessed:

I do know one thing now though – I could NOT do an all glass regular front door. No way, no how. When darkness hits that baby is closed and I need my privacy.

I was so thrilled about the door I figured it was time to update the trim like I’ve been doing all around the house. What a difference!:

black interior doors

You can see how I install my DIY craftsman trim here.

Now it works great with the new window trim up there as well:

thick window trim DIY

I still need to do some caulking on the door trim but it’s almost complete. I want to replace that foyer tile even more now! I still need to finish up replacing the chair rail throughout this front area as well.

We’re enjoying all the natural light that the new door brings in. I adore it! It makes the whole house brighter. We went with the heavier storm door with great security features, so I feel comfortable leaving it open all day:

craftsman diy door trim

Do you have a storm door? Does it make you feel incredibly suburban? :) Or do you have a glass front door and love it? Either way the natural light is amazing and I’m never going back! Whoot!

Monday, April 28, 2014

Living room refresh

Good Monday to you! Hope you had a great weekend!

I’ve mentioned before that I LOVE when I get to move furniture around…because I never move it around. Our house has a very open floor plan and very little useable wall space (that isn’t covered by windows). So once I find a spot for something it stays…forever. Moving furniture is a rare treat. :)

I found this étagère at HomeGoods a couple years back and it was love at first sight. I loved the detail on the sides of it and the size – nice and skinny. It started out between the two windows in the living room, but that became too busy to me, so I moved it next to the sofa last year:

tall etagere

It was there for a long time, but the height right there bugged me. It was right where the dining and living rooms meet and it felt awkward. I don’t have a full shot to show what I mean. It wasn’t awful or anything, I just wasn’t feeling it.

I decided a few weeks ago to try it in the corner where this desk/console used to sit:

desk by window

I wanted to use that desk in my office so the spot was freed up. I moved the bookcase over and loved it in that spot! And that of course started off a series of other small projects as well. It’s how I do. :)

When I installed the new window trim a couple weeks ago I started replacing the chair rail as well. I wanted something simpler that would sit flush against the window trim. And when I put the rail in years back I kind of cheated along that half wall behind the desk. Long story short the trim on the half wall didn’t meet up with the chair rail on the wall. So I removed all of it, including the top of the half wall, and installed all new:

replacing trim on half wall

Now the chair rail on that wall is one continuous piece of wood instead of two mismatched pieces. This would all make more sense if I had taken a before pic, but I forgot. :)

I got this new-to-me primer at Lowe’s when I was painting the window trim and so far I love it:

wood primer

It gives the wood a great base and goes on really smooth. I finished off the new chair rail and the top of the half wall with caulk and two coats of semi gloss paint. I still have quite a bit of chair rail to replace but I’ll do that as the budget allows.

But the best part is that I think this piece has finally found it’s forever home!:

skinny bookcase

It’s much bigger than the desk was, but takes up less visual space for sure. I couldn't believe the difference. I love how open it feels now and that we can appreciate the pretty detail on the side!

I loved what I had on the wall above the desk so I moved that between the windows:

DIY craftsman window trim

I’m not sure that will stay but I do like that the round mirrors break up all the rectangles in this spot – windows, wainscoting, bench and bookshelf.

OH! And I pulled the chair away from between the windows and I LOVE it. I hesitated to put the chairs on the rug (they don’t match but I’m working on that) -- I’ve liked having the floor more open. But WOW, what a difference it made to pull everything together – it really opens up this room. Love it. More pics soon!

I edited the contents of the shelves down a bit:

white etagere

I’m not 100 percent on the bottom shelf, but I’m using what I have so I’ll deal. ;)

I’ve decided for now I’m not putting the drapes back up. I’m sure I’ll crave more color there eventually, but for now I’m loving how clean and simple it is. Speaking of color, I was looking back at photos and found this before that shows the étagère in it’s original spot and the old pinky walls:

bookcase between windows

Can you believe how pink they were in that light? Goodness. Anyway, here’s how it looks now, with new paint and trim: craftsman trim on windows My little BFF is smooshing himself into this shot. :)

This room was on my list of spaces I wanted to rework this year and so far I’m really, really happy with how it’s coming together! It’s a two story space so it’s harder for me to figure out.

Do you move furniture around a lot? If so I’m jealous. It’s a free fix when you get the itch to tweak things around the house. :) Or do you keep things the way they are forever like me? I love using what you already have in a different space – it feels brand new when you move it around!

Sunday, July 22, 2012

DIY art (reusing an old canvas)

Hello there! Happy start to another week! Can you believe it’s almost the end of July already?? Unreal. Today I’m sharing another project that I’m TOTALLY in love with. I’m totally in love with the price too – FREE. Awww. yeah.

When we had some of the downstairs walls repainted last month, I had to figure out what I was going to do with the large rectangles I had created with molding above the living room sofa (sorry about the old pic, I couldn’t find a newer shot):

I’ve had it up there for years so I was kind of feeling like a change, but I wasn’t sure what kind of change. Thing is, I knew if I left it as is then I did take the trim down later, I would end up with the pinkish wall color behind that molding that I would have to paint.

So to avoid that, I took all the trim down before they painted – I figured I could put it back up pretty easily if I wanted.

After the wall painting was done, it wasn’t long before I couldn’t handle the empty wall, so I went ahead with an idea that had been growing in my head for awhile. ;)

I had a large canvas art print I had purchased years and years ago on clearance that wasn’t really my style anymore. I almost took it to the consignment shop a while back, but decided to keep it with ideas of reworking it.

So rework it I did. :) I started by priming it a couple times:

priming canvas

Then I grabbed as many colors as I could find in my stash that worked with that room. I wanted mostly aqua and blue tones but also wanted to pull in the wall color in the room.

So the Bub and I opened them all up (I think we used seven colors total), and I would pour paint on the canvas (totally randomly) and he would paint:

DIY canvas art

At first I thought, what in the heck am I doing?? But then…the more we poured and brushed, the more it came together.

And I tell you what – it was FUN! We were making art! :)

I figured out about half way in that I needed to keep a “wet edge” on my paint brush –- otherwise the paint was pulling a bit the more I added to the canvas.

So I got a cup with water, and I would dip the brush in, then paint, and it went so much better. It kept the paint really smooth and easy to work with.

When we were done (and it was hard to stop!!), I couldn’t have been more pleased!

You can see on the left where it was pulling a bit, so the paint wasn’t as smooth. On the right, it’s more flowing:

And when all was said and done, I actually like the combo of the two textures. I totally meant to do that. ;)

I was trying to have the colors continue onto the sides perfectly, but I just ended up painting them when I was done:

reusing art canvas

I LOVE how it turned out – we are arteests!! ;) DIY art blue cream

The Bub thinks it looks like clouds (he kept telling me as we were working on it, which I thought was adorable). I think it looks like waves – either way I think it turned out pretty darn beautiful. :)

I love that the texture of the original art still shows through too:

blue DIY art

Of course it’s not nearly as wide as the molding was, but I think it works well on that wall. At first I was going to make another large rectangle around it and paint it out white, so it “frames” it a bit. But now I’m not sure – I’ve decided I’m going to live with it as is (by itself) for a while and see what comes to me:

DIY art canvas

I may go ahead with the trim, I may do a couple large sconces? I’m not sure, but I know with time the right thing will pop in my brain. It may be years. ;) But until then, I’m enjoying it as is!

I can’t believe we created this – it’s so fun to tell people we painted it. :) I know I say this a lot, but this could NOT have been any easier to do this. There was absolutely no rhyme or reason to it – we just swiped the paint back and forth, added more, painted back and forth, over and over till it was covered. (And it’s not even covered perfectly.)

When there was too much of one color in one area, I just poured on another and brushed it in. Like I said – it was a BLAST. I truly enjoyed it. And may do it again. ;)

Have you ever created your own art? Did it turn out how you hoped it would? Better? Worse? :)

Monday, July 9, 2012

Pink walls, begone!

Heyyyyyya! I’m back to show you a HUGE change we made to the house a few weeks ago, and it was a very long time coming.

When we built more than eight years ago, we found out during the process that the builder would paint the interior walls for us if we wanted. Since our dining room, living room, loft and staircase are all connected, and all but the dining room have soaring ceilings (about 25 feet up at the tallest point), we jumped on that option big time. (For those spaces.) And the fact that they were going to paint it all for $600 (that we rolled into the mortgage) made it so we couldn’t pass it up.

We chose a color called Beechwood Grey by Porter and they were able to spray it on before floors or trim were installed (hence the cheap price).

Thing is, it wasn’t too long before I regretted our color choice. Sometimes it had more of a gray tone and I didn’t mind it. But other times it had a pinky hue that kind of drove me crazy. Eventually I no longer saw any grey, just PINK.

Pink as pink could be, pink.

And the kicker, beyond the color, was that they painted in flat paint. Flat paint has it’s place (ceilings!) and on big walls it can be a good idea, because it definitely hides imperfections in the wall.

But for all that is good, it is NOT a good idea on high traffic areas, like say…a staircase? A staircase wall that a little boy touched ever. single. time. he walked up the stairs as he was learning to climb them?

A staircase that showed every little smudge from every piece of furniture we’ve ever carried up the stairs:

grossyuck 

Grody to the MAX.

Thing is, at least with the old flat paints (the newer ones are coming out with wipeable versions), you just can’t clean them. You could scrub all you want and it it won’t come clean. And then if it does come clean, you wipe off so much of the finish that it leaves a mark where you cleaned.

There’s no winning with it.

But we couldn’t just repaint those stair walls because a.) there’s no way the color would match perfectly b.) the walls are about 25 feet tall.

Uh, this girl? Not going up there. :)

So they sat there, all grody, and honestly I didn’t know that we’d ever be able to do anything about them. I just thought it would be too much to have them painted. But man, that staircase was looking AWFUL.

One day the guys that have been working on the basement took me to a house to show me how they had done something. While we were there they pointed out all the stuff they had done in the house, including painting a two story family room.

DING DING DING!!!

I had no idea they could do it, and it planted the seed.

So months later, we saved up the money (which turns out wasn’t even much more than we paid the builder!) and had it done and I AM SO HAPPY!!!!

The color is Analytical Gray by Sherwin Williams and I am head over heels in love with this color. Here it is in the dining room soon-to-be library:

Sherwin Williams analytical gray

(The top isn’t cut in because I will reinstall the crown up there eventually. The dining room transformation is coming along, more on that soon!)

Here’s that room with everything crammed in there as they painted – I had painted the dining room myself, but you can see where it stopped on the wall going to the front room:

yikes

I used to have a piece of trim up there so I could paint each room a different color. You can see that’s gone and I’ve since installed the wainscoting around into the dining room (above). Doesn’t it look so much better?? (And my money plant is growing like a weed!)

This is a LOVELY neutral color, beige mixed with just the right amount of gray. I think they call it “greige?” I call it perfect. :)

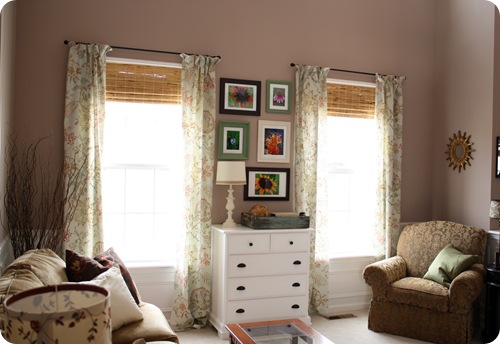
I took some before and after shots of the spaces to show you the difference this color has made. Here’s the living room window wall, before on the left, after on the right:

pottery barn jute rugdecorating bookcase

Oh my goodness, I can’t believe how pink those walls look now that I look at them in pictures!

Here’s the desk area in our living room, before on the left, after on the right:

cream desk homegoodsSherwin Williams paint

The foyer/staircase area looks soooo different:

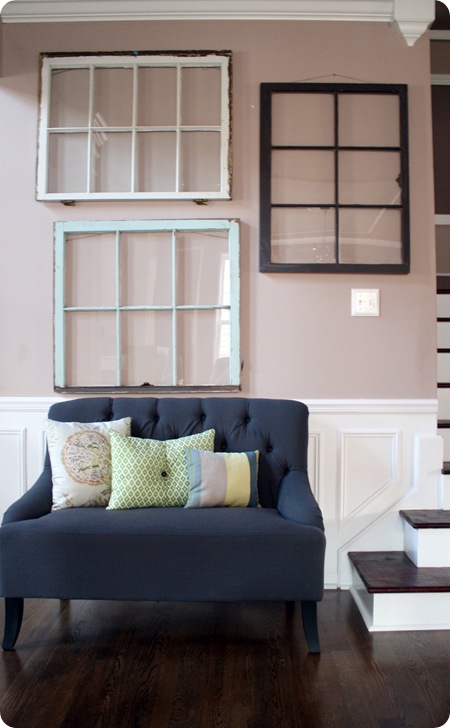
old windows on wallold windows on wall

Wow. Pink.

Not sad to see ya go.

Here’s my favorite before and after:

baseboard trim on stairs

Ah yessssss…the joys of an eggshell finish. I use eggshell pretty much everywhere in our house – it’s not too shiny, and it wipes up well. (Sometimes eggshell is called satin.)

And I like that it bounces the light around a little bit – I swear it makes the spaces brighter because it has a teensy bit of reflection to it. The flat just absorbed all the light and sucked it up into it’s dark, pink, flat chasm.

OK, drama. But for REAL my Squeezies. This is huge. I think this is one of the BEST changes we’ve made to our house – LOVE IT!!

I’ve already made a few other changes because of this one, so I’ll show you those over the next few weeks. WHOOO!

So do you have a go-to neutral paint color? It can be SO hard to find one that works for so many different spaces, like this one had to. If you’ve got one you love, please share!

P.S. Did I mention…WHOO?

P.P.S. You can see more on the rug in the dining room here!

Sunday, May 20, 2012

Refreshing the living room

Hello there! I hope you had a fantastic weekend! It was a good one here – I got SO much done. And had some fun. Just the right mix. ;)

I’ve been making some changes to the living room over the past year or so and I am really loving how it’s coming along. I know living rooms are typically more “fancy,” but I don’t really want fancy in our house. It’s a big, open room so we spend quite a bit of time out there. The Bub plays in the living room more than he does any other room downstairs, so it needs to be comfy. Even though I don’t want fancy, I do like this space to have a little flair.

As some of you know, we got new hardwoods last fall, courtesy of a fridge leak and great insurance. (It so would not have happened otherwise.)

The floors made a HUGE difference in that space, but I’ve really wanted a rug all this time. I’ve been looking for MONTHS and I finally found the right one. I started with a cream rug back in January from World Market, and I loved it – but once I put it down I knew it was too small (6.9 by 9.6 I think). And the day I got it, a visitor came in with shoes on and I had some major sweats. I didn’t want to live worrying about the dirt that would show.

So it went back, and the floor has been bare again. :) I decided I wanted to go with a natural material like a jute, because it would hold up well and I love the look of them. But it was the feel I was worried about, so I researched a TON, read a lot of reviews and tested a few out in the stores.

And then I waited for a sale. ;)

Last week I got the ONE:Pottery Barn Two Tone Diamond Jute Rug

I went with the 8 by 10 size and it was on sale for just over $400 – one of the best deals I’ve found!

I loved that it was the natural look, but had two different colors and had just a slight design to it:

I was afraid a full jute rug would be the exact same color as our sofa and wash everything out, so when I got home with this one I realized it was a good call:

I have a very confusing relationship with that couch – I love that it’s nice and deep and the cushions are oh-so-comfy. I struggle big time with the color and the fabric. I would have had it recovered by now, the the back cushions are sewed on. NICE. I may still do it, I just need to check out my options.

AnyHOO…lately, I’ve decided to just work with the color, not against it. And that’s another reason I really, really like this rug. It pulls in the color of the couch and makes it not stand out as much.

It’s way softer than sisal, and softer than most jute rugs I’ve looked at. It’s not baby butt soft or anything, but it’s not bad at all to sit on (which is good for the kiddo):

pottery barn jute rug

And it’s like a little foot massage when you walk on it. :)

I love that keeps this room from getting too serious – the fringe on the ends helps with that:

large nail head trim chair

The 8 by 10 size is perfect for this space – at first I had it running the opposite way, and it wasn’t right. It’s amazing how switching the direction of your rug can make a HUGE difference in a room! Try it. ;)

I like that it goes under the sofa just a bit:

pottery barn jute rug

You can see I don’t accessorize our coffee tables. (This one is from Garden Ridge.) Around here, a flat surface is a Lego surface, so really, there’s no point. :)

I put it under the sofa a bit because I didn’t want the rug to go under the desk chair on the other side of the room:

cream desk homegoods

I don’t think I’ve shown you this desk yet! I got it about a year ago at HomeGoods and luuuuurve it. It’s such a pretty little piece. I have a plan to change it up a bit, but I’ve had that plan for almost a year now and it hasn’t happened yet soooooo, I’m showing you the desk. ;)

For years, a chair that went with the sofa sat in that corner. Lately I’ve wanted to try and create more “vignettes” in this space – it’s a big room with soaring ceilings and it didn’t feel cozy to me before. Now it feels so much warmer – I adore this desk and how different it makes the space look!:

desk by window I did a tiny bit of rearranging by moving the round table over in the corner:

For no other reason than I just wanted to move something around. ;) I never move furniture in our house, so even a little table feels like I did something BIG.     

So this space is one of my favorite before and afters. Early on it looked like this:

We really loved it at the time, just like everything in this house. I love (most) changes every step of the way, but it sure is fun to see how different the same room looks years later:

A couple of winters ago I started the process by adding new window treatments (that I made myself) and adding a dresser (that was in the Bub’s nursery) to brighten it up a bit:

And now it’s really come together:

jute rug living room

It’s taken a few years of waiting for the right pieces and I’m SO glad I've been patient. Sometimes it’s a good thing it takes me forever and a day to do anything.

There’s still a BIG project I want to work on next, and it involves the walls. And ladders. OH MY.

I think picking out a rug is one of the hardest decorating choices, hands down. Do you? Part of it is the cost issue, but it’s also because they make a HUGE statement in a room!

**You can see how I made the terrariums on the desk here.
**Check out the DIY Pottery Barn pillows on the cheap here.
**And more about the bookcase here!