Tuesday, July 31, 2012

How to pick out tile (in the laundry room!)

Hello all! I’m making little bits of progress on a bunch of rooms right now – it’s decorating ADD at it’s finest. But at least there’s (some) progress, right?

I’m SO happy with how our basement laundry room is turning out! It so fun to have a new space to work with, I’m in heaven. And dare I say it – it’s not so bad when I have ROOM to do laundry.

Yep, I said it.

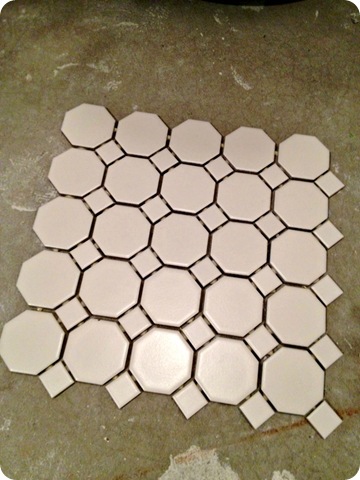
Anyhoo, I actually picked out the tile for this room months and months ago, I think before the room actually had walls. ;) I had always dreamed of this pretty hexagon tile from Lowes in the space:

white hexagon tile

I wanted something a bit different, something that was fun, but wouldn’t break the bank. And this stuff was perfect. (It’s called American Olean Sausalito tile.) But as time went on (and it was closer to the time of installing it), I got cold feet.

The tile is really thin, and I thought it was supposed to be used only on a backsplash. Even the guys who have been working on the basement were worried about using it.

I was so bummed, because I had planned on this stuff for half a year. :) So I did two things – asked some bloggy friends if they had used it, and went to Lowes to find out more about it.

The first bit of info I learned was from my friend Cassity at Remodelaholic. She told me that typically tile that is made for wall applications (like a backsplash) is white or cream on the back. Tile that is made for the floor is dark or clay colored on the back. Mine was dark on the back!

I had no idea! Good to know, eh?

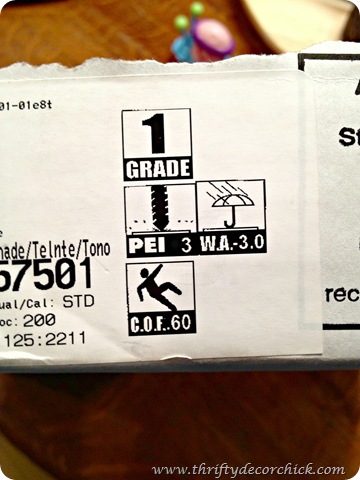
Then Lowe’s guy showed me indicators on the tile box that helped a ton:

how to pick out tile

It was a wealth of information! I looked up what the codes mean and found this helpful pdf from Home Depot.

First up – the grade for this tile is a one (the highest quality) and you want to use grade one or two for floors, a three for floors.

The PEI (stands for Porcelain Enamel Institute) is a three – this indicates the tile’s resistance to abrasion. This one is fine for moderate wear and suitable for home use.

The little umbrella icon is for water absorption, which is something you want to think about for a spot like a laundry room! This one falls between low and moderate absorption so it was fine for this space.

Finally, one I didn’t even consider but is nice to know – the C.O.F., which is basically the slip factor. My tile was rated at .65, and anything above .60 exceeds ADA (Americans with Disabilities Act) guidelines – which means it’s too not slippery.

I was honestly surprised to see that my pretty little tile passed every test with flying colors!

SOLD! :)

Because I have limited experience with tile, and because the mortar had to be spread as thin as possible to avoid it seeping through all of those grout lines, I didn’t DIY this project.

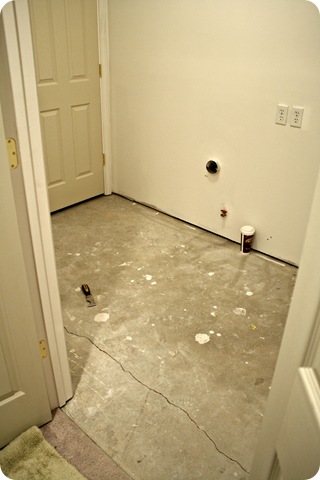
The room had turned into a second storage room over the past few months, so I did clean it out and get the floors cleaned up:

I went back and forth on an underlayment in here, since the tile was going directly on cement floors. I talked to about four contractor-type peeps and every single one of them said it wasn’t needed. So I didn’t do it, but I’ll let you know in time if that was a good idea or not. ;)

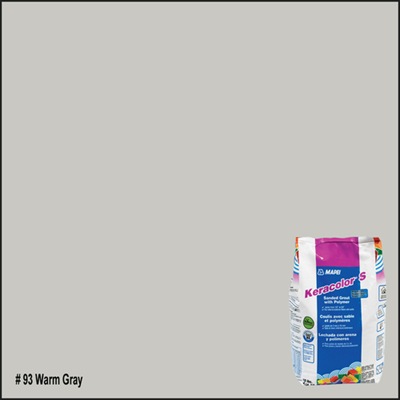
Because I didn’t want to worry about keeping bright white grout lines clean, I used a light gray grout color:

warm grey sanded grout

This is the product I picked out (from Lowes) and it’s a sanded grout called warm gray. I love it!!

One thing to consider – one bag was more than enough for the square footage of this room, but obviously those tiles have more than average grout lines. So we needed two bags of the grout to get ‘er done.

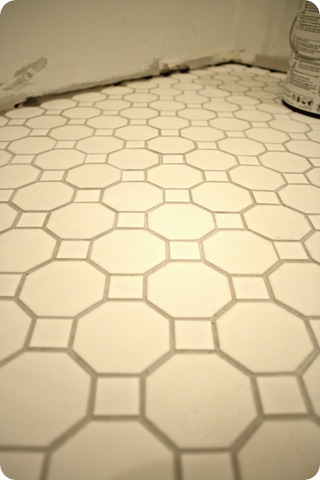
I am SO thrilled with the result:white tile gray grout
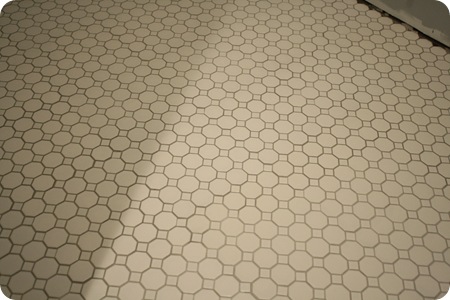
The gray grout will be easier to take care of, and I LOVE how it actually shows off the pretty shapes of the tile. They would be lost with white grout!

After it was grouted and wiped down, I cleaned it well one more time, let it dry for an hour, and used this sealer the guys recommend:

one hour spray grout sealer

Other sealers I’ve used in the past can’t be applied till about three days after the grout is done. This one can be applied after just an hour. It was the easiest sealant I’ve ever used – I just sprayed it down on the tile, working my way across the room.

The floor will be super wet when you’re done, so work your way out of the room. Let it sit five to ten minutes then just wipe it clean! I got down on my hands and knees with two rags and wiped as I went through the room. It says you can do a second coat 30 minutes later, but I soaked this floor so I didn’t think it was needed:

white tile gray grout

Isn’t it pretty? It turned out just as I envisioned.

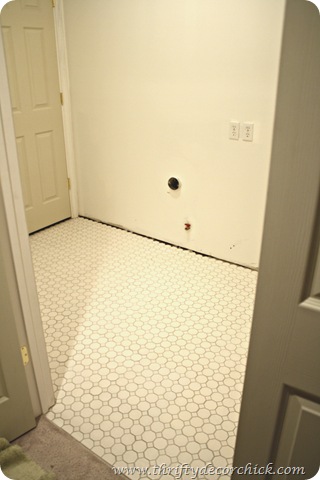
Here’s the after with the tile:

white tile gray grout hexagon

This room already looks SO much different now! I’ve been busy in here and I can’t wait to show you more!

Now I’m psyched to get the bathroom tiled and I think I might try my hand at it. I think. :) I’ve never done floor tile and I’m nervous. I was planning on going light on the floors in there too, but now I’m thinking dark, which I’ll explain soon.

This tile cost more than basic ceramic tile, but I thought for the unique look it wasn’t too bad – the whole room was less than $140. I’ve seen this look for WAY more so I’m thrilled with it!

Have you tried this pretty hexagon tile in your home? Have you ever tiled a floor? Any tips?

P.S. I think I said “grout” 55 times.
Sunday, July 29, 2012

Laundry room to mud room (Oh yeah)

Hello there! Hope you had a wonderful weekend! We had a great one – I got some DIY time in, some quality kiddo time and even a date with the hubs! And it wasn’t 101 degrees – bonus! :)

I’m sharing a before and after today that’s been a loooong time coming. I’m giddy about it. Grinning like mad. Elaine Benes dance happy. It’s not anything Pinterest worthy, but let me tell you…it’s BIG. (To me.)

This weekend was momentous – the former laundry/mud room is now just a MUD ROOM.

Can I get an AMEN??

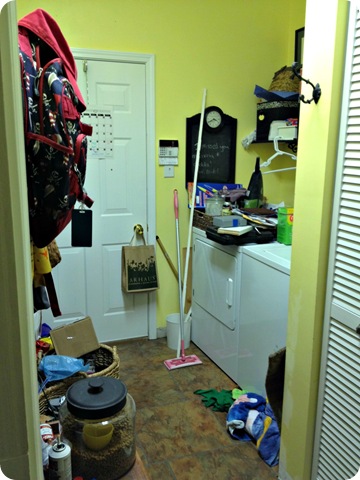
I took this picture minutes before the waster and dryer were moved out:

yes, this is real

It looked like that all. the. time. Every time thought to myself, “Self, are you sure you want to move the washer and dryer downstairs?” I would walk back into this room.

Yep, yep I do.

I tried. Tried to make it work, tried to keep it organized. It was not within my realm of…well…anything. I couldn’t do it.

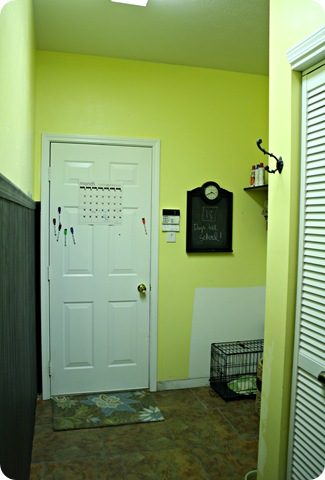
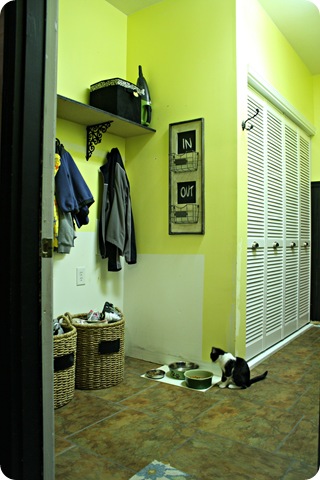
This room has a long road ahead of it, and all I’ve done so far is move everything that was on the left over to the right (where the washer and dryer were), and it’s made all the difference in the world:

You can now see when I painted this room I didn’t bother to move the W/D – I just painted around them. ;) No one could tell. Till now.

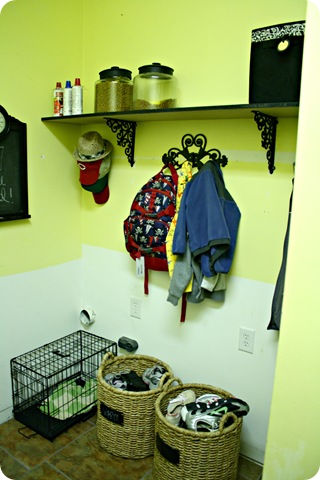
I also didn’t move them to install the beadboard, so that’s coming soon. For now I moved the shelf up about a foot and took the hooks that were on the long wall on the left and hung them underneath:

in between mud room

My goal was to make this room functional before the Bub starts school in a few weeks. (Kindergarten. Sniff. No, I don’t want to talk about it.)

I feel a meeeeellion times more organized already. I feel like we can breath when we walk in and out of our house:

Doesn’t it look AMAZING????? OK, I know it’s kind of a mess still, but I have rose-colored-mud-room glasses on and I think it’s stinkin’ beautiful. ;) I am so thrilled to have such a large, open space as a mud room. (It feels HUGE to me now.)

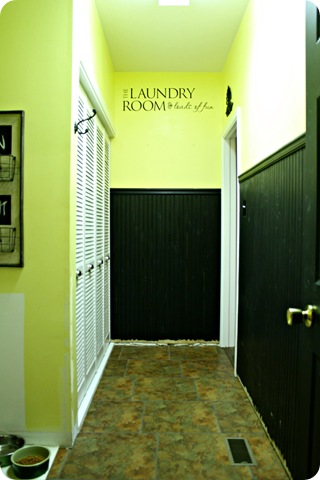
I have big plans for this room, of course. Beadboard, paint, new trim (casing, baseboards and crown), maybe new lighting, a bench, coat storage and cabinets and storage up to the ceiling in that cubby area.

Oh, and I can take that vinyl down cause it’s not a laundry room anymore:

yellow and black laundry room

Booyah.

Best day ever!! All weekend we noticed the little things – like we can walk out of the house as a family instead of lining up single file. It’s fantastic. :)

I’ve been trying to decide on a wall color for months and I think I found it this weekend. Right now I’m just really excited to put baseboards back in here. See, the little things – it doesn’t take much to make me happy.

Do you have a dedicated mud room? Do you love it? If you don’t have one, have you figured out a way to make your main entry more organized? Do tell!


**You can see how I changed out the ugly metal utility doors here and how I installed the peel and stick tile here. And if you’d like to see how this room looked after it’s first redo, check out this post from way back when. ;)

Thursday, July 26, 2012

The new laundry chute!

Hey hey! How are YOU? And you? :)

I’m back with a project I’m SO SO SO excited about!! You may remember that as a part of our basement finishing process, we decided to move the washer and dryer to the basement.

I know, some people think I’m a little cray cray for doing it. I get it. I talked about our reasoning here. And let me tell you, I am counting down the DAYS till it gets moved down there. It will be the best. day. ever.

Anyhoo, one thing I wanted to do if we were moving the washer and dryer down a level was to install a laundry chute -- we made that part of the “finishing plan.” Laundry chutes are kind of like basements for me – I just think they are the coolest. At first I thought there was no way we could do one in our house, but when we decided to finish the basement, I started to really think about where we could put one.

I did some sleuthing for a few weeks – a lot of walking up and down the steps, taking measurements, figuring our where things were. At first I thought we could put a chute down from the floor in our master closet. Then it was the upstairs bathroom linen closet, but I realized a while later that I was waaay off in my measurements.

So I sat on it some more and finally figured it out. The idea only came to me because a former decorating client of mine did just the same thing – she had a chute installed in the bottom of a bathroom vanity.

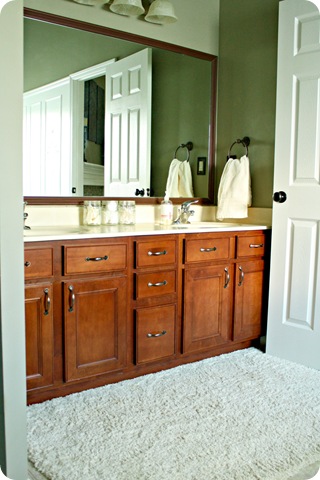
And the day I figured out we could do the same, I did a happy happy dance of JOY! JOY! (Name that cartoon.) The start of our laundry chute is at the very right, under the vanity in our bathroom:

maple bathroom cabinets

I didn’t get a pic of the inside because I ran out of daylight and our bathroom has horrible lighting. Anyway, that’s where it starts.

It goes down through our powder room closet, and then into the basement. Now I thought about doing this myself, but I’ve never cut through floors before (egads!) and didn’t have the tools to do so. I was also scared to death of cutting into something major, like electrical, plumbing, whatever.

So I asked the guys who have done all our basement work if they were interested and if they thought they could do it. They were all into it and then came up with a brilliant plan to make it happen.

I have to say, these guys have been around a ton over the past seven months and we get along awesome. It was SO fun to see them so excited about this project. They were practically giddy with their idea.

And that idea was, instead of framing out a chute and then building it up with walls (that would have to be ultra smooth – metal or sheeting or laminate, but nothing that has any rough edges so it would grab clothes – they were going to use PVC pipe.

Like this:

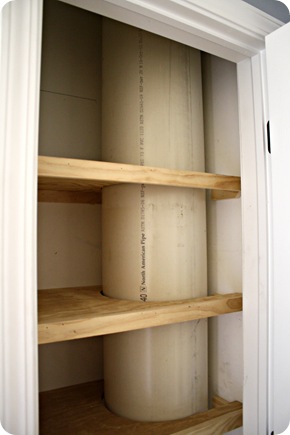
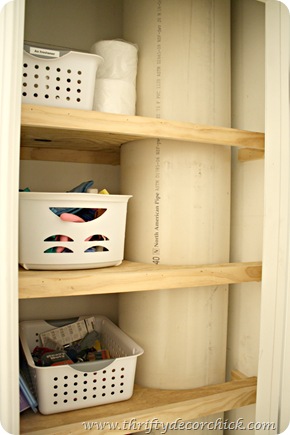
Thing is, the original plan I had thought up was going to require them to rebuild our linen closet in the powder room off to the side (long story, but the chute was going to take up a ton of room). This idea made it so they could run it through the closet, build new shelves around it and we’d save the cost of building a new linen closet.

The pipe is not cheap – I think it was $20 a foot? So we paid a bit more in materials, but a lot less in labor. Especially since no new closet was needed.

We ran into a snag going up in the bathroom upstairs (hit a water pipe) that they had to rework, and then going down, we were too far over into the basement. The clothes would have landed on a cement wall and studs in the basement.

But they guys came up with a solution, and that was to get fittings that curved the pipe, so it landed in an open spot into the basement. It was only a few inches over but it was PERFECT:

DIY laundry chute laundry chute pvc pipe

You can see that they were able to rebuild the shelving in there (done the same way I built the new shelves for the pantry) so I am still able to get necessities into that closet:

pvc pipe laundry chute

I did a bit of a purge, so even though I lost about half of the storage, I still only had to move a couple baskets down to the basement. And eventually we’ll have mud room storage, so I’ll be able to use that if I want to keep the stuff upstairs.

I still need to fill holes in the closet walls (from the old wire shelves), paint the wood shelves, and I may even paint the pipe. I wonder if paint would stick? How funny would it be to make it a fun color or something?

I think it is hilarious when I open this door now and see this huge sewer pipe. HILARIOUS. It just make me giggle uncontrollably. Seriously.

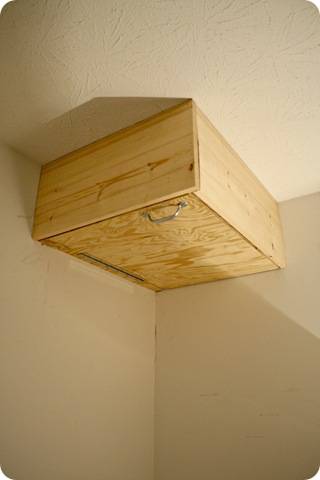
The chute ends in the basement and the guys made a little box with a door:

I’ll fill the holes, caulk and paint it and you won’t even notice it!

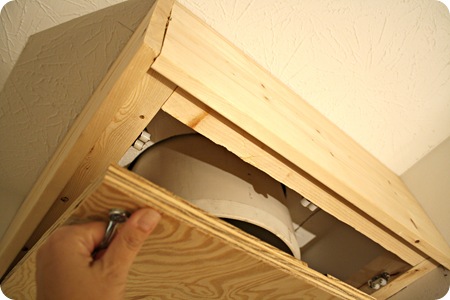
They used latches to keep the door secure:

And it works! The pipe is wide enough I can send towels or even throw rugs down no problem. The great thing is the inside is a smooth as a babes bottom, so everything sails right through, even with the little angle. Nothing for anything to get caught on!

There’s a few things I want to add, just for safety reasons. Some consider laundry chutes to be a safety concern when it comes to fires – if a fire started in the basement, it would have a straight shot upstairs. But from my research online and talking to folks, the same could be said for staircases, so opinions vary on that.

To be safe, I’m going to order a fire safe metal door to go in the basement (instead of the wood door). I’m also considering using some of the leftover PVC pipe and extending the chute down a bit more into room, then framing that out, so it’s closer to the floor.

If you have young kids, there’s things to think about, obviously. I’ve heard some stories about things and people (??) heading down chutes! Our kiddo is too big to fit in this of course, and he’s just not the type that would try to actually go down the thing. But just to be safe (with smaller kids in the house occasionally) I plan to put a child lock on that bathroom vanity door. The guys made a lid for the chute, and I’m going to install a lock on it so only we can get the lid off.

I cannot tell you how WICKED COOL this thing is!! We are just tickled by it. :) It’s got me soooo ready to get that laundry room going – so hopefully I’ll have more to share on that soon!!

So did you have a laundry chute growing up? Or have one now? Any fun stories to tell? :) My grandparents have one and I always thought it was just the coolest thing. I would open it up just to look down into the basement every chance I got – just because I could. ;)

Tuesday, July 24, 2012

Stick a fork in it (The basement is done!)

Well, almost. :) Done enough I tell you! Today was the day – the carpet was installed in the basement and we have been so excited about it! I know I’ve said it about every big part of the basement reno, but the carpet made such a HUGE difference.

I talked about our plan for the basement flooring back here when we had a different carpet picked out. Since then a new one came available that was SO much softer and only $200-something more than our original option.

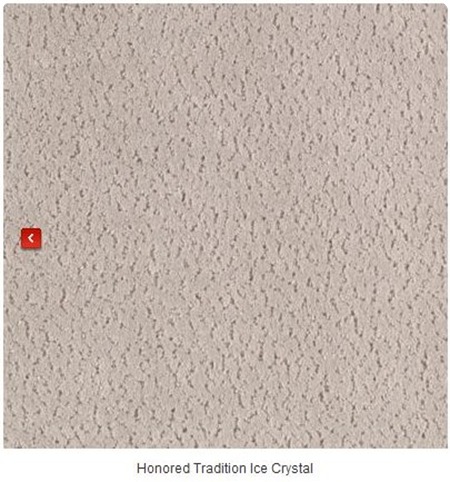
It’s a Mohawk carpet, and the design is called Honored Tradition:

Capture

We went with a lighter carpet with a gray tone to it. I chose this one because our upstairs carpet has a really slight gray undertone and I LOVE it. I brought this sample upstairs to match that color as much as possible – but this one is much grayer (and a bit darker).

It has a slight design to it, but in my pics you really don’t notice it. I’m so glad I changed the plan at the last minute cause this is soooo much softer than the first one we had picked out! We upped the thickness of the padding too so it’s super cushy down there.

LOVE. And by the way, it is not lost on me that I couldn’t wait to get rid of the carpet on our main level last fall (for the hardwoods after a leak), and now I’m thrilled about carpet. :) We were just so tired of those cold, dusty cement floors. So. tired.

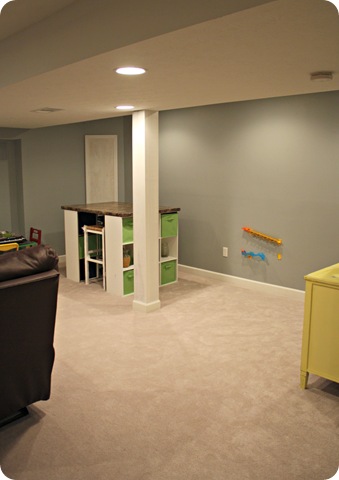
Here’s some before and after pics of the basement – it’s come a long way in the past seven months!! Bear with me though because things are still very basic and I kinda just threw toys on the shelves. I spent the whole day putting the room back together. :)

Here’s a shot of my craft area before:

And that same spot now:

Mohawk carpet honored tradition

Little different, eh? :) OH my goodness, I am so thrilled!!

Those who are super observant will notices my DIY craft table got moved. I changed things up a bit, and I love it so far. I’ll talk more about that soon!

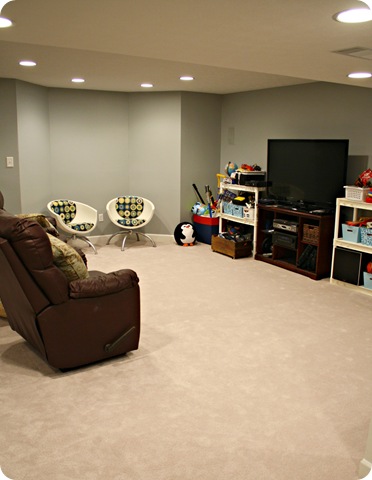
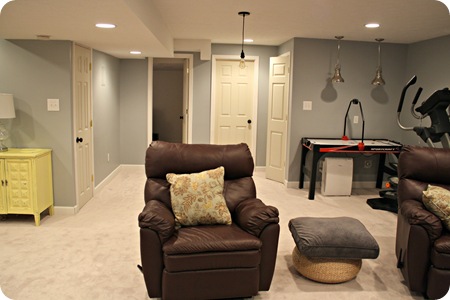
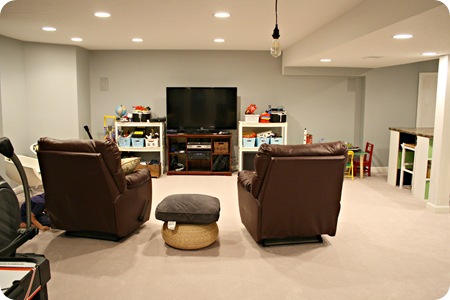
This was a shot of the basement last year, into what is now the family room area:

This is that same spot now:

basement carpet

One of my favorite parts of having a finished basement? Getting rid of all those random rugs and carpet remnants. I think we had eight of them down there and they were so gross from the drywall dust!
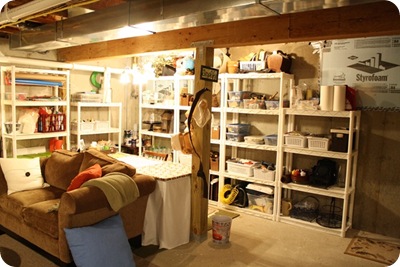
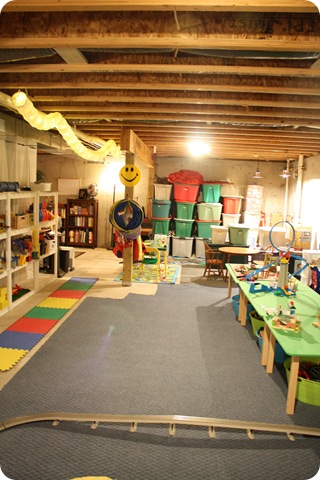
The Bub’s toys used to line the “wall” of our storage area:

plastic shelving

And now that area (to the right) has an actual door and walls. ;) Best. things. ever.:
Mohawk carpet honored tradition

I got rid of so much stuff, there’s not many places to sit down there. :) We have a solution for that, but we have to figure out if we can get it down the basement steps first. (Crossing fingers.)

This was a picture of the length of the basement before, and it shows how how far back it goes:

That area is segmented into rooms now – most of which are still awaiting finishing. :)

Mohawk carpet honored tradition

Those doors still need to be painted – I’m going dark!

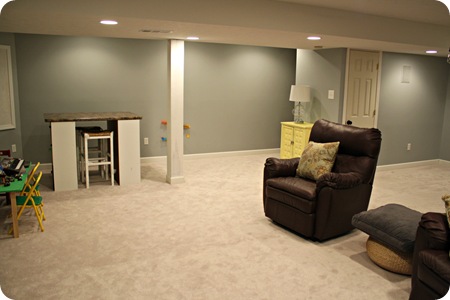
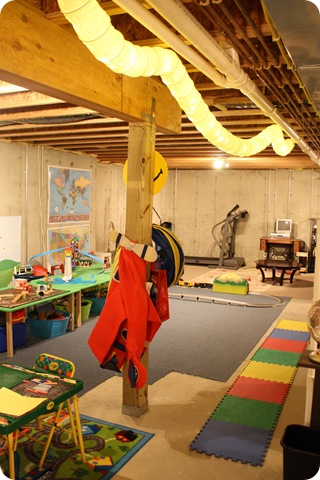
Here’s another photo of the opposite direction:

basement play area

And how it looks today:

Mohawk carpet honored tradition

It keeps striking me that the space looks so much bigger with walls, ceilings and flooring. You would think they would make it feel smaller? But I think it feels massive now! Of course that will change as we fill it back up with items, but I do want the family room to feel cozy and warm so I’m good with that.

I can’t believe it’s (pretty much) done!! There’s still a very long to do list. Lots of painting yet to do, tiling two rooms, moving the washer and dryer, lighting in the laundry and bathroom, a sink, toilet, trim work…and I haven’t even started all the fun decorating projects I have planned for this space. I cannot wait to have some fun with it instead of constant DIY projects. ;)

Once I compile all the receipts I’ll do a final post about the whole basement finishing process and how the costs came out. And there’s one final BIG project that we’re working on this week that I can’t wait to show you!

So what do you think? Big changes huh?? It feels like forever since we started but it’s only been about seven months. I think it will be a good nine or ten months before it’s completely finished, but having dust-free, cushy flooring underfoot feels like the final frontier. I have been fighting the urge to roll around on it all day. ;)

Sunday, July 22, 2012

DIY art (reusing an old canvas)

Hello there! Happy start to another week! Can you believe it’s almost the end of July already?? Unreal. Today I’m sharing another project that I’m TOTALLY in love with. I’m totally in love with the price too – FREE. Awww. yeah.

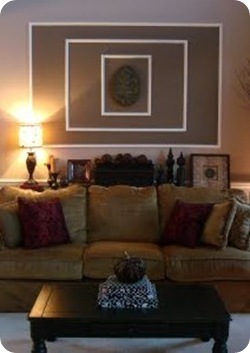
When we had some of the downstairs walls repainted last month, I had to figure out what I was going to do with the large rectangles I had created with molding above the living room sofa (sorry about the old pic, I couldn’t find a newer shot):

I’ve had it up there for years so I was kind of feeling like a change, but I wasn’t sure what kind of change. Thing is, I knew if I left it as is then I did take the trim down later, I would end up with the pinkish wall color behind that molding that I would have to paint.

So to avoid that, I took all the trim down before they painted – I figured I could put it back up pretty easily if I wanted.

After the wall painting was done, it wasn’t long before I couldn’t handle the empty wall, so I went ahead with an idea that had been growing in my head for awhile. ;)

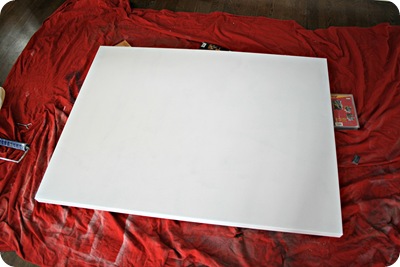
I had a large canvas art print I had purchased years and years ago on clearance that wasn’t really my style anymore. I almost took it to the consignment shop a while back, but decided to keep it with ideas of reworking it.

So rework it I did. :) I started by priming it a couple times:

priming canvas

Then I grabbed as many colors as I could find in my stash that worked with that room. I wanted mostly aqua and blue tones but also wanted to pull in the wall color in the room.

So the Bub and I opened them all up (I think we used seven colors total), and I would pour paint on the canvas (totally randomly) and he would paint:

DIY canvas art

At first I thought, what in the heck am I doing?? But then…the more we poured and brushed, the more it came together.

And I tell you what – it was FUN! We were making art! :)

I figured out about half way in that I needed to keep a “wet edge” on my paint brush –- otherwise the paint was pulling a bit the more I added to the canvas.

So I got a cup with water, and I would dip the brush in, then paint, and it went so much better. It kept the paint really smooth and easy to work with.

When we were done (and it was hard to stop!!), I couldn’t have been more pleased!

You can see on the left where it was pulling a bit, so the paint wasn’t as smooth. On the right, it’s more flowing:

And when all was said and done, I actually like the combo of the two textures. I totally meant to do that. ;)

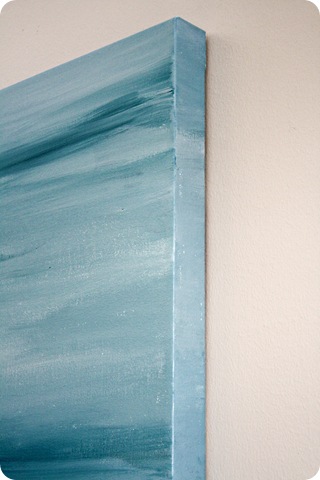
I was trying to have the colors continue onto the sides perfectly, but I just ended up painting them when I was done:

reusing art canvas

I LOVE how it turned out – we are arteests!! ;) DIY art blue cream

The Bub thinks it looks like clouds (he kept telling me as we were working on it, which I thought was adorable). I think it looks like waves – either way I think it turned out pretty darn beautiful. :)

I love that the texture of the original art still shows through too:

blue DIY art

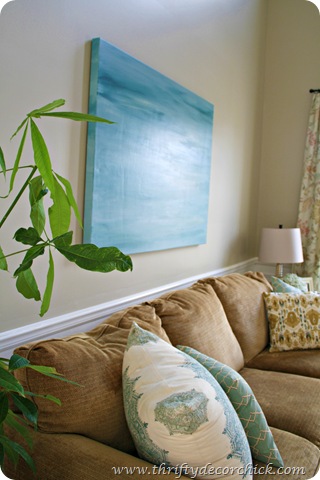
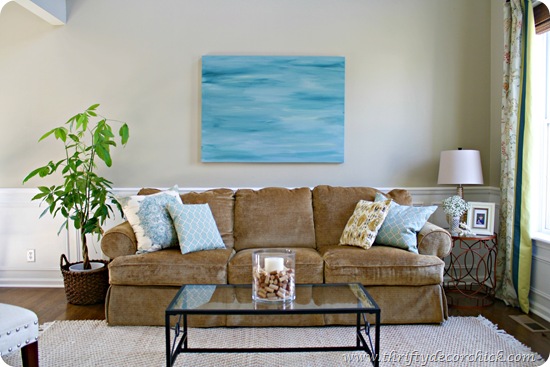
Of course it’s not nearly as wide as the molding was, but I think it works well on that wall. At first I was going to make another large rectangle around it and paint it out white, so it “frames” it a bit. But now I’m not sure – I’ve decided I’m going to live with it as is (by itself) for a while and see what comes to me:

DIY art canvas

I may go ahead with the trim, I may do a couple large sconces? I’m not sure, but I know with time the right thing will pop in my brain. It may be years. ;) But until then, I’m enjoying it as is!

I can’t believe we created this – it’s so fun to tell people we painted it. :) I know I say this a lot, but this could NOT have been any easier to do this. There was absolutely no rhyme or reason to it – we just swiped the paint back and forth, added more, painted back and forth, over and over till it was covered. (And it’s not even covered perfectly.)

When there was too much of one color in one area, I just poured on another and brushed it in. Like I said – it was a BLAST. I truly enjoyed it. And may do it again. ;)

Have you ever created your own art? Did it turn out how you hoped it would? Better? Worse? :)

Thursday, July 19, 2012

Chip It! (And the powder room plan)

Soooo…remember that loooong list I made weeks and weeks and WEEKS ago? Well, it’s still not done. Mostly done, kinda. But not done. I did get some big things off the list, and one of them was the powder room that’s been in shambles for well over a year now.

Shambles my peeps. A YEAR. Year and a half now? I thought it was less, but no. A good 18 months.

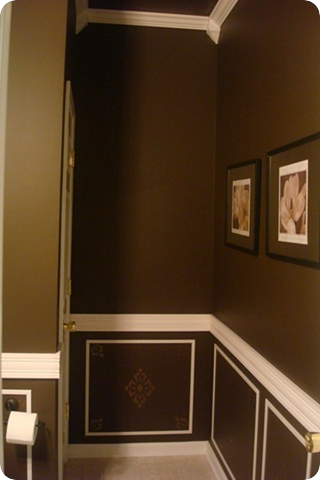
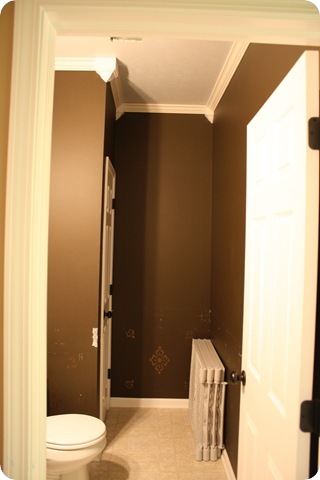
It started out like this:

It was fine for a while, but geesh, it was SO dark. And brown. With more brown.

And then one day I could not handle it anymore. The trim in here was never done to my liking (more on that in another post), and I was just SO OVER the chocolate brown.

So I decided to take the trim down and paint it. And I got as far as the ceiling:

It’s sat like this (notice the fan cover missing?), with meeeellions of holes in the walls, random stencils and curiously enough, those chocolate brown walls I couldn’t stand anymore (hmmm), for about six months.

This is because I came up with about 50 other things I want to do in this little room…so I kept putting it off.

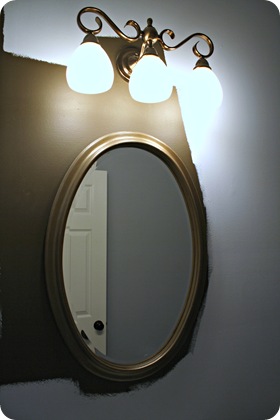
Then last fall I was having a party and freaked out and slapped a coat of paint on the walls. And by “slap0 a coat,” I mean no cutting in, brown bleeding through, painted around the mirror and didn’t even take it down, “slap.”


And I thought that was better than the dark brown??? Oh my.

I liked this look so much, it stayed like this for nine more months. Did I say this room has been a mess for 18 months? I meant two years.

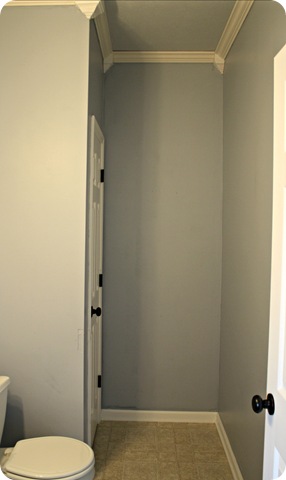
Anyway,  a couple weeks ago we had another party and I was SO fed up, I finally cut in and then took the mirror down and finished the first coat I started eons ago:

blue powder room

I didn’t even do the second coat though, because as I was painting I was deciding I didn’t want to keep it this color. That’s what it’s like living with me people…aren’t you glad you don’t have to? :) I mean really, it’s been two years, it’s time for a change.

Yes, I’m serious.

I am moving to gray/blue tones in the rest of the house and I want this little room to be FUN. So I found my inspiration for the FUN – a painting the Bub painted for me for Mother’s Day:

I know, it’s brilliant. I know.

I love the colors in the painting, and I am determined to use at least a couple of them. Bear with me – it’s going to be good. (In my head it is.) There’s lots more going on in here I’ll tell you about soon, but for now I need to figure out the perfect paint color.

That’s where Sherwin Williams comes in. They wrote me about their new Chip It tool and I tried it out and was HOOKED. This thing is fun fun FUN!!

To use it on your computer, just drag this little button to the tool bar (on my computer it’s the area right next to the box for web addresses):

 Chip_It

It’s a lot like the Pin It button for Pinterest – it takes two seconds.

And then wherever you are online and find a photo you love and are inspired by, you can click that little button and “paint chip” it. They’ll give you five to 10 Sherwin Williams paint colors pulled from the photo. How cool is that?

IT’S AWESOME. You can upload personal pics, like I did using a photo from our recent vacation:

purple sunset

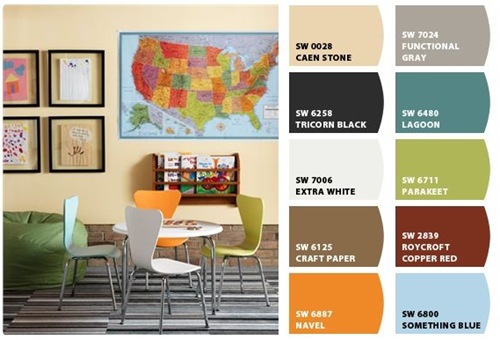
Or you can just use any photo you find while surfing the Net. This is one I found on Pinterest, and loved because of the colors specifically. The Chip It tool does all the work for you:

orange, blue, green playroom

I love the Navel, Parakeet and Lagoon colors! I have had SW paint decks for years, and I’ve never seen those colors once – funny how you don’t see how well colors work until they are next to each other. I absolutely LOVE them together!

So I used a photo of my son’s Picasso-like talent art to Chip It again – and it pulled out a perfect reddish pink color:

Sherwin Williams chip it

It’s the Fireworks color and it’s not too red, not too pink (this is a room the hubby and kiddo use after all). I’ll have to take a look at in the room to see how it works, but I thought the Chip It pulled some really pretty colors from the art.

Isn’t that fun? I’ve been using this tool for a few weeks now and am so excited to keep going – it will be PERFECT to use while surfing Pinterest. Can you imagine?!

So, do you think I’m crazy for the blue/reddish idea? I swear it will come together…I’m willing to place bets. ;) At this point, I’m just happy that after three years I have a bathroom that has a fan cover and looks presentable, at least at first glance. Don’t look too close, please.

I’ll update you soon on the rest of the plan for this room! I’m REALLY excited about it! :)