Wednesday, September 28, 2011

Paper Fall Wreath

Well hello!! Thanks so much for all the wonderful comments on our deck and patio over the past week or so. We are just pinching ourselves – everything turned out so beautifully and we couldn’t be happier.

I am so not worthy of the awesomeness. :)

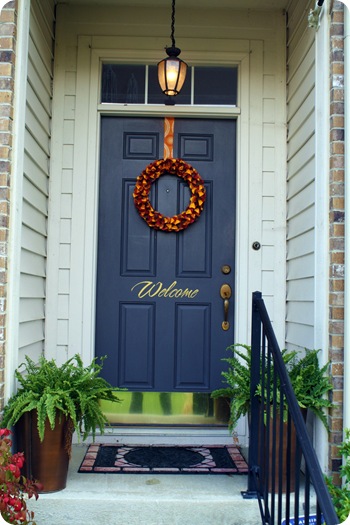
The next party on our Autumn Linky list is the Door Decor shindig over at Rhoda’s!

image

I had an idea for a couple DIY fall wreaths this year, and the last one turned out to be a total pain in my booty. I thought the second one would go much faster.

Well. It was. Kinda. ;)

No really, it was much faster. It was still time consuming, but the fact that it cost less than $5 made it totally worth it.

Can I get a WHOO?!

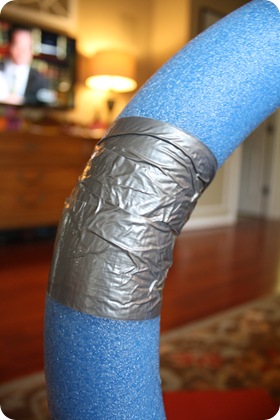
I didn’t have a form for this wreath, so I improvised. I saw a little trick on Pinterest (sorry, I don’t think I pinned it so I don’t have the source) where someone took a pool noodle and taped it together:


It worked like a CHARM. In the photo I saw, they cut the noodle at an angle at both ends and then taped it together, but I just put end to end and taped it with duct tape.

Cost = FREE. ;)

And if you don’t have one, they cost about a buck at the dollar store (although I’m not sure if there’s any left right now).

I found some fun fallish fabric at Hob Lob a few weeks ago, and just got a bit of it. I cut it into strips:

And wrapped it around, just to give it a pretty backdrop:

Cause a blue pool noodle doesn’t exactly scream FALL. :)

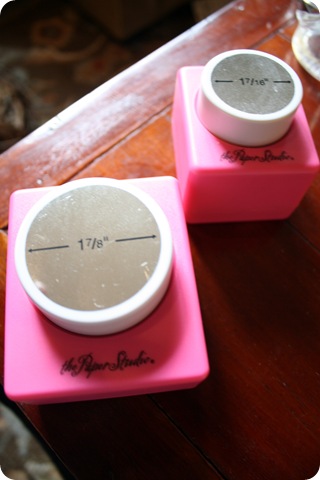
Then I grabbed my hole punches:

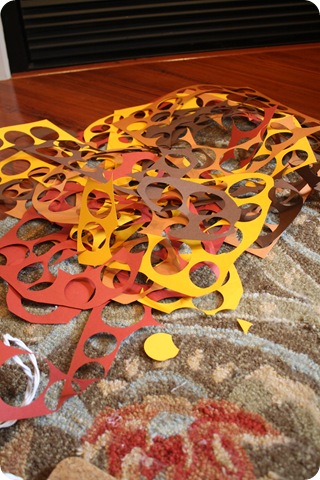
And my scrapbook paper (also from Hob Lob, half off!), an started punching.

Punch punch punch:

I used red, yellow, orange and brown – all warm luscious fall colors of course!

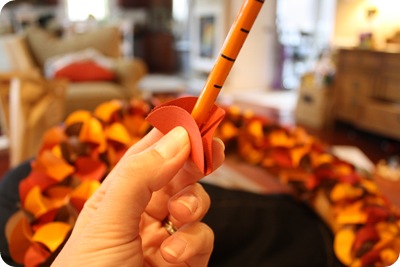
Using the end of a pencil, I wrapped each cut out around the eraser end:

Then dabbed the back with hot glue and stuck them on everywhere.

I LOVE it:

IT’S SO FLUFFY!!!!!

You’ll notice that the density changes throughout the wreath. ;) I started on top and made them really tight next to each other. I realized very quickly it way going to take EONS if I kept that up, so I started spreading them out a bit more.

Then half way in I realized using more of the larger circles and less of the smaller ones meant it would go even faster, so you can see how I used more of the large ones on the right.

Whatever.

It adds interest and dimension. That’s my story and I’m sticking to it.

I took a few hours total, most of which were spent sitting in front of the TV, so I’m not complaining. If you used bigger circles it would go even faster!

You can see here that I didn’t do the sides – that’s why I wrapped it:

Now, our porch is covered and the front door gets NO rain – so keep that in mind if you try something similar.  Obviously this wouldn’t stand up to the elements. I think this would look AWESOME over our mantel as well!

I’m not sure which what decor will go on the door for the rest of the season – it could be my felt wreath:

Or my beauty from last year – the dollar store wreath:

I love my Southern Living at Home container stuffed with fall fillers:

And here’s a couple more ideas from a couple years ago:

So many choices!

I am leaning toward my square wreath or the paper one, just because of their beautiful fall colors:

I can’t wait to show you the porch next week at my party! I have a few changes in store. Buwahahahaaaaa!! Not sure why I just buwaha’ed you – but I’m pretty excited. ;)

Can’t wait to see your fall door ideas at Rhoda’s place tomorrow!

Sunday, September 25, 2011

I want to hug my fridge

Hey hey! How was your weekend? We had a wonderful time in southern Indiana in a cabin with my family – we had such a blast!! Indiana in the fall is my very favorite place to be! Well, it’s my favorite place to be any time of the year, but you get it. :)
Well, it’s been a month since our fridge died on us and caused water damage in the kitchen. We’ve since gotten the island installed and put back together, and a couple of weeks ago we got our new fridge.

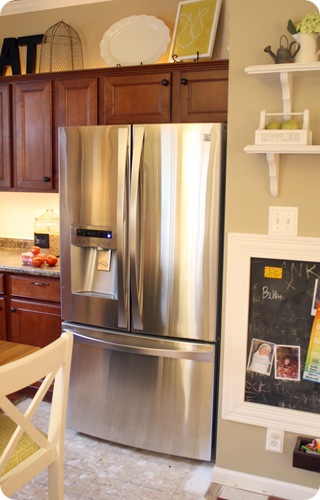
And it’s beautiful. I mean it people:

kenmore elite 31.0 cubic feet

Excuse the plywood. :)

Wait…hold on.

It’s more like this:

For reals. We had to wait two weeks for it, since it was out of stock, but it was worth the wait! I knew I wanted the French-door style refrigerator and it does not disappoint. When we went shopping, there were a ton to choose from, and at first I was looking at the counter-depth versions like we had before.

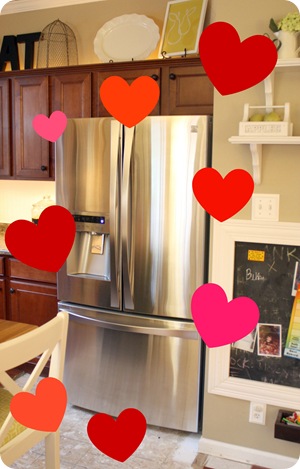
But then I saw this one. Hearts were fluttering out of it, even in the store. ;)

(Duh. I thought I had mentioned the brand! It’s a Kenmore Elite – you can find out the deets here.)

The basic measurements of this one are the same – but the space inside can’t be beat. It’s got 31 cubic feet of space inside. That means 31 cubic feet of AWESOMENESS:

And when you open the doors, there’s singing. I can’t pinpoint where it’s coming from, but it happens.

Wait, maybe coming from my head. Whatever.

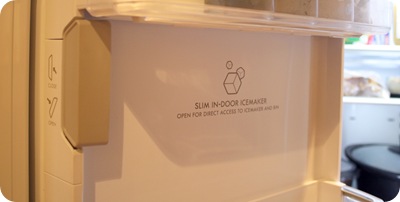
It’s HUGE. Part of the reason it holds so much is that the ice maker is in the door:

freezer in the door fridge

It makes the cutest ice too. Really. Our old ice was long, these are square-shaped. It really doesn’t take much to make me happy.

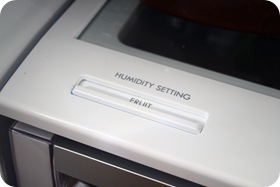
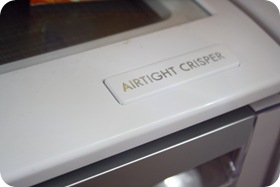
It’s got the basics:

IMG_7060IMG_7061

And some fun stuff like extra deep door storage:

The bottom drawer inside is my very favorite thing. It’s wide and huge and it is great for flat, wide stuff. And you can open one of the doors or both – which I think is brilliant. So often we’re just grabbing milk or whatever, and I like that we can still just open one door if needed.

The only difference in size is that it isn’t counter-depth, which means it comes out further than the counter. It sticks out about four more inches than the old fridge. We kept the old fridge in place and moved it out for a few days to make sure we wouldn’t mind it.

We didn’t. :)

And we have the same issue with this one that we had with the old one – the right door doesn’t open all the way:

There’s nothing we can do about that, so I’m not bothered by it. (We’re used to it anyway.) And actually, because this fridge sticks out a bit further than the old one, the door opens more than before.

I was pleasantly surprised to find that ALL of the drawers (even the long bottom one) still pull out completely, even when the doors don’t. SMART.

Our old fridge was a side by side, and it always drove me crazy. I felt like the older refrigerator we had long ago (like, eight years ago) was more spacious. We couldn’t fit much at all in our freezer in the old one, and it especially bugged me that we couldn’t buy frozen pizzas.

I know, my life is rough. ;)

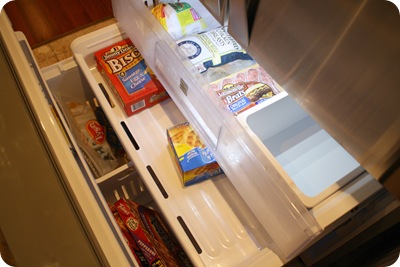
But what really sold me on this one were the THREE drawers in the freezer:

Most French-door styles have two freezer drawers and this extra one totally sold me. Now our meat has it’s own drawer. Love that! And the meat is happy too. I’m guessing. ;)

You’ll notice the freezer and fridge aren’t full – it’s because we’re slowly refilling it all. I had no idea how much food we had in our fridge (that went bad) and how much it would cost to replace it all. It’s crazy! The insurance company will cover some of it, but not all, from what I understand.

The insurance claim did not cover the new refrigerator, which is about the only thing they aren’t covering.

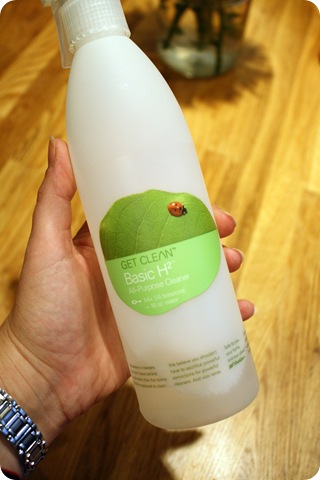
Many of you have asked how I keep our stainless so clean, and I’ve tried just about everything. The best I’ve found is my Shaklee basic cleaner:

shaklee stainless steel cleaner

It’s all I use on the fridge anymore!

So far the only thing that has slightly bothered me about this new style is that there’s not much room for all that stuff we used to keep in the door – you have to keep it out in the open part of the fridge. This isn’t a big deal because there’s SO much space, but I like having that separate spot for all that little stuff. It’s the organizer in me. ;)

But it’s not a big deal all, at least to me. Overall, I’m LOVING it so far.

And I think we’ll finally see some progress on our floors this week – I’m meeting with the flooring guy to work on stains tomorrow. We’re going the finished on-site route, for reasons I’ll explain soon!

So, do you have this new style? Love your side by side? Traditional freezer on top? (I liked it more than the side by side!) It makes me wonder what they’ll come up with next – but I think this is the best design yet!


P.S. I need to get my fall mantel going, because our first fall linky party is this Tuesday over at Layla’s place! Get your fireplaces and mantels ready!!

Thursday, September 22, 2011

Candy Corn Love

Well HEY!

First of all, thank you for the lovely comments on our deck! You all are the sweetest!! We are just so pleased with how it turned out.

Sooo, last week I was trying to get some crafty mojo going up in here. (That would be up in hea if you’re hip. I’m not.) I had a GREAT Halloween craft in mind, and I got all the way to the end…and it was just, well.

Wrong. :)

Since I had all the supplies for it, I wanted to reuse them somehow. So I took it all apart and I have a plan in mind for all the parts. (And yes, I’ll show you the unfortunate craft soon.)

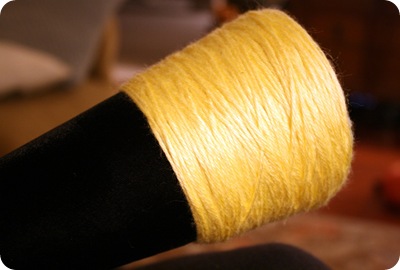
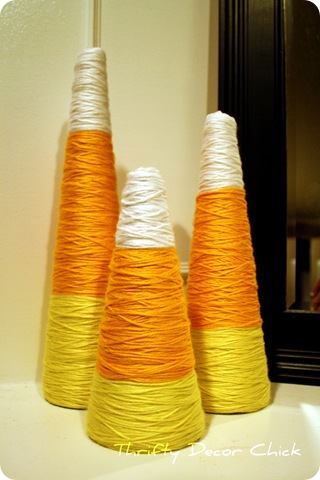
I had three Styrofoam cones to reuse, and after a few days, I finally came up with an idea. I got some yellow, orange and white yarn at Wally World and started wrapping, and wrapping:

(The black on the cone is part of the unfortunate craft. Please ignore. Not needed.)

I didn’t use any glue – just wrapped. And wrapped. ;)

You see where I’m going with the yellow, orange and white – especially if you read the title of this post. I’m not so good at the teasers.

I ended up with some big yarny candy (I almost wrote carny – that would be a whole different craft!) corns!:

yarn candy cornsThey are too cauuuute! And WAY better than the original craft. Believe you me.

They were so easy it was just silly – just time consuming. But because I just wrapped (and wrapped) willy nilly, it was a great project to do while sitting in front of the tube watching the new fall shows.

I just tucked the end of each strand into the back of the cone. Easy peasy! I think they’d be a fun craft for kids – maybe with big chunky yarn?

So. cute.

Next up, working with the actual candy corn. I’ve seen candy corn wreaths for a while now and finally tried my own. Again, ridiculous easy.

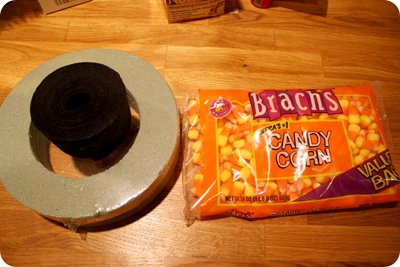
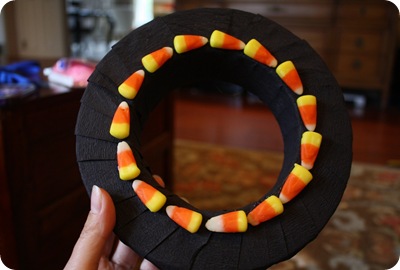
I started with a dollar store wreath and a bag of candy corn:

I wanted to start small for my first time crafting with candy corn. ;)

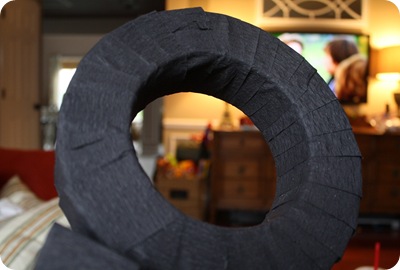
I needed something black to wrap the wreath with, so I just used black crepe paper. Anything would do – fabric, ribbon, even tape:

For the first row, I laid the candies out to check spacing, and then glued them on with my glue gun:

But after that I just glued them on, without checking spacing first.

And I glued. Annnnnnd glued. :)

I did a three rows on the front and then realized I wasn’t crazy about so much black showing through, so I just kept gluing:

candy corn wreath

(I apologize for the awful photos – the dark is sneaking up on me lately and I’m losing my picture taking light much sooner than usual!!)

The front is a couple layers deep, the sides have one layer. The second layer of corns on top were just placed to cover the black that was peeking through. It went MUCH faster than I thought it would – you’d think it would take forever and it didn’t. You just put a line of hot glue on there, then plop them on in a row, over and over. And over. ;)

Lots of repeating on these crafts. Wrapping, gluing and plopping.

But this is another mindless one that is fun and goes really fast – the perfect craft in my eyes!!

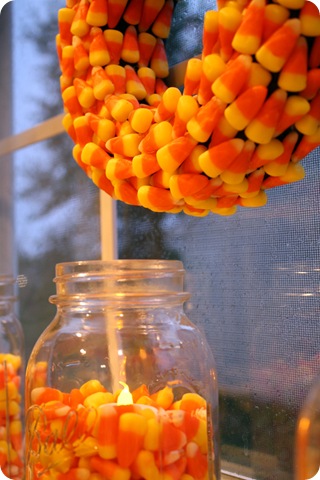
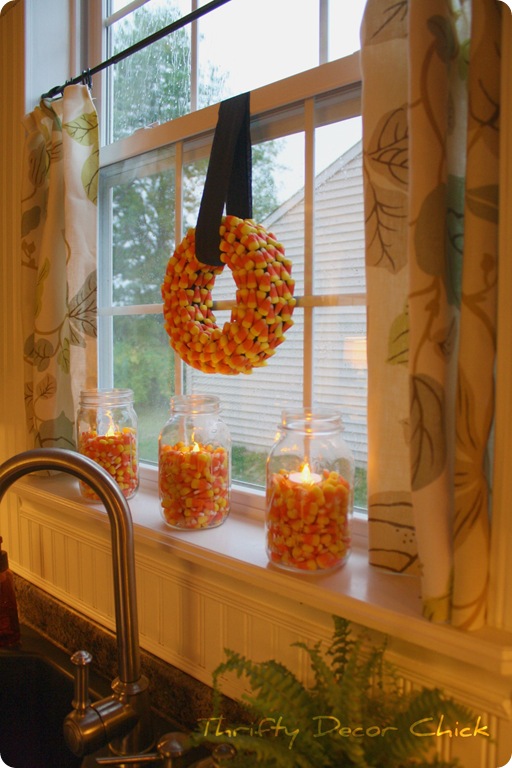
I hung it with more crepe paper on the kitchen window, then added my Ball jars to the window sill filled with more candy corn:

candy corn crafts

Again with the LED lights plopped inside. You can find them just about anywhere, but I get mine super cheap at the Dollar Tree. I like to have a bunch on hand, especially this time of year!

I love decorating with candy corn – it is so FESTIVE! :) And there’s no danger of me eating them – I don’t care for the stuff. Crafting with it – love. Eating it – yuck. ;)

Now if I was crafting with Chunky Bars, we’d be in trouble.

The wreath was a whopping $4 to create. I have no idea if it will hold up, so the cheap aspect is a good thing. ;) I will spray it with a sealer of some kind and store it in a Ziploc bag and see how it turns out. We may have a fun science experiment come next fall. ;)

But for now, the kitchen window is ready for fall!:

ball jars with candy corn

I love that candy corn is a little bit fall, a lot Halloween – so it “works” for the next couple of months. So FUN!

Got any candy corn crafts? I just think they are the cutest! Do share! (And link to them in your comment if you’d like!) Have you started your fall decorating? I plan to work on it this weekend – can’t wait! :)

Friday, September 16, 2011

A beadboard island…again!

Well helloooo! Thanks for all the thoughts on the flooring – it’s helped a LOT. I’ll keep you updated on our progress. (Which I hope happens soon!)

Last week we saw some progress of another kind – we got our kitchen island reinstalled and I was so happy to have it back!

The guys doing the work had to pull off all of the beadboard and the corbels in order to get the island up and moved (into my office, which is why progress has stalled in there). But they came back with all the supplies, ready to rebuild the whole thing!

I felt bad, cause usually when they go back to a house to reinstall and island, they reinstall an island and move on. At our house, they had to redo all the “extras” I had done. ;)

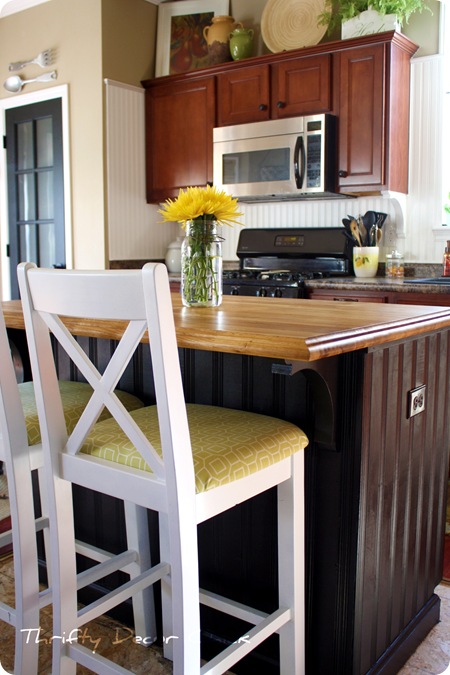
I was pretty good – I didn’t hover. (Ahem. Too much.) And they did a great job! The guys bought a different kind of beadboard:

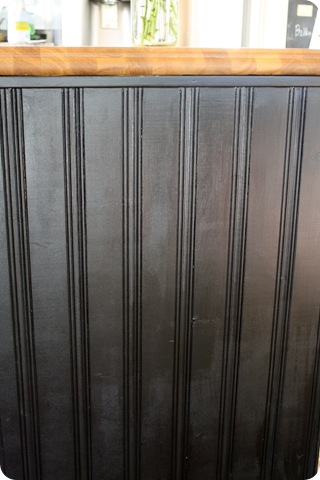
black beadboard

And I actually quite like it! I’ve never seen this one before, but the “board” and “bead” parts are both wider. I like that it’s now a little different than the beadboard backsplash.

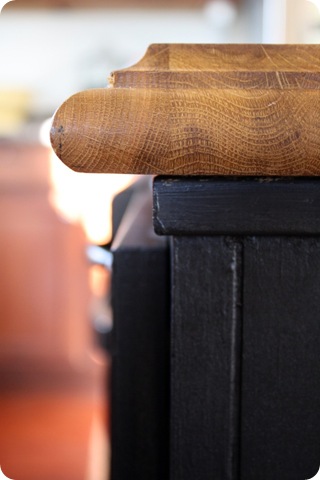
They also fixed a couple things that had bugged me about my installation. I didn’t leave enough of an overhang with the butcher block on the cabinet side when I installed it, so I had them move it out a bit:

It always bugged me before -- it’s the little things! (That drive me crazy and then make me happy.)

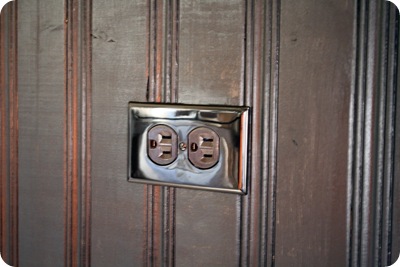
And when I installed the beadboard around the island I cut out around the outlet, instead of installing the outlet cover over the boards, like I did with the backsplash. So they fixed that for me too:

The whole island needs a light sanding and another coat of paint, but I’m waiting till the flooring is done before I do that.

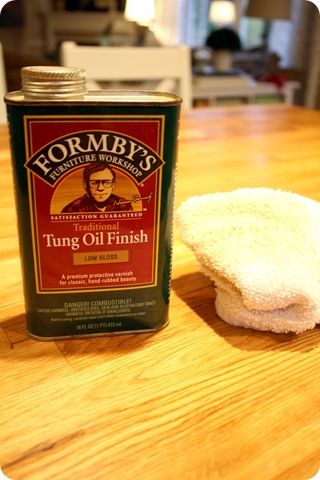
There was a little mishap with a ring of black paint on the butcher block countertop, but it was a small price to pay after all the hard work they did. And it was time for me to apply another coat of Tung oil on the counter anyway.

Many of you have asked how the butcher block has held up and I must say – I LOVE IT. At first I was obsessed with keeping it perfect, but I’ve long since realized perfect is impossible and wear and tear shows character. (If you keep saying that to yourself it finally sinks in. Realize it or go crazy I say.)

I hope I feel that way about the floors years from now. ;)

There’s a few small scratches here and there, but they aren’t bad at all – overall it still looks beautiful! We leave cups and and liquid on it all the time, and it holds up GREAT.

To take care of the black paint, I had to sand it down a bit:

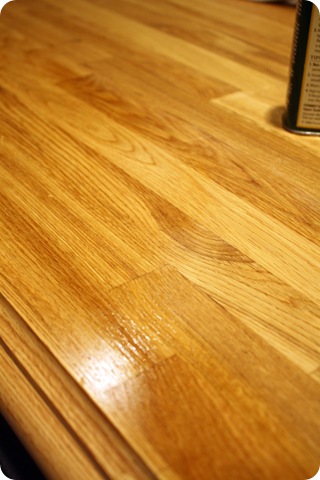
I went after a few other minor scratches while I was at it. Then I just wiped it down and covered it with another coat of Tung oil:

tung oil on butcher block

You can see how it brings the wood to life – the oil is applied on the left of the wood below:

tung oil on butcher block

It needs to dry for about 12 hours, and then after a sanding with steel wool, you can do another coat. I only did one for now, but the first time I did it (a year ago), I think I did three coats.

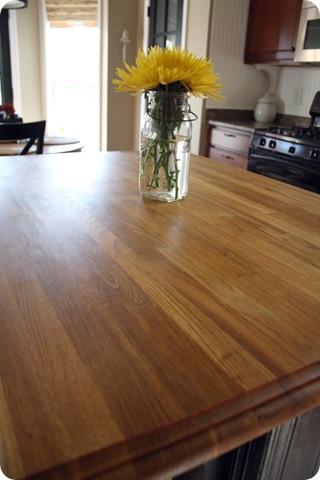
It still looks fantastic!:

And now things are getting back to normal in the kitchen. We even got the new fridge yesterday – no more walking to the garage for a piece of cheese! YAHOO! :)

Now the plywood on the floors seems so much more manageable:

    beadboard island

The island houses our trash compactor, so it’s so nice to have that back too. And the island is the hub of our kitchen – I couldn’t believe how much I missed it!

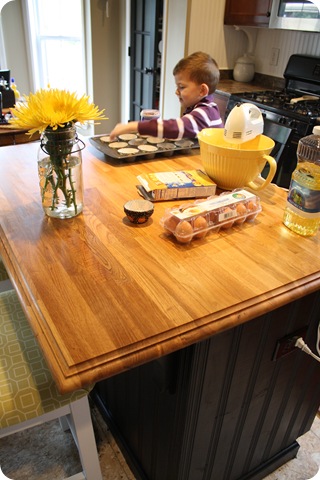
We celebrated it’s return by making cupcakes:

butcher block beadboard island

They were Halloween cupcakes, I admit it. ;)

One baby step at a time…we’re getting the kitchen back! Just in time to tear out all the floors! Ah well…I am not complaining!!

Overall I’m thrilled with my butcher block counters -- they aren’t nearly as much upkeep as I thought they would be. It’s all about treating them after they are installed and knowing they won’t stay perfect!

I’m so letting go of perfect. :)

Wednesday, September 14, 2011

Picking out the floors

Well hello! I’m happy to announce we have some progress with the floors in the kitchen and family room. Nothing is torn up, nothing is laid down, nothing is even picked out. But the insurance company has given us the green light to move forward and that is AWESOME news!

I’m clicking my heals over here! (OK, in my head…I’ve tried doing it for real and it ain’t pretty.)

I told  you a couple of weeks ago about the water issues we had in the kitchen – and since then we’ve lived with a big rectangle cut out of the floor, down to the plywood. Thankfully most of that plywood is covered with our island again (I’ll catch you up on that soon), but we’ve got that pesky problem of covering the hole to deal with.

That means picking out floors. And if I thought buying a new sofa was bad, wowza…that was nothin’. This is BIG people. Very, very BIG.

One thing we know for sure – we aren’t going back to laminate. I know – I professed my love of laminate here and I have loved our floors:

image

But that’s back when they looked pretty and shiny. ;) Over the years they have lost their shine – they are dull and will not clean up no matter what – I’ve tried absolutely everything. The only thing that works is getting down on the floor and working on one square foot at a time, and even then they are just dull and yucky.

Secondly, the water issue. Overall our floors have held up GREAT – but you just don’t mess with water and laminate. I’ve discovered it takes VERY little time for the water to seep into the floors and then spread. And they can’t be dried out – at least ours couldn’t. I believe there may be laminate flooring you can “patch” now (replace sections), but at least with the kind we got, it’s not easy (if even possible). And once bitten, twice shy you know…I just want to avoid this situation ever again if possible.

With real wood, or even engineered, the floors can be dried out and then repaired. Even then I know it’s not fun, but it can be done. (We’ve already ordered these to try to avoid water damage in the future.)

And now…because we’re tearing out the floors in the back of the house…we’re considering tearing out the carpet in the front of the house too. Mostly because of things like Christmas trees falling:

image

And (lots of) red ribbon staining the carpet. :) And our beautiful (late) pee cat (in the pic above) did her share. And the dog. And the cherry that was stuck to the bottom of my shoe while I walked around the living room the other day – that was awesome too.

Let’s just say, it’s not pretty. I will spare you the pictures. :)

So anyhoo…the insurance will cover most of the flooring, and we’re deciding if we’ll pay some extra to have the whole bottom floor done. I’m leaning toward yes. Hubby is leaning toward putting his hands over his ears yelling “nananananananaaaa I’m not listening!!” because of all of our mishaps this summer. I can’t say I blame him. ;)

I started out looking at engineered flooring, but our “Guy” says his “Guy” is saying we could do real hardwood for the same price. Specifically unfinished wood, finished on site (our house).

Say whaaaaa?

I’m still looking into all options – engineered, prefinished and unfinished. The unfinished and all the work involved is already giving me hives. With the sanding and staining and moving furniture out and US out and three animals and a fish out – HIVES.

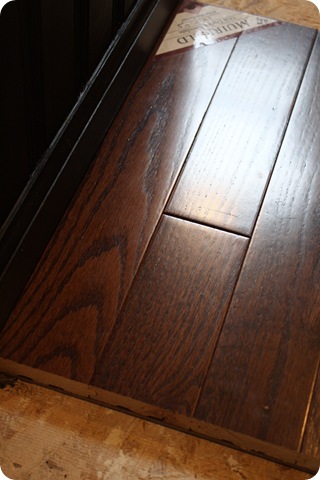
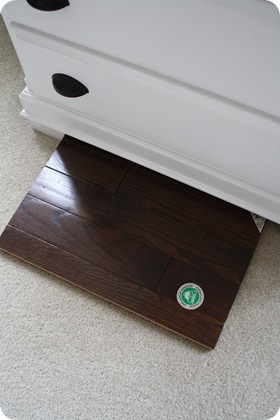
Our Guy swears we won’t have to be out of the house, but I think he’s sweet talkin’ me. I’m definitely leaning toward engineered or prefinished. So he brought  me a prefinished sample today and I’ve been showing her around the place. ;)

I picked out the laminate floors to match our kitchen cabs, which I will do again – umm…never. Wayyyy too much reddish going on. I like the contrast with these dark beauties:

Check them out against the black island:

Oh la la!! :)

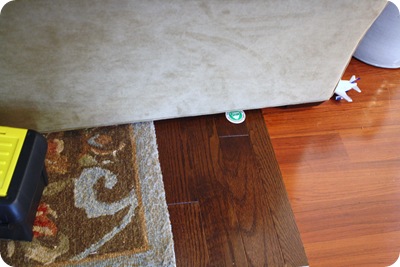
I tested her out with the sofas – in the living room:

And in the family room, with the rug:

My heart was beating a bit faster. ;)

But I think I may have squealed a little (out loud) when I tried it up against the white dresser in the living room:

OH my gah. That. is. gorgeous.

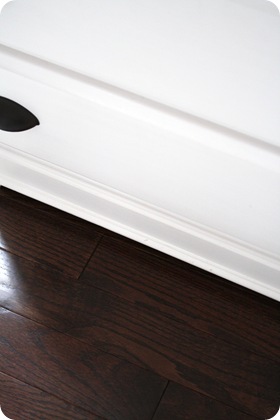
And then I about passed out when I put her up against the white molding and the drapes:

Oh be still my heart, I am in LOVE. Is it bad to pick the first sample you see? (Those last few pics are more the actual color – it looks reddish up above.)

But I still need to look around – I’m a compare 342 options and then research it on 289 web sites kind of girl. This site is by far the best I’ve found to explain the different options in flooring and what you should look for. Check it out if you are trying to figure out the flooring conundrum yourself.

I’d also like to check out wider planks too – the sample has 3 1/2 inch planks and I’d like to see the four inch. I also love the look of the hand-scraped wood, but our Guy has mentioned that many he’s worked with have had issues with those. I’m not sure of the specifics yet, but I’m going to dig deeper on that one.

And of course there’s the budget – if engineered is cheaper, we’ll most likely go with that. But he keeps telling us we can do real for the same price. I don’t even know how that’s possible, but I want to trust Guy. ;)

So…again, I ask you to help a girl out! Any advice? I know I’ve asked before, but I would LOVE specifics! If you could pick between engineered and wood, what would you do? What reasons? Have you had issues with either? Happy with one over the other? Did you go prefinished or finished on site?

I’ve never had wood floors and never thought in a million years I would – but here I am, looking at wood floors.

That is why I never say never. Ever. ;)

I’m hoping to make this the fastest, most well informed decision ever, so hopefully I’ll have an update for you soon! Thanks in advance for all your help, my Squeeeeezies. I REALLY appreciate it! :)