Tuesday, September 28, 2010

A fall mantel

Hello there! Well, the bins of fall decor have finally been pulled up the stairs, and I’m a little shocked at how much beady/leafy/pine coney stuff I’ve accumulated over the years.

I mean, I lurve me some beady stuff, but it’s a little much. :)

I set to work on the family room mantel today and started out putting it together like years past, but quickly realized I quite liked the way I had it decorated already…so I just decided to make some fallish changes and I LOVE it!

I especially love that it only took about 20 minutes and stuff I already had.

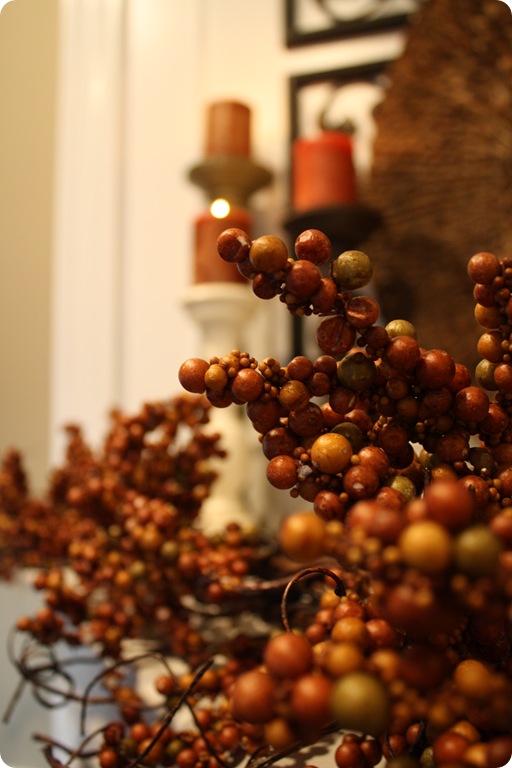
I started with some long, branchy, beady thangs I found deep in a storage bin…I don’t even remember buying them. :) I love finding surprises from the previous year! How fun is that?

I piled four of them up across the front of the mantel and fluffed. And fluffed. And fluffed some more:

beady stuff

I love that their twisted branches look so real.

Well, as real as branches with squishy foam beads can look:

:)

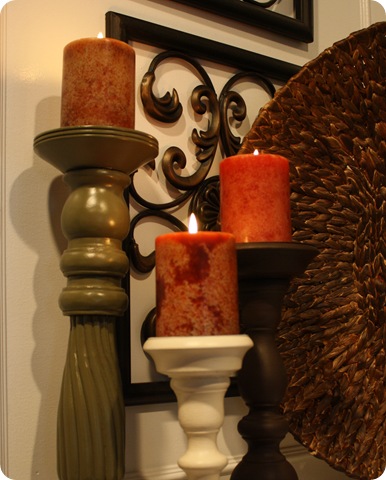
Instead of adding a ton of candles across the mantel like I’ve done in the past, I just changed out the cream candles for some in warmer tones:

The warm, fall-inspired candlesticks work perfectly!

I filled the cloche with some fall fillers, but when I stood back, it was looking a bit too busy. So I grabbed a candle stand, perched a twiggy pumpkin on top, and tied a ribbon around the base instead:

I love how the pumpkin ties in the texture of the large rattan platter in the back -- that platter stays up there throughout almost every season because it’s so honkin’ big and fills up the space perfectly.

I was determined to use what I have, and I realized this week I had PLENTY to use. ;)

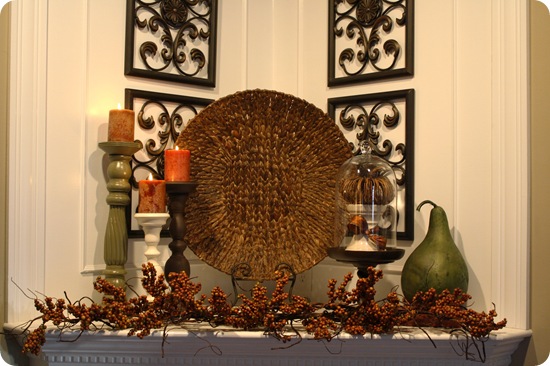
I’m really pleased with how it turned out!:

fall mantel

I’m not sure where I got the beady stuff last year, but I’m willing to bet it was Hobby Lobby. I’m obsessed with the Hob Lob. The huge gourd was from Michael’s last month – I think $10? The twig pumpkin was a Goodwill find this summer ($1.99!) and the cream ceramic candle stand is from Target (they still have them in the Smith and Hawken section.)

I’ve mentioned before this corner mantel has been a thorn in my decorating side – it’s much deeper than a normal one and not nearly as wide. It’s a bit challenging to make it work, but I think I’m starting to get the hang of it.

It only took six years. :)

I love that I’m able to layer decor a bit more with a mantel like this:

Of course, I especially love it at night…lit candles make just about anything look lovely!:

There you have it! My fall mantel –- using what was already there, amped up with fall colors and fluffy beady stuff. You can’t go wrong with beady, seriously.

Have you started fall decorating? Are you feelin’ it yet? Just as I start to get in the fall mood…it’s supposed to get in the 80’s here again this week.

GAH!! Bring on October!! :) (I’ll be putting up the Halloween mantel before I know it!)

**I’m linking this up to Nester’s mantel party and Julia’s fall decorating party!

Sunday, September 26, 2010

Rewind: Warm fall glow

fall glow

Can you believe I am just now really starting to decorate for fall? Most of you probably think I’m right on time, but this is about a month late for me. ;) My recent aversion to stuff has made me cringe at the thought of pulling the bins upstairs.

But this weekend I finally got the bug, and it’s coming out slowly but surely. It’ll just be a tad simpler this year.

Last year I showed you how to take some of your most basic decor and make your home glow with the fall season – this is a repost for anyone that wasn’t around these parts a year ago.  ;)

Funny how pretty much every space in the photos below has completely changed since then. Don’t get too confused. :)

Enjoy! (Some updated pics will follow.)

------------------------------------------------------------------------

When it comes to decorating for fall, there are three things you need for a fabulous result: different textures, layering of the textures and it's gotta smell gooooood! You can't go wrong if you incorporate all of these.

I like to take items I already have and change them up for fall. For this display, I used a tray (Southern Living at Home, I love you!) I already had: I had the two larger candleholders, and purchased the three smaller ones for $1.50 each at Hobby Lobby. I placed them so the sizes were layered, and and filled in between with my go-to fall filler:

I got this stuff at Z Gallerie a couple years ago and it's still my favorite filler for this time of year. It's got glitz, it's got natural, it's got warm. Awesome.
 
I fluffed it all just so and added my candles -- the large ones were $5 from HomeGoods, the smaller were $3.50 at Hobby Lobby:
It took all of five minutes to do. I bet you have items laying around you could use too!
I wish they had scratch and sniff computers. The scent of cinnamon and apples is wafting through our house.
 
This is my view while I blog tonight:
Loverly. Have I mentioned yet how very much I ADORE fall? Just in case I haven't, I. ADORE. fall.
 
Our family room mantel has been warmed up as well. Last year I found some scrap wood, stained it and it serves as the perch for simple red and brown candles:
You'll soon realize I am a bit obsessed with these beady things. I think they are GORG. You can find them at Michael's. (I always get them on sale, they are $7 each before the discount.) I weave them through the candles for texture:
And wrapped them around the candles in the hurricanes for more texture and layering:
Yum. I could just eat it, it's just delicious. Well, not really, but you know what I'm sayin':
Delish.
 
These candleholders are so fun to fill during the holidays. Funny how I can't figure out what to put in these things most of the year, but from now until early January, I'm golden:
I fill the bottom of each with leaves in different shades of orange and red:
I get my leaves by finding garland I like, then snipping off the leaves. This is much cheaper than buying packages of leaves.
 
I add my candles and then my "scatter" -- I love this stuff! This I found at Pier 1 years ago, and I think they still carry something similar:
Autumn-inspired ribbon is tied around and fluffed just a bit for a final touch. Sigh. :)
 
In the kitchen, I used another Southern Living piece and a clearanced plate from Pier 1:
I wrapped the candle with more foamy beady things (I used double stick tape on the back to secure them). Again, layering and texturing (word?):

Oh yeah, and a yummy candle. Glorious!

Try taking items you already have -- add a candle and then some texture -- whether it be pumpkins, acorns, apples, leaves, whatever! (Just make sure they aren't near the flame! Yikes.) Have I mentioned how much I love... ummm... OK, I'll shut it. I'm off to eat a caramel apple covered in peanuts, that should shut me up.

-------------------------------------------------------------------------------

OK, totally weird, cause I’m about to eat a caramel apple again…right now. :)

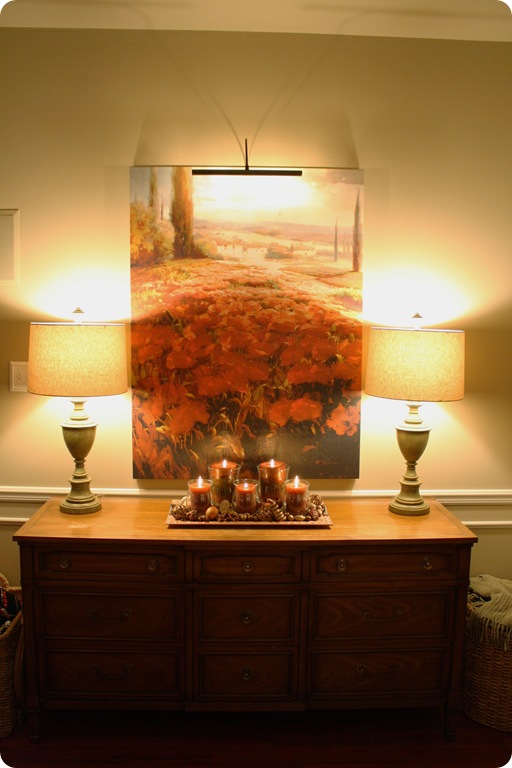
I still haven’t touched the mantel or most of the other decor I mentioned in this post last year, but the tray with candles took less than five minutes to throw together on our new old Craigslist dresser:

IMG_0259

I used the two big chunky candles from the mantel last year in the bigger glass candleholders and I love how beefy they are:

IMG_0265 Because I used what I had, this little display cost me zero buckaroos, and I love it:IMG_0281

Take any kind of tray, (check out Goodwill if you don’t have one!), some candles and any kind of filler and you’ll have a beautiful fall glow for your home! Lurve…

Friday, September 24, 2010

Bloggers in New York!

021

Well, enough of my bloggy friends have posted their pictures now, so I can finally steal their pics and share my post about our whirlwind NYC trip as well! ;)

I was there for less than 48 hours, but crammed a crazy amount into that time. The evening I arrived, I joined the group of bloggers at the Rue Magazine launch party – it was held at Atelier in the New York Design Center, and I must admit, us DIYers were looking around at the fabulous decor and pointing to things we could totally do on our own:

007

Doesn’t that look familiar? ;)

I was thrilled to finally meet the infamous Eddie Ross and Jaithan:

IMG_8238

(Left to right, Jaithan, me, Rhoda, Eddie, Camila, Marianne and Cristin.)

I was SO excited to finally meet Camila – she is a doll and she worked so hard on pulling so much of the week’s activities together for us!

Many of the Design Star contestants were at the party, and I grabbed a quick shot with Michael:

IMG_8248

I have to say – I felt so incredibly out of place at this party! OH my goodness. I’m a t-shirt and jeans kind of girl, and you pair that with having just traveled for five hours, and I just felt SO…thrifty.  ;)

The next day was pretty much dedicated to The Nate Show – but we started out by meeting up with Beth and her friend Kathleen, and were able to take a quick walk over to the beautiful Central Park:

031  034

Rhoda, Beth and I were perfectly color coordinated!:

three

Beth was absolutely as sweet as can be – and just like every blogger I meet that I “know” through blogland, I felt like I had known her forever! There are no awkward moments, just immediate friendship!

I LOVE BLOGGERS. :)

Speaking of bloggers I love, we met Megan from Modern Bird before the show:

IMG_8282

Um, she is hilarious and FUN! I knew she would be.

I was looking forward to meeting Janell all week!:

IMG_7694

I finally met up with her in line before the show and yet again, we felt like instant friends! And did you hear? She taped a segment on the show! With NATE! I’m so thrilled for her – she is such a lovely person and an incredible designer.

The photo shoots continued outside with Lakeitha and Erika:

IMG_7697

How cute are they? How is it possible that every. single. blogger there was that gorgeous?

We didn’t have to wait in line for long outside before we were ushered in…but then the real wait started. ;) We waited for about two hours in separate rooms, so everybody was scattered. The staff was SO friendly and kept checking in with us over that time. I was impressed with their patience with us and their professionalism.

Our room was finally ushered into the studio, and Rhoda and I were bummed that we were quite literally some of the last few into the room -- which translated to what were probably the worst seats possible. :)

It ended up being OK, because, of course, the cameras are everywhere, and at one point or another I think everyone ended up watching the big screens above so they could see what was going on.

You may have seen that some bloggers were less than happy with The Nate Show producers and the fact that us, the bloggers, were never mentioned on air. I have to tell you that I never even thought about that – in between segments, Nate thanked us in general and those who had helped to promote his new show numerous times. He was obviously very grateful.

I guess it never crossed my mind that he would say anything about us on air. I mean, the producers did ask us to send in some of our projects, so I wondered if they would highlight some of those, but overall I never expected us to get a shout out.

I found him to be sweet and engaging, and after the show he took time to answer questions from many of the bloggers in the audience. He mentioned that he never does that, so it was a lovely gesture on his part:

photo

Before the trip, I was obviously excited to go to the taping, but the real reason I was so looking forward to going to NYC was to meet and spend time with my blog friends – who are now women I consider friends in real life. The Nate Show was just an exciting extra of the trip!

And seriously – is he not the CUTEST?? Really.

After the show we stopped for some New York pizza:

IMG_8303

(My friend Kate and I, deciding between cheese pizza and extra cheese pizza. ;) )

Then walked through Times Square to a subway station:

IMG_8336

Darn it, we didn’t see ONE rat!! I was hoping Rhoda would get to see one. ;)

After a very quick stop in at a party sponsored by The Nest, we headed to Little Italy for some dinner, and then a bunch of us went to check out the view at the Top of the Rock at Rockefeller Center:

IMG_8358

My new and old blog friends: Cristin, me, Kate, Rhoda and Janell.
We had a blast!

I have to give an extra special shout out to Rhoda, for inviting me along with her – she is amazing and a blast to hang out with. And my roomies Emily Clark and her friend Katie (I can’t believe we didn’t get a picture together!) were the cutest and sweetest. Between the three of them I was surrounded by southern accents for days and I was all “y’all this” and “y’all that” when I got home.  ;)

I cannot stress what a blessing blogging has been in my life. I have met so many fantastic, strong, smart women. I have had some amazing opportunities because of this blog. And I am ever thankful and overwhelmed by all of it.

P.S. We have no idea when our episode airs -- we were told to watch online, so I’ll keep my eye out and let you know! :)

Thursday, September 23, 2010

Master bedroom redo: Part one

I know I promised a post about the NYC trip today, but I’m waiting on everyone else to post about it so I can copy all their pictures. ;) That’s how I roll.

So…you may or may not remember my post a couple of months ago about our bed, and why it made me cry I never made it.

I told you then I was on a search for new bedding…and I found it, over time. I big fat LOVE IT.

And oh yeah – IT FITS THE BED. Can I get an AMEN? And a hollaaa?

This process was not a cheap one, and I splurged more than once. So if you don’t like it when this Thrifty Chick splurges, please…just step. away. from. the. blog. now.

We like to sleep and we sleep as often as possible and I believe we deserve some sahhweeet bedding. And we paid for it all in CASH. :) (Don’t hate Dave Ramsey!)

So anyhoo…the transformation started with new sheets. I had my eye on a new duvet cover, and when I decided it would be the one, I knew I wanted luscious chocolate brown sheets to go with it.

We had brown before, but these are luscious chocolate brown. There is a difference:
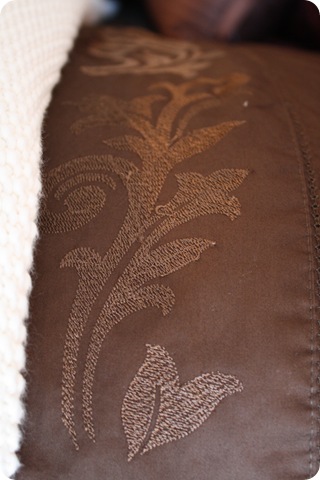
chocolate brown target sheets

I love that pretty detail! Oh, and did I mention they are 500 count sheets? LUSCIOUS.

And they actually FIT and stay put:
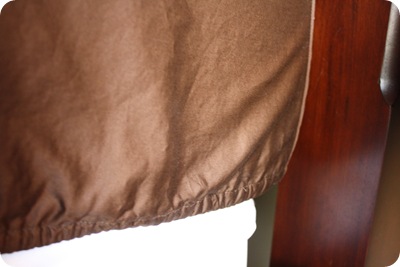
I believe the package said they fit mattresses up to 18 inches, and ours is a tad over 17 – and they really fit, they weren’t just saying that.  ;)

Total cost was $80 I believe? (At Target.) Totally WORTH IT.

Next up was a biggie – a blanket. We needed something that would go from summer to winter with no issues – not too heavy, not too light.

On a trip to Pottery Barn for my family room pillows a while back, I saw the most simple, beautiful blanket called the Fisherman Knit Blanket. I may or may not have brushed it against my cheek. I’m serious – it was crazy soft.

And so incredibly expensive. About $150 expensive. I know, stop choking. I know.

But I couldn’t get it out of my head. I was obsessed. I looked it up on Ebay for weeks, hoping to find a deal and nada. I looked it up on PB for weeks hoping it would go on sale and nothin’.

And then I saw something that sealed the deal. One customer who reviewed the blanket online said it was just lovely, but to watch out because it stretched…a lot.

Ding ding ding!!! It was the one. I knew it would fit over all sides of our monstrous bed!:
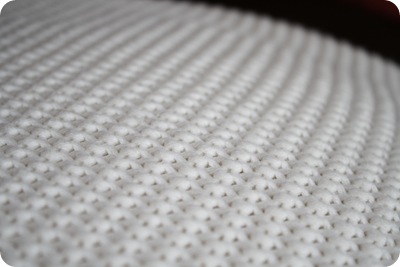
I bit my lip and went in and bought the blanket – the most expensive blanket I’ve ever owned. And it is so freakin’ fantastic, I cannot even stress it to you how fantastic it is. It is like cuddling up with a cloud.

You think I’m kidding. I’m not kidding. I caress it every single night:
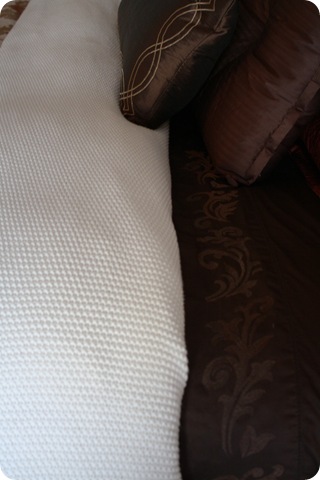
One of my biggest complaints of our old comforter/duvet was that it wouldn’t hang over our thick, king-sized mattress. One day I finally realized why. First of all, the duvet cover had shrunk over time (the whole set was only $25 on Ebay, so I’m not surprised) and when I took the comforter out of the duvet, I laid it down to measure it.

My “king-sized” comforter wasn’t king at all – it was a queen. Yeeaaahhh. Four years and I never realized. Really? I know it said king on the package.

So off to Target I went again, to buy a real king size comforter. For reals this time. I checked. :)

The best part is that it has tabs inside so you can tie the duvet to it:
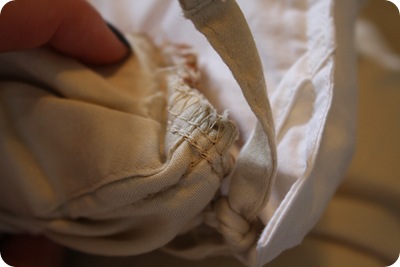
I love smart stuff. I thought only the fancy schmancy duvets and comforters had that little ditty.

And then…it was onto the duvet cover. I was trying to avoid another duvet…I just didn’t want to deal with it again. But this one at Target had been calling to me for months. Every time I went in I would put it in my cart, put it back, put it in my cart, put it back.

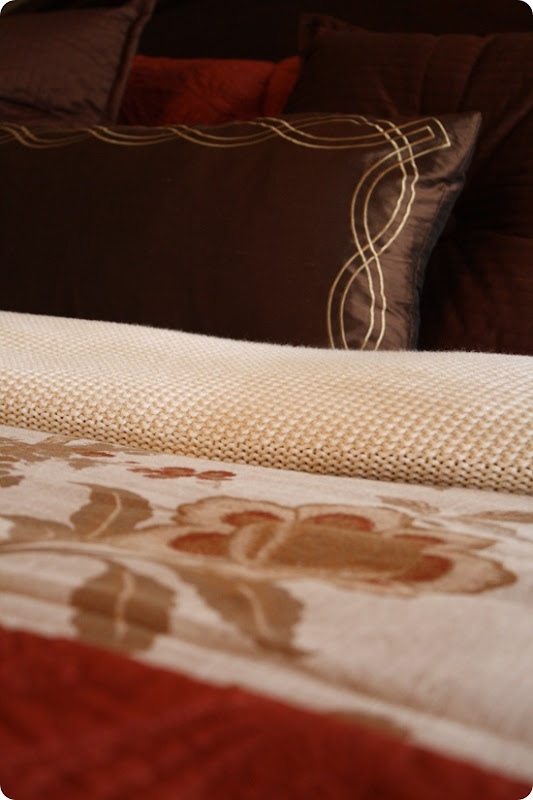
And one day, when I had the cash saved up, I got it. And it’s lovely:
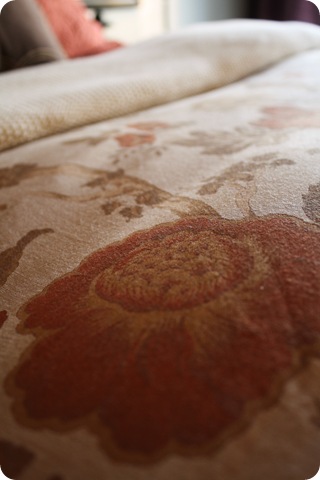
target duvet

It’s all creamy and rusty and chocolatey and soft and it’s SO US. There was very little color in the room other than the walls and drapes before, so I wanted to add a pop of something. And the rust color was that something.

The final splurge was a throw for the end of the bed. I see pictures of beds with a throw laid across the bed and it just screams luxury to me. There was a rust colored throw and shams set that worked perfectly with the duvet (also from Target):
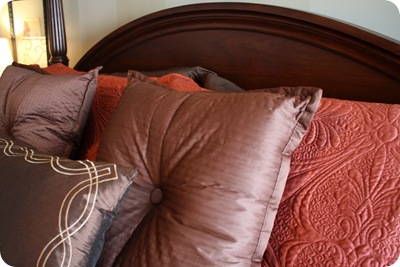
rust and chocolate pillows

The only part of the bed I haven’t splurged on is the pillows – the throws are all from before.

So now, this bed, that took a good 45 minutes of my life every time I made it:

Has turned into this soothing spot:
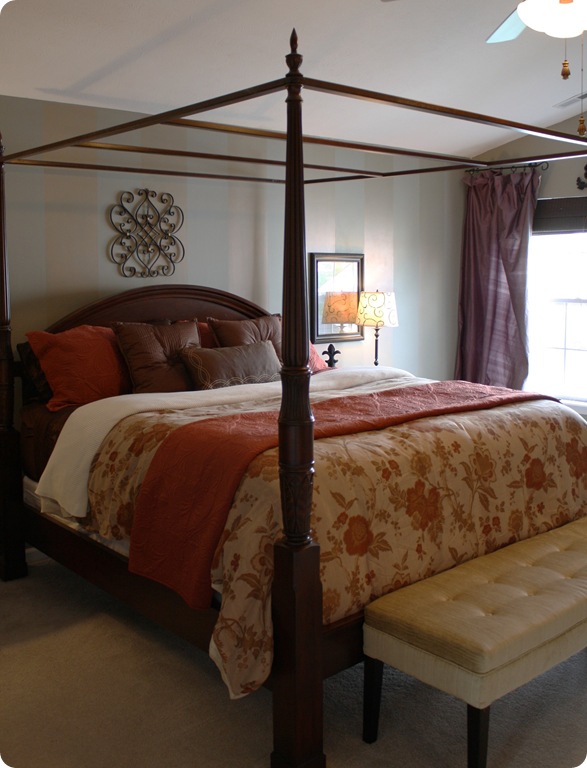
  rust and chocolate bedding

(Ignore the purple drapes falling off the rod, umkay? They’re going.)

And this science fair of a side:
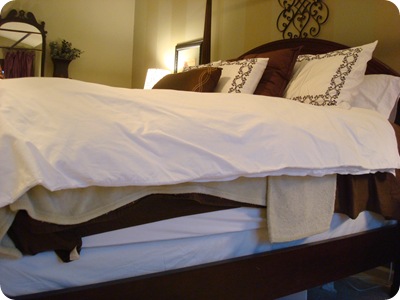
Is now this:
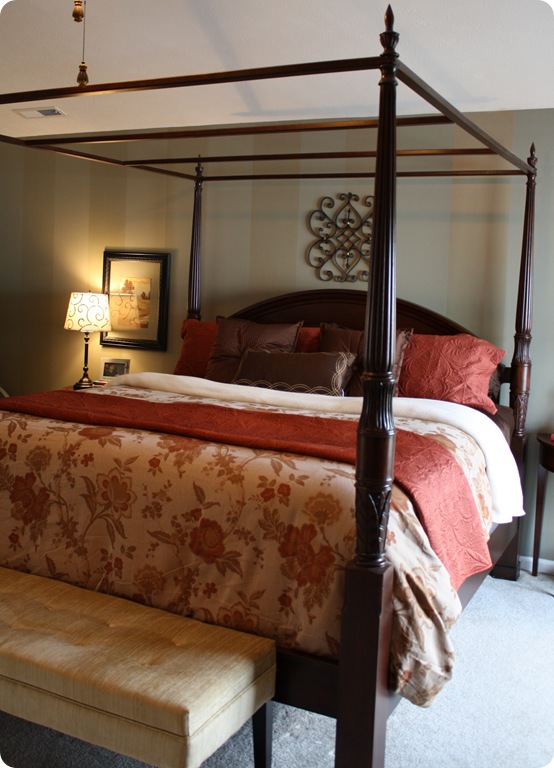
target rust beddingBest part? It took less than 20 minutes to make, from start to finish. I have actually been known to make our bed lately. Can you believe it??

Close your gaping mouth, it’s true.

So there you have it, our new bedding, step by step. I bought everything over a couple months, as we had the cash to spend. There’s still SO much to do to this room! I’d like some pillows to fill up those shams a bit better , I need to make a (LONG) bedskirt and I have a few ideas in mind for the wall behind the bed:
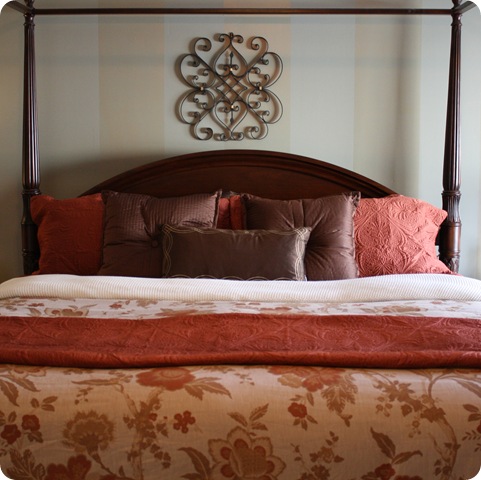
Plus new lamps, nightstands and drapes! I’ve made a few other changes in here already that I’ll show you soon. The redo is going to happen slowly, but that’s how I do it best. :)

I adore how warm and cozy it is – of course the colors are perfect for fall, but we love them year round. And they work great with the greyish green color on the walls. (Valspar color called Tornado Watch, from Lowes.)

I’m trying to decide what color to do the bedskirt – cream or chocolate? Or maybe rust? Is that too much rust? We’ve gone without a skirt all this time and I really want to get one on there. I’m tired of seeing the extra dining table leaf sticking out from under the bed. ;)

I had fun taking pics for this post with a little somethin’ somethin’ that followed me home from the camera store today:
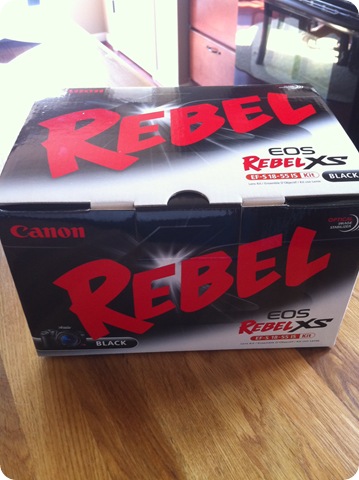
WHOO!!! :) Isn’t it amazing?! Oh my goodness…I have so much to learn! Can anyone recommend a web site that explains aperture and all that good stuff?


Welcome to my latest advertiser!

Picture10-2-1