Monday, May 31, 2010

The 411 on spray paint

I hope you had a wonderful Memorial Day weekend! I made a little bit of progress on the kitchen, but otherwise we just enjoyed having hubby home for four days straight!

School’s out for summer!!  ;) Whoohoo!

If you’ve read this blog for 2.1 seconds, you know how much I luuurve spray paint. In my humble opinion, there is no cheaper way to transform accessories and furniture.

And floor vents.

And roman blinds.

And plates.

Just about anything folks. Believe you me.  :)

Today I worked on a couple of spray paint projects for the kitchen that I wanted to show you. And while I was at it, I figured I would answer some of your most often asked spray paint questions.

I’ve had this large tray from Goodwill forever – almost ten years I think?:

before

I sprayed it in black spray paint, then later I added a vinyl monogram to it. Since I am redoing the kitchen and lightening things up a bit, I thought I would give it a little spray paint update!

I took off most of the vinyl but left just a bit, then sprayed it in an apple green spray paint (from Home Depot). After it dried, I peeled the vinyl off and left the black underneath:

It will most likely not stay as is -- it’s very very apple, and the coverage isn’t great, so I may to something to tone it down a bit. :) Maybe some distressing? We will see! I’m rearranging the tops of the cabs, but for now it sits next to a clearanced Pottery Barn bird cage – isn’t that adorable?

Which brings me to one of the FAQ spray paint questions:

Q:  Which brand/type of spray paint works best?

A:  I use black and white dollar spray paint (from various places – WalMart, Home Depot, Meijer, Lowe’s) all the time and it works great! Usually it just comes in glossy and matte, (shiny and not shiny) and it doesn’t cover quite as well as the more expensive stuff.

If you are working on something that already has a base coat, or something small, the cheap stuff will work just fine. If it’s furniture, plastic, outdoor equipment, etc. – use the nicer paint made for that.

Because I’m involved in the Amex spring home makeover initiative (yippeee!), I am redoing our kitchen with Membership Reward Points – and wooeee, it’s been fun! (I’ll give you another update later this week!) Today I got a new chandelier for over the kitchen table.

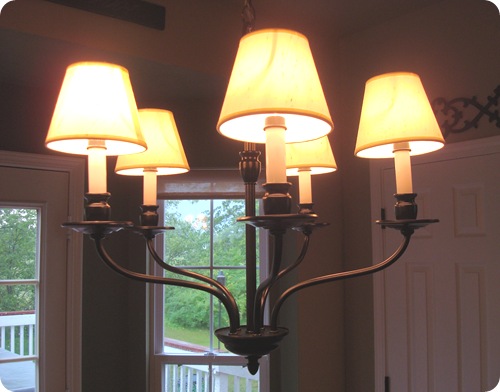
I really loved our old light, (which was a $30 Lowe’s score!), but I had hung it just a bit high, and it always felt just a teeny bit small for the table:

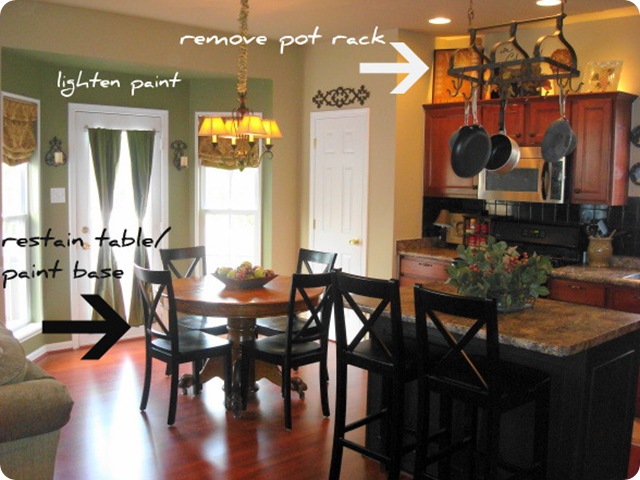
pot rack

So today I was able to purchase a purdy new fixture for the space:
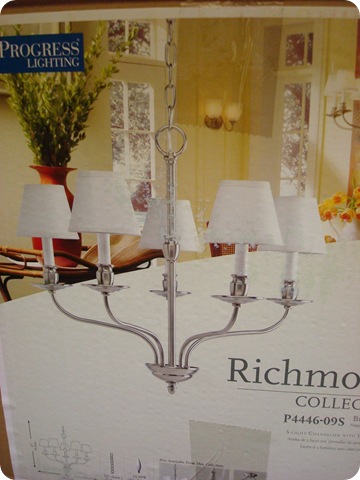
As you can see, it came in a brushed nickel finish, and I was thisclose to keeping it that way, I liked it so much! But when I held it up over the table, it disappeared a bit with that finish. I wanted it to have some visual substance up there, so my ORB spray paint was to the rescue!

**I have no idea what “visual substance” means. But it sounded good. ;)

I taped off the lights, then hung the fixture from a hook out in the garage (I took down hubby’s lawn trimmer to do so) and then used nails to secure an old sheet on the wall behind it.

Which brings me to a couple more questions I get a lot:

Q:  Where do you spray paint in the different seasons?

A:  In the spring/summer/fall that’s easy – usually in the backyard or on the deck. Usually I can be found holding an item out at arm’s length, over the edge of the deck, spraying away. Then I’ll just lay it on the railing to dry.

I keep old sheets around that I use as drop clothes when I paint, but most often I use them on the garage floor to spray paint. A few many, many times hubby has come home to a slew of items drying on his side of the garage floor. Which I know thrills him to no end.  ;)

In the winter, I have been known to spray paint in the basement – but I do quick, light sprays, then leave immediately. Usually anymore, I do my winter painting in the garage.

Q:  Do I need to prep my surfaces for spray paint?

A:  Other than thoroughly cleaning an item, honestly I don’t prep much. :) If it’s bare wood, a spray primer is a really good idea. You’ll prime the surface and use way less spray paint in the end.

On wood items, sometimes I will do a light sanding to prepare the surface – but most of the time I don’t. On metal, I usually just spray directly on the surface, but if it’s something that will get a lot of handling, I definitely prime it first. I have sprayed many metal lamps and did not prime because (the bases) don’t get touched much.

Same goes for light fixtures – I mean, how often do you touch them? At least around here, it’s not much. :)

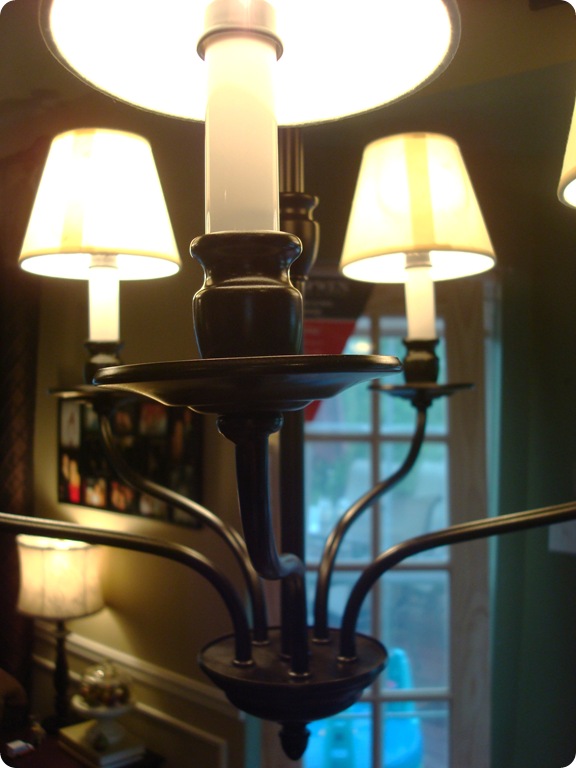
So for the kitchen fixture, I didn’t prime. I did light, quick sprays and worked my way around the light as it hung. I LOVE the way it turned out!:

It’s got loverly, graceful lines:
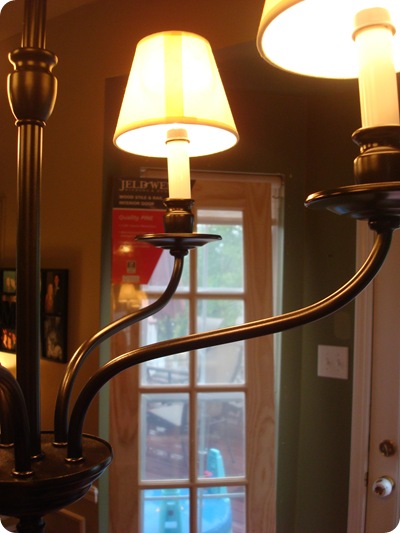
041Swoon! (Ignore the pantry door in front of the window!) Now the light hangs about 29 inches above the table instead of 31 (I know, but I notice.) And it’s 23 inches wide instead of 18 inches – which fills in that area much better.

Visual substance and all.  ;)

I’m thinking of an update for the shades – you know I can’t leave well enough alone!

The Krylon oil rubbed bronze paint I used dried super fast, even out in the freaking-insane-I’m-sweating-just-standing-here-heat we had today, but you need to be sure to let anything you spray paint cure (dry) long enough before you handle it.

Because I’m insanely impatient, I waited till this fixture was dry to the touch and then started installing. Because of that, there were a few little scratches here and there after I got it up.

I just threw the sheet over the kitchen table and sprayed little touch ups. I don’t recommend doing this unless you really have yours spaces covered. But I am me and me is crayyyyzay! :)

So if your project doesn’t go just right, what do you do?

Q:  How do I fix bubbles/crackling/drips/oopsies?

A: Imperfections usually mean one of two things – either you didn’t prep properly so the paint isn’t adhering well, or you are spraying too much, too fast. Drips always mean you’ve used too much. To correct those, wipe them off immediately if you can, then spray over. If you notice them later, sand it down lightly and spray again.

Same goes for crackling. Whenever I see that it means I haven’t prepped well. Sometimes I’ve noticed crackles when I’m using spray paint that has been in the heat or the item I’m spraying has been in the heat.

Crackle can be harder to cover – so sand down as much as possible and spray again.

If you follow these tips, you should get a finished product that will last you for years!:

You can transform just about anything with a can of spray paint! For a few bucks you can spray outdoor furniture, plastic stuff, furniture (I usually only recommend spray paint for smaller pieces – otherwise it gets expensive!), baskets – whatever!

Light fixtures are one of my favorite items to use spray paint on – you can make a builder grade shiny brass light look fantabulous with a $6 can of spray paint!

And anymore your color choices are endless -- the metallic options are great too. You know how I love the ORB, but I also used brushed nickel all over the Bub’s big boy room and I LOVED it:
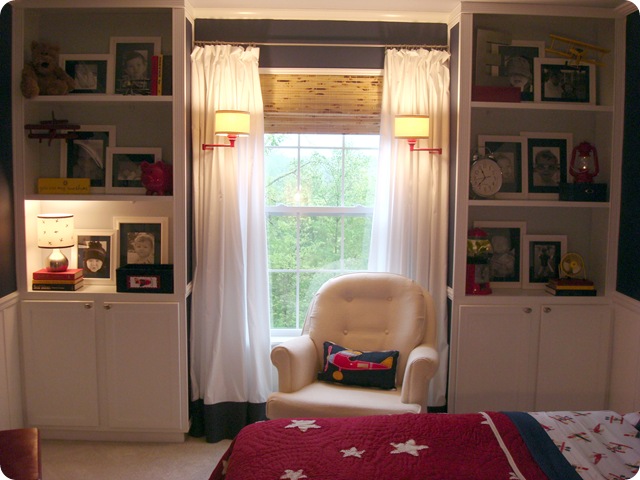
built ins

The possibilities are truly endless – I’ve seen some of the most outdated, hideous “befores” become some amazing, up-to-date afters with just five minutes with a spray paint can. :)

Try it out and I swear you’ll be hooked!

Any of you seasoned spray painters got a great spray paint project you want to share? Link it up in the comments!

Any other questions? I’ll answer them in this post or in the comments throughout this week.

Thank you to this week’s sponsor!:
rustedcapture125

Friday, May 28, 2010

A (new!) kitchen sink

OK, if you are a connoisseur of kitchen sinks, you will LOVE this post. If not, well…ummmmm…you won’t need your sleeping pill tonight. Just read ahead. :)

I have to say…the installation of the kitchen sink has convinced me that this will be the last sink we ever own – at least in this house. It was a doozy.

Remember when I asked your advice on the double or single sink on this post? I had already bought a double bowl sink in the lovely black granite I had been coveting for years.

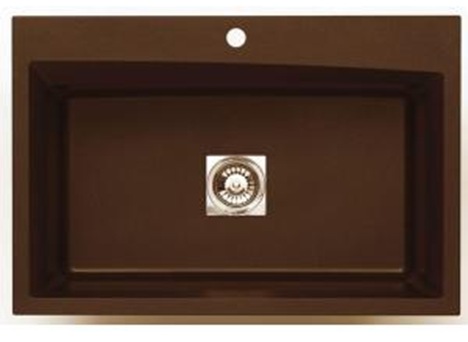
I read your comments and totally succumbed to the peer pressure suggestions and decided to return my double bowl and go back to get the single bowl sink:

sinkA bit of panic set it when the display sink was GONE. And I didn’t see any on the shelves. What the what? I asked Home Depot Guy, and he found one on the floor – but the kicker was that the cutting board and strainer that come with the sink were missing – so it was on clearance and was marked down from $350 to $197.

Ding! Ding! Ding! I’ll take it, yes sir, right now, hurry up, put my name on it, place a guard in front of it, please and thank you.

Whoo hoo!

Well, I should have known better. That’s where the good luck ended.

My awesome, fantastic Dad had offered to help install the sink, so Wednesday he came bright and early (7:30 a.m. – which is very bright and very early for me) and we checked over the new sink, then started the removal of the old one.

Yessssss!! I was so happy to see it gone! Giddy!

There was one itty bitty issue with the new sink. There were no instructions in the box (it had been the display). So when we realized there was only one hole in the sink (for the faucet), we had to figure out how get a hole in there for the lovely soap dispenser that came with the new faucet I had purchased.

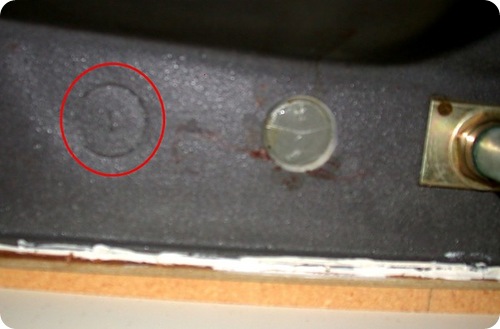
On the underside of the sink, there were what are called “knock-out” holes:

holes (source)

They are slightly scored and there are a few, so you can pick where you want the dispenser. Since we had no directions, I looked online and found numerous sites saying you can just tap the knock-out with a hammer and the hole “just pops right out!”

Hmm. Sounds fishy. Dad wasn’t keen on the idea, but I read the directions to him and we tried it. Didn’t work. And it was stressful.

So Dad insisted on using a drill bit to create the hole instead.

But we didn’t have a drill bit just that size. I had bigger ones. Smaller. A lot smaller. A little bit smaller. Not that one.

So off to Home Depot went Dad. Came back, started drilling. And the drill started dying. It pooped out before we even got half way through the sink. We called it a day, and Dad planned on being here early and bright again on Thursday.

That evening, I went back to Home Depot (trip #614), and opened a sink to see if I could find directions. They said to use a ball peen hammer to knock out the hole. OK! We can do this!

The next morning, Dad tried said ball peen hammer. With a slight little tap, it broke off a (huge) corner of the sink.

Awesome.

I called Home Depot –- the single bowl sink is now only sold online. But I have a hole in my counter and I need a sink TODAY. No go. Nothing. Nada. I called another Home Depot and asked if I could buy their display.

Yes, yes I could, but I need to return the bad sink to the store I bought it at. So we drove to one HD, returned sink. Drove to another HD to buy a new (display) one.

But the display sink had the cutting board glued to it to show peeps what you get if you buy said sink. Glued with cement, as much as I could figure. It wasn’t budging.

The single bowl sink was not happening.

Then, I saw a lovely double bowl version with a very large and DEEP left side, and a small, shallow right side. Many of you had commented on that type of sink and loved it, so I was starting to realize I could fall in love with a different sink! Yes!

We asked HD Guy if the ball peen hammer was a good option – and there was a look of horror on his face. I think his words were, “Oh dear God, NO.”

He suggested the drill bit we were already using. NOT a hammer. NEVER a hammer.

Umkay.

One hundred extra bucks later (no clearance sink here!), we got it home, and started drilling the hole for the soap dispenser with a freshly charged drill. Two minutes into drilling, the bit was completely stripped.

We were almost there. And we had been home for approximately four minutes.

So I left, again, headed to Home Depot. Halfway to the store I realized I didn’t have my purse.

Oh. Dear. Lord.

I turn around, and we all go back to the hardware store.

We get home, start drilling again. And the drill dies. Again.

I was looking around for hidden cameras. Am I on TV?

Nope. :)

So I called a friend, went to his house and picked up two drills – one was corded. (Powerful.)

It worked!!

Houston, we had a hole!!!! 

I could have cried, really. It was such a beautiful hole and it only took ten hours!

So we start installing the lovely faucet and Dad asked which direction I want the knob for hot and cold – it can go on the right or the left. We’re right handed so of course, I want right, RIGHT?

But the hole for the soap dispenser that had taken ten hours to drill was in the way. It was too close to the faucet.

Are. you. kidding. me?

We tried it on the left, and I hated it. We flipped it to the front – and what the ?? I loved it! But wait, is it allowed on the front? Heck yeah Dad says!:

072

And I love it!! I’ve never seen in placed like that before but I LOVE IT! Hot to the left and cold to the right. LOVE.

We dry fitted it to the counter again, checking everything one more time before we siliconed around it. But when we went to pull out the sink, the brackets kept catching. Finally, we got them free, and when we pulled the sink out, there was an awful noise.

We checked the brackets and all were fine, but then looked that the sink and saw that one of them had caught the counter and pulled chunks of laminate off.

Really? REALLY?

Dad glues them down and it looks good as new (glorious laminate!) But then when we would try to adjust the sink with the silicon under it, the chipped pieces would move every. single. time. we even slightly moved the sink.

We spent ten minutes trying to fix silicone-covered, sticky laminate chips. If you would like to know what crazy feels like, this very well might be it.  :)

We gave up on perfectly placed chips, and just left it alone. After tightening the brackets under the sink, which took about 30 minutes because the screws would not turn, we had an installed sink!!

Almost!

Dad came back this morning (third day in a row – I love you Dad!!) and got the plumbing reconnected.

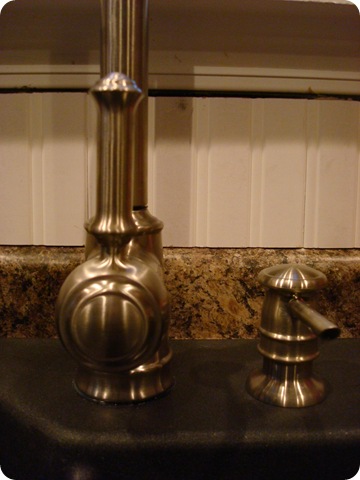
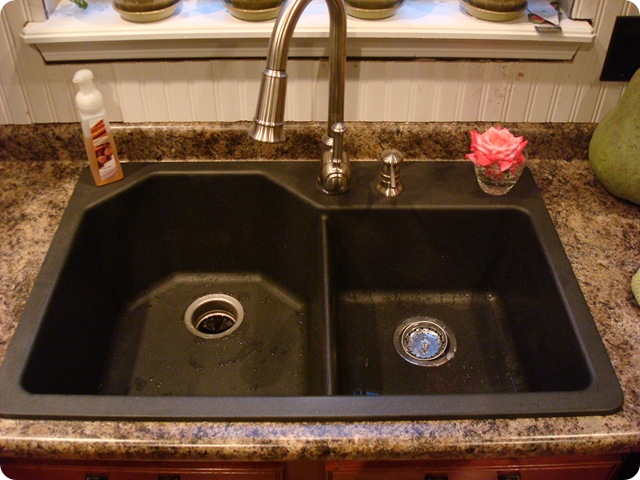
And now we have a gorgeous, beautiful, deep (TEN inches!) sink and faucet:

066

Sorry, I didn’t wipe it down and make it all perfect – I am just so unbelievably giddy to have a brand new sink and faucet with no cracks, leaks or additional holes. A working sink is highly underrated!!

I got a stainless faucet to go with our appliances (I was afraid an ORB finish may disappear into the sink). The pull out sprayer is SO FREAKIN’ COOL!!!!:

We had a sprayer on our old sink, but once I get used to this I have a feeling I’m never going back to a separate sprayer!

Ignore the unfinished, dirty beadboard in the background peeps. I was just concentrating on running water.  ;)

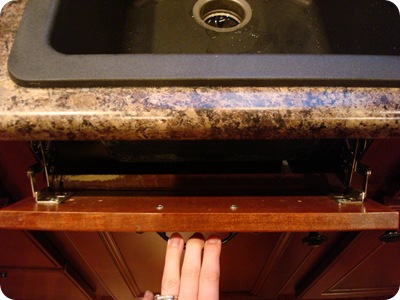
I had to say goodbye to my lovely tip out trays, because they don’t fit with the new sink:

But I do. not. care. one teeny. tiny. bit. I have a sink! And a faucet!

Amen!!

I have a plan to attach the tip out trays on the insides of the cabinet doors under the sink, and I think that will work out great anyway.

So, are you asleep yet? Helloooooo?

My grand plan was to take pictures along the way and show you exactly how to install a new sink and faucet. But 90 percent of the pictures would have been us drilling a hole and at the check out line at Home Depot.

And that would have made this post even less exciting. :)

So what say you…isn’t it GORG?! I have to send out one more shout out to my DAD – love you so much!!

Our IKEA trip today was not without a bit of drama as well, but we had a BLAST!! I will tell you more about it next week! (That place is SO COOL!!)

Wednesday, May 26, 2010

Garage sale (and beadboard) love

garage-sales-bn-logo Well hello! I am SO excited about the kitchen progress – whoohoo! I’ll share more on that in a bit, but first I wanted to tell you about a fantastic Web site for you garage sale freaks-who-get-up-at-7a.m. lovahs out there.

I first told you about Garage Sale Tracker about a year ago when they were just starting up (here). Their little site has gone and grown up – I’m so impressed! If you are even slightly a garage sale fan, you will LOVE their site. You just enter your zip code, then the distance you’re willing to travel, and garage sales in your area pop up, with dates, items that will be sold – even directions with a map to the location.

Score!!

It really is awesome. And you can list your upcoming garage sale for FREE. (We used it for out neighborhood sale last year.) They’ve also added consignment shop and flea market locations to the site. Are you kidding me? It’s a thrifty girl’s shopping DREAM.

Anyway, the folks at Garage Sale Tracker are excited about their latest venture – an iPhone app:

Ohhhh yeah baby! You know how much I love my iPhone. I mean it. LOVE. Deep, abiding, forever kind of LOVE.

This was me after I got mine last year:

Giddy. LOVE. Love love love.

So when the GST folks told me they created an app, I just about squealed. In my head. Not out loud. That would be silly. Um. What?

Anyway, I downloaded mine (it’s free) and love it! (It’s nestled right between the ABC Train app for the Bub and the Angry Birds app for me. (Best. game. ever.)

You get all the great functions of their web site right from your phone:

It’s thrifty shopping at your fingertips! I’m so excited to do more garage sale shopping this year, now that our kiddo is becoming a fan of shopping. (Yes, he is a golden child.) I love that when I’m out and about over the weekend, I can go to my app and see if there’s anything in my area.

You can’t beat it!

Welllll…you can. Garage Sale Tracker can anyway. They are giving away TWO iPhones next month – one via Twitter entries and one via Facebook entries.

Um. Hello. A FREE iPhone.

The contest runs through next Friday, June 4th and you can enter as many times as you want via Twitter and Facebook. (By the way, I only do Twitter and my personal Facebook from my phone. So easy!)

In order to enter, you have to register for a free account at Garage Sale Tracker. (Click here to do so.) Next, follow GST on Twitter and tweet about them or follow them on Facebook and make a comment. (See details here.)

The Garage Sale Tracker folks will announced the winner at 5 p.m. on June 4th – so you have a week and a few days to tweet and comment your heart out!

If you win, you won’t regret it. Pinky swear, cross my heart, promise you.  :)

I’m just a little too much in love with my phone. Maybe?

In other news, the kitchen is coming along swimmingly. We currently have no sink, but my Dad is coming first thing tomorrow to continue the installation. So far, it’s going the way many of my projects do – what could go wrong, has.  :)

But when we slid it into it’s spot today, my heart skipped a beat. OH, I love it!

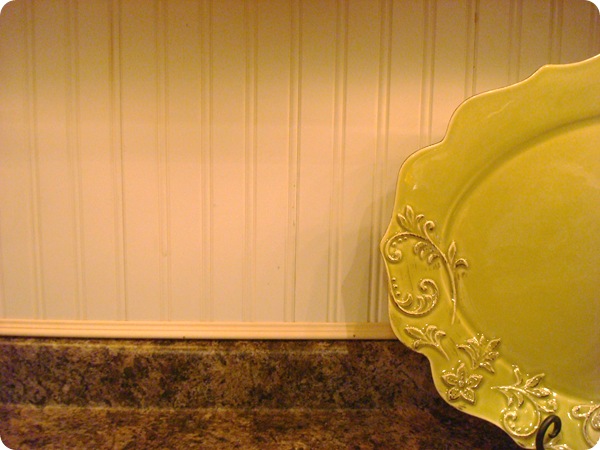
I finished up the beadboard backsplash today, and let. me. tell. you. – it’s a LOT of work. It’s easy, but time consuming. Am I making any sense?

For the first time in six years, I am cursing our builder for installing so many bleepity outlets in our kitchen.  Good Lord. Each outlet involves a lot of measuring and cutting to fit the beadboard around it. If you are lucky and have no outlets, you’ll be golden!  :)

I still need to finish trimming it out, painting it and adding one more accent, and then I’ll show you (next week sometime I’m sure). For now, here’s a peek:

beadboard backsplash I was excited to get the trim up there, so I installed some tonight. About five minutes ago I remembered what a PAIN in the booty it is to paint beadboard up against trim like that. Gah! (The trim is needed, in my opinion, to cover the edges. But once I show you the details you can decide what you would do.)

I’ll give you a full tutorial on the beadboard next week!

OH YEAH – I almost forgot! I’m going to IKEA on Friday!! Egads, I’m SO EXCITED!! Any tips for this newbie?

Monday, May 24, 2010

The kitchen redo: Part two

apple

First of all – some winners! The (random) winner of the Jewelry of Lav is April from CT and the winner of the Wuslu giveaway is NadiaAnac from Nadia’s Nest. Congrats ladies! Email me and I’ll get you connected for your goodies!

So I told you last week the fantastically amazing awesome news – I was picked by Amex to promote Membership Reward Points by using them to redo a room in our home – and that room is the kitchen. Gleeee!

I tell you what…our living room is piled high with kitchen stuff, but nothing is installed yet. With our NYC trip over the weekend, I was a little short on DIY time.  :)

This week I was asked to use 100,000 Amex Reward Points and I’m slowly but surely getting some projects going! (And I am so psyched about the changes!)

I showed you last week how I wanted to install crown molding throughout the kitchen:

[butcher[9].jpg]

Since our kitchen and family room are really a big great room, I got enough crown to go around the whole space. Last night I played around with my compound miter saw and some scrap crown and I *think* I figured out how to cut it. I am SO EXCITED!!

I tell you what, the corner pieces I usually use make installing crown VERY easy, but they can get expensive. Because of all the corners in this space, the corner pieces were going to be at least $150 – so figuring out how to cut the molding is going to save some major cash!

I think it’s going to take some trial error and a few bucks worth of crown molding, but I’m determined to get it – and I’ll let you know how it goes!

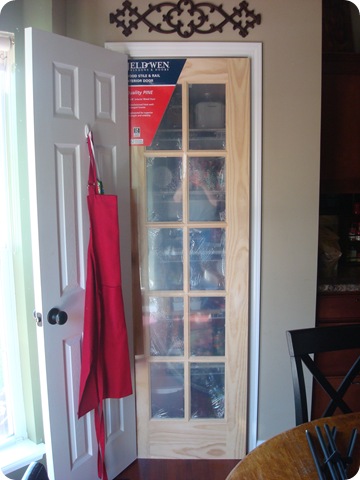
The next purchase was one I’ve been wanting to get for at least two years, probably more. I present to you…my new pantry door:

new pantry doorWell, kinda.  :) I’m a little worried about it because it’s millimeters too big. Like, just a teeny smudge. I’m hoping when I mortise the spots for the hinges, it will fit better. I’m a  bit worried about this one – really hoping I can get it to work!

I still need to get the film that I’m going to put over the glass to hide the not-always-organized-pantry, and I need to paint the door. In my head it’s always been black, but I’m not sure what to do now. White? Black? Fun color? The room will have accents of apple green and yellow, so I could do one of those colors. Thoughts?

The next purchase for this week was beadboard to redo the backsplash. I went back and forth between a cream tumbled stone in a subway pattern and beadboard. Our counters have plenty of color and texture to them, and I wanted to go as simple as possible – the tile was just WAY too much. (For me anyway.)

I covered our kitchen island in beadboard last year, and I was a little concerned it may be beadboard overload. But now that I look at it, it’s really going to tie the island and the rest of the kitchen together, which is a very good thing.

Then, today, I got a wild hair and started thinking about the demo of the original black tile – and realized I could totally just install the beadboard right over the tile. I know – craaaazaaay:

beadboard backsplash

As I showed you last week, that tile is up there GOOD. I don’t mind taking it all down, but I do mind the mess, the time, and the likelihood that I’ll have to replace all of the drywall.

I have only made some cuts and leaned the beadboard up there for now, because I want to check on one more detail before I glue anything down with Liquid Nails. But just having a third of the black covered is already SUCH a huge difference – I am SO SO excited!!

I got some supplies to start the redo of our kitchen table – and I’m hoping to get to IKEA this weekend for the butcher block island countertop. (Yippee!!)

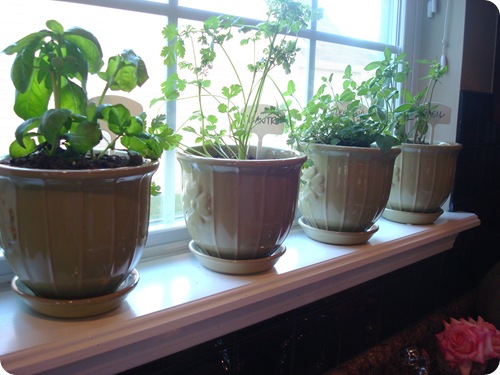
Otherwise, I’ve been slowly reaccessorizing the room – I got some cutie patoot flower pots from Home Depot to hold all of my herbs on the windowsill:

And today I went to Pottery Barn to look for some fun little accessories – fun little accessories that were wicked expensive! Geesh, that’s hard for me to do!  :)

Half the things I got are actually going back because they just didn’t work, but I did get a couple itty bitty metal pitchers:

Goodwill shelves

(Of course I spray painted one. I couldn’t resist!)

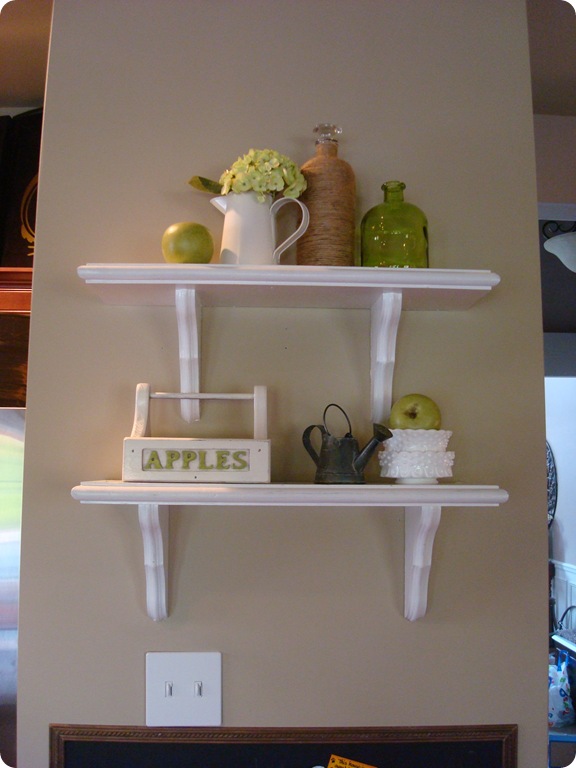
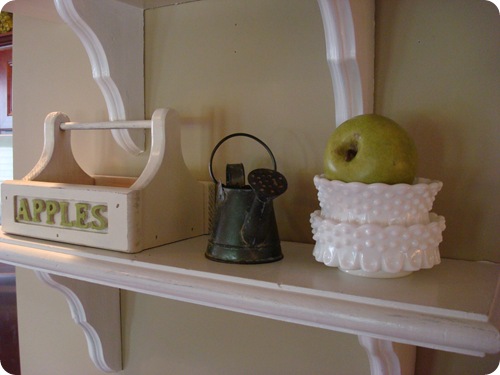
And I’m sorry. But I’m a thrifty girl through and through. Right after Pottery Barn, I headed straight to Goodwill, where I found this little crate for a buck:

I spray painted it (still needs a little touch up) and added green to the front of the letters and it’s as cute as can be!:

009

The shelves were $4 finds at Goodwill a few weeks ago, and the rest of the accessories were from around the house. I still need to paint the shelves and the stuff on them will most likely move around a bit, but I love the way the they give the wall some depth. The art I had up there before never seemed just right.

It’s going to be a busy week Squeezays! I’m so excited and of course feeling so fortunate that I was asked to be involved in the Amex spring home makeover. Whoo!

So…because you all are SO HELPFUL  – I need your advice once again! What color would you paint the pantry door? Hmmmm? And has anyone out there successfully glued anything over existing tile? Am I crazy?

Don’t answer that.

Thanks in advance!!


TDC is one of five blogs picked to promote the Amex Membership Rewards program.
I have received reward points to use as I wish to redo a room in our home.

Sunday, May 23, 2010

36 hours in NYC

ts

Well howdy! I hope you had a fantastic weekend! Ours was a whirlwind!

My hubby and I took a little “jaunt” to New York City with a few friends for the weekend. Actually, it was a business trip for hubby and some of his coworkers, and I tagged along. A trip to NYC is non-negotiable. This wife is going, every. single. time.  :)

If you’ve read this blog for a while, you know New York is my favorite place on earth, besides home. My hubs took me there almost ten years ago for my first trip (just two weeks before 9-11) and I feel in love at first sight.

Even before I had ever been there, I knew I would love New York. It did not disappoint. And every trip since, I fall in love more and more. We love the city so much, we got married there.  ;) Needless to say, I have an emotional attachment to NYC, and I miss it so very much when I’ve been away for too long!

We got in Friday morning and left late Saturday afternoon, so it was a very quick trip. I was still able to take about 150 pictures in 36 short hours though! I thought I would share some of the city I love with you…

The one place I’ve never been in NYC that I’ve wanted to visit every time (and we never get to it) is Grand Central Station. Imagine my glee when we pulled up to our hotel and it was right next door!:

gcsIt was all I had dreamed and more!:

Part of my fascination with the city is the beautiful architecture everywhere you look. The detail inside and outside the older buildings is fantastic. I can’t get enough of it!!

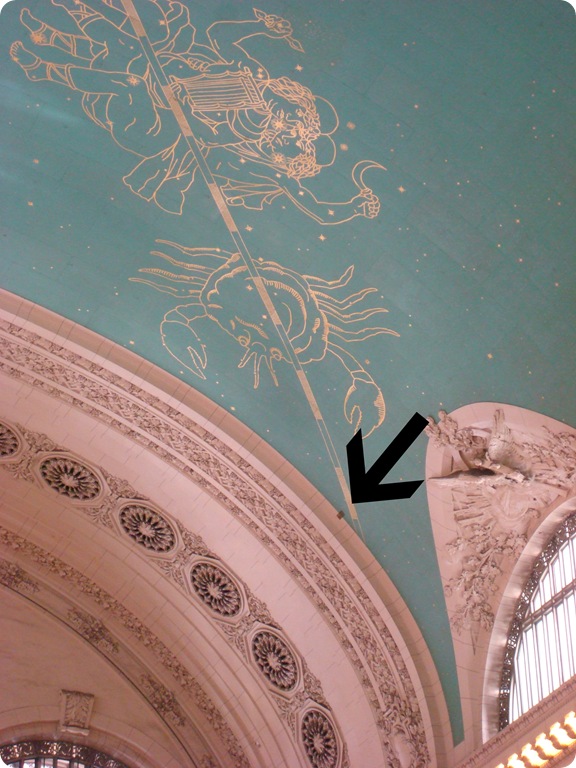
A hotel staff member took us on a quick tour and told us a story about the ceiling -- it is stunning – painted blue with all of the astrological signs:

ceilingSigh. Seriously. Do you see all that detail? Excuse me while I SWOON. Anyhoo, notice the little spot the arrow is pointing to? (I added the arrow, by the way. :) ) Turns out smoking was allowed inside for so long, the ceiling and stone used to be the color you see in that little spot.

Ummm, EWW. From what we were told, they didn’t even know the ceiling was painted as it was, until they meticulously cleaned all of it. The dirty spot was left next to the Cancer sign as a little subliminal message.  :)

No other place makes me feel as energized as Times Square:

The city has shut down a couple streets in Times Square to traffic, and it was pretty awesome:

Times Square at night is sensory overload (in a really good way). I’ve never seen this many people there before – it was crazy Friday night! They have tables and chairs out in the “streets” now and it’s just so cool.

Every time we’re in NYC, we have to get to Roxy’s:

086

But we don’t go for the amazing sandwiches – we go for this:

084

Cheesecake as. big. as. your. head. My pick this time – apple caramel streusel cheesecake. Just looking at the picture has me salivating all over again. Yummo, it was delish!

One of our favorite spots in Times Square is the massive Toys R Us store:

080

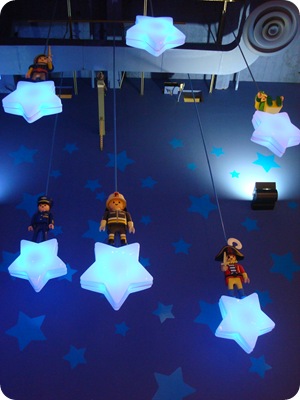
We’ve decided we’ll take the Bub to the city soon and we’re pretty sure we could kill half a day just in here. :) The massive Ferris wheel greets you when you walk in:

098

And the magic for grown women the kiddies just keeps going:

087 088 090


I feel six years old all over again every time I walk in here!

We saw the musical Promises Promises this trip. I think it’s the first time we haven’t seen Wicked since it’s been on Broadway. Sean Hayes (from Will and Grace) and Kristen Chenoweth (from Glee, Wicked) were the leads and it was FUNNY.

Of course, my eyes wandered to the magnificent theater:

Now, that’s a light fixture.  ;)

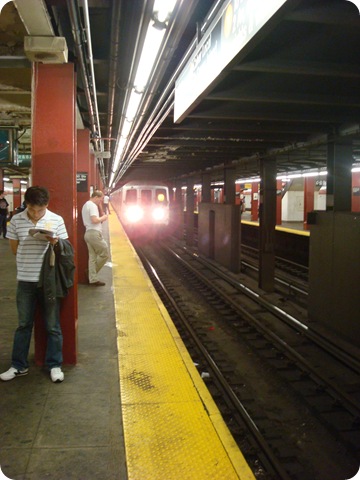
Dare I say it – I even love the subway. The subway smell is something you never forget. I don’t think it smells bad…it’s just that smell:

subwayIn all the years we’ve visited, we have never seen an infamous ‘rat in the subway’ – until this trip. We counted at least six. I have pictures but I didn’t want to freak anyone out with the beady eyes! (A few were honkers.) I’m thinking the city is spending their bucks on more important things instead of the rats lately.  :)

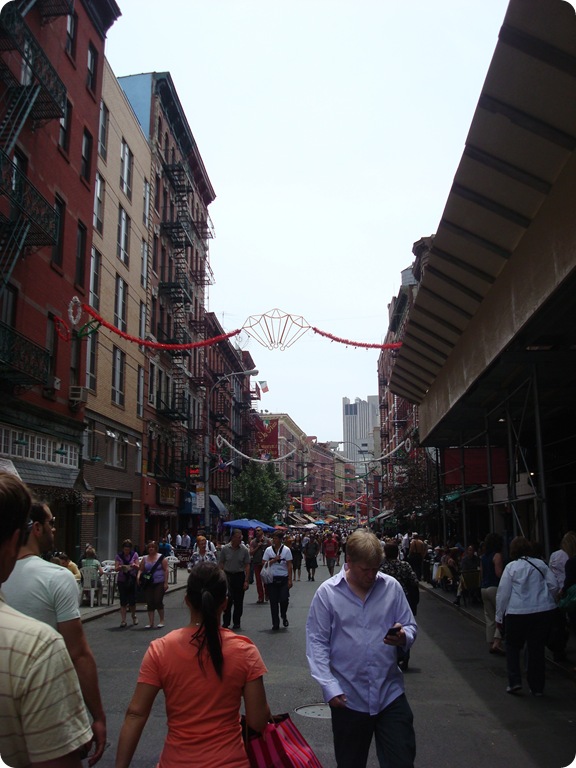
We spent a few hours in Little Italy:

little italy

The street was shut down here as well, and it was magical. It always amazes us how there can be restaurant after restaurant after restaurant down the street, all serving Italian – and they are all PACKED!

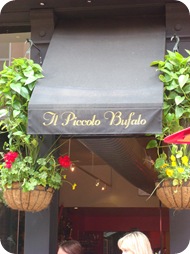
The store fronts are beautiful:


Da Nico is a favorite of ours -- every time we visit we eat there for at least one meal. And every trip, a very sweet, 90-something Italian woman named Lucy has been sitting out front. My stepdaughter and her friends would get a picture with her every year. She told us the key to her long life was lots of pasta and lots of wine.

If she’s right, I think it’s safe to say I’m going to live till 100.  :)

We didn’t see Lucy this time though. I’m hoping she’s doing OK and the pasta is keeping her going!

Every time I see some of the city’s finest, there’s a slight tug at my heart:

It still makes my heart ache.

I’m so thrilled that I’ll be going back to this lovely city at least two more times this year – and the next trip is only a few weeks away! This time it’ll be with girlfriends, and I cannot wait!!

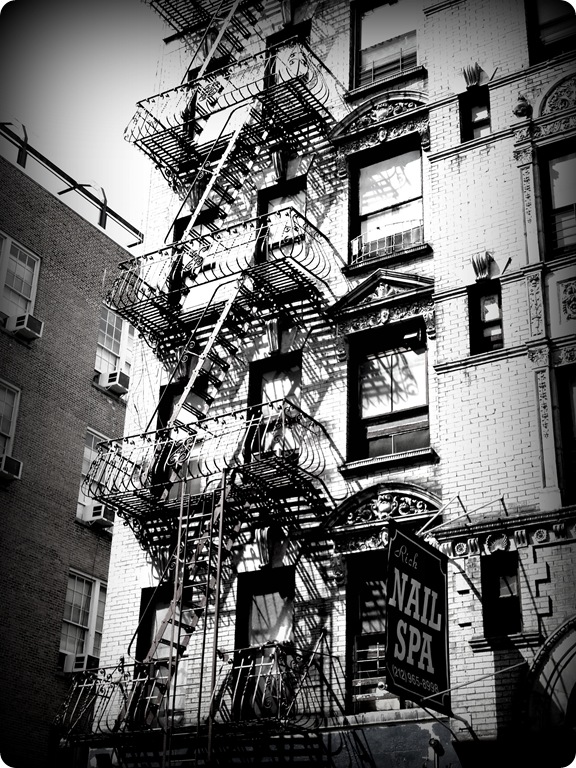
Because I am so inspired by the beauty that is everywhere in New York, the pictures I take there are some of my all time favorites. I played around with a few of my faves from this trip – now I just need to find the perfect spot for them!:

Grand Central lights

Grand Central Station

Little Italy ironwork Little Italy If you haven’t gotten a chance to visit New York City – I urge you to go. It is ALIVE. And it makes you feel that way too!

I’ll be back with a kitchen update tomorrow!