Showing posts with label other holidays. Show all posts

Friday, April 18, 2014

Fun Easter ideas

Hello and Good Friday to you! I hope you have a lovely weekend planned, whether it be activities with your family or just relaxing. :)

I had a cute Easter-themed project planned for this week but I just couldn’t get it done. Wah waaah. I know it’s down to the wire here but I thought these other Easter-themed projects and ideas were too cute not to share!

I am totally in love with the pretty colors of these naturally dyed eggs:

naturally dyed eggs

(source)

I love ours as bright and as obnoxious as possible but these colors are so lovely! (And who knew red onion would make a green egg?)

We’re big Despicable Me fans in this house, so of course anything minion makes us smile:

minion eggs

(source)

How CUTE are those? And totally easy to pull off too.

I pinned this the other day and didn’t end up digging the plastic eggs out in time…fail! My son will get this lunch next year for sure:

lunch with Easter eggs

(source)

One of my all time favorite tables settings I ever put together was this spring/Easter-themed one from a few years back:

twine wrapped eggs

I wrapped some plastic eggs in twine and yarn and nestled them in burlap – so easy.

The rest was just flowers stuck inside my Goodwill glass centerpiece:

Easter table setting This idea is absolutely gorgeous – I wonder if you could use fake eggs or if they would float too much:

Easter centerpiece

Those are two of my favorite flowers – ranunculus and gerbera daisies! Isn’t that so pretty?

What do you make for Easter dinner? Our standard is Pioneer Woman’s prime rib:

pioneer woman prime rib

(source)

GOODness. It is delicious. I’m not a big cook by any stretch and I now make this for both Easter and Christmas (and sometimes Thanksgiving!) and it’s SO easy to do.

I thought this snack idea was so adorable!:

Easter snacks

(source)

I mean, come on. Dying. That is the cutest!

Do you have Easter plans? We’re going low key this year – just enjoying a weekend without a lot going on. We are planning to see Heaven is for Real and I’m bringing my tissues because I bawl at the trailer alone. :)

Hope you have a lovely, blessed weekend!


P.S. I have the pin it button installed on my photos but I ask you visit the sources and pin from there. :)

Monday, February 13, 2012

You’re Kool

Hey there! I’m posting early today (for me anyway) because I just had to share a Valentine’s project we worked on for the Bub’s (little bitty cutie patootie) friends.

I figure if you want to use them for your kiddos for school tomorrow or for friends, you could still get it done tonight if I posted this early enough.

OK, so I think I actually came up with an original idea here. (Yeah right – is there an original idea anymore??) In the world of Pinterest I know that’s unusual. ;) I thought this up a few weeks ago and we finished them last night. They turned out TOO CUTE!

LOVE them!

It’s so simple – first we grabbed (what seemed like) one meellion packets of Kool-Aid from the grocery. Because they were so cheap, I ended up with two for each kiddo in his class – total cost of just over $6.

*Important note: You may not want to go through the self check out with 32 individual packets of Kool-Aid. With all of the not scanning and not registering on the stinkin’ belt and the all the sweating and…well. I just would advise you to go through a regular line.

OK.

Anyhoo, I had some little treat bags from Hob Lob that were a buck. I created a “kool” valentine on Picnik (still not ready to talk about that, boo!), and then stapled them to the treat bags:

O.M.G, I just adore how they turned out!

Usually we do the standard box of valentines, but this was a fun little project for both of us:

I figured the Kool-Aid would be a welcome change from all the candy. Plenty of sugar still, yes. But different. :)

Cause I’m nice I saved the valentine and made it so you can use them for yourself your kiddos!

You should be able to click on this image to get to the full size:

Photobucket

Then you can paste it into a Word document and size it to what you need.

I thought they were pretty darn cute. :) The Bub loved them too.

It took less than an hour to cut them all out and put them together. And each one ended up at less than 50 cents each – pretty decent for a custom treat!

I had plans to get a couple other Valentine projects finished, but time got away from me. I dug through the storage bins and pulled out my cutie XO letters:

And my rose petal wreath has been repurposed since I made it years ago, but I love how easy it was to put together:

You can see bunches of other V Day crafting ideas on my Pinterest board here. I know it’s late for this year, but you’ll just be plenty prepared for next year. ;)

Did you do any fun Valentine’s crafts? Cute valentines for the class? I’d love to hear!

Monday, August 16, 2010

Jewelry for your furniture

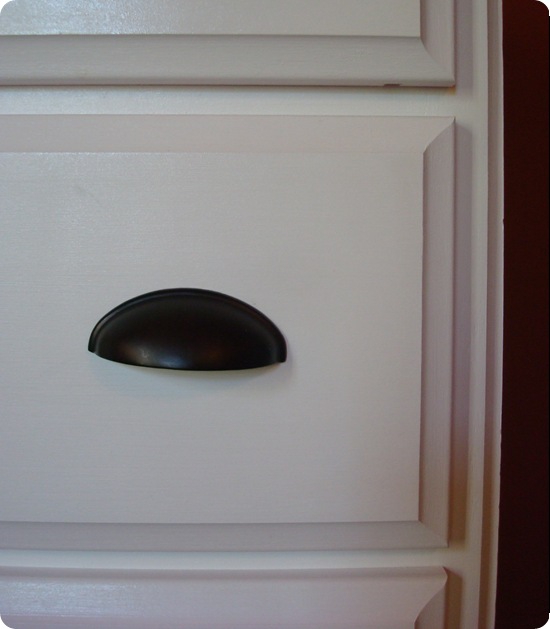
017Often I think it’s the little things that make a big difference when decorating – or maybe I should say little splurges. :) Things like decorative pulls and light switch covers make me smile. But they aren’t cheap, and they certainly aren’t a necessity, so I add them as I can.

One of my favorite little details are pretty knobs. You can absolutely transform the look of a piece of furniture with just new hardware. So reeehealy, when you compare buying new furniture to buying a few new knobs, that’s not really a BIG splurge, eh Dave Ramsey? Wink wink. Nudge nudge.

I showed you the fab selection of knobs and handles at my local True Value:

hardware

Excuse me while I wipe the drool…

Recently I was on a mission to find just the right knobs for my Craigslist buffet in the foyer:

I found the most beauteous glass knobs at True Value and they made a HUGE difference on this piece:

glass knobs Ohhh, aren’t they lovely? It’s all like PAAAADOW…I’m all glassy and crystally and shiny and you can’t take your eyes off me, gorgeous!

All that glitter for five bucks each. Whoooohoo!

One thing to watch for when you change out hardware is how the finish looks underneath. Sometimes if knobs are installed too tightly, they will damage the wood.

The person who painted my buffet (before I bought it) put the knobs on before the paint had cured. So they were practically glued to the drawers. (I had to take a hammer to a few of them!!)

I still need to touch up the paint around some of the new knobs because of that:

The brass hardware on my other recent Craigslist purchase is actually quite beautiful:

083

Yes, you heard me right. I just said brass was PRETTY. It’s the antique looking brass though, not the blinding shiny stuff. :)

I found some brass polish at True Value and went after these beauties with an old tooth brush:

The old finish is on the left, the cleaned finish is on the right:

Loverly! Not all of them cleaned up that well, but I’m just chalking it all up to the beauty of an old piece.

Obviously, I’ve had a bit of a Craigslist dresser obsession lately.  :) A few weeks ago I picked up a Henredon dresser for our bedroom for only 50 smackaroos (AWWWWESOME!! I’ll show you soon!), so I was moving dressers around all over the house. The old dresser in our bedroom moved to the guest room, and the one in the guest room had no home.

It’s the one from the Bub’s nursery, and it’s just lovely:

Sniff. Sigh. Boohoo…I changed my baby on this dresser for so very long. :)

I knew I wanted to use it somewhere, and then it hit me – with the new table-turned-desk for the office, I needed storage. Why not put the dresser in there?

As it was, it just looked a little off. So I was off to True Value again, checking out their selection. I found just the knobs I was looking for, and then picked up one of these jobbies as well:

I had one of these guides years ago and have no idea where it went – I was SO glad to see they had them! Turns out my hardware screw holes were two inches across, so I none of the holes on the guide matched up. I just drilled a new hole where I needed it, which made it a little harder to keep level. (Ignore the circles – those were reminders for another project.)

Normally you could just rest the ledge of the guide on  your drawer. But I’m difficult. Always. :)

I used the original hole in the drawer as my center, and made sure the two for the new pulls were level by using a small level on top of the guide. Then I marked the spots with a pen and drilled the new holes:

And installed my purdy new pulls!:

Love love LOVE! It makes it look so much more office-y. :)

(Just imagine it without the brick wall color and the cords piled up next to it, and with molding on the wall and all new art and accessories…umkay?)

I lined the drawers with a fun green contact paper:
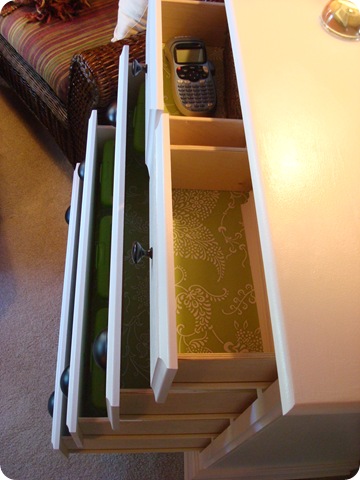
You know I love you when I show you where I keep my Dymo label maker.

Don’t even think about it.

:)

And would you looky there…room to grow:

It’s going to work great in the office!

Speaking of the new look, I think I found all of my paint colors for the redo at True Value as well:
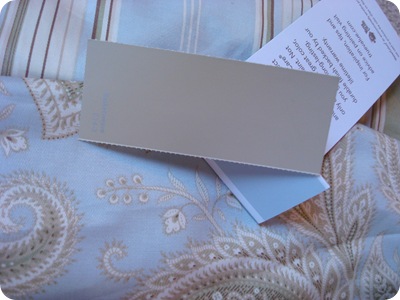
With white molding, of course. :) Now, I just need to paint. My lazy summer living booty is not looking forward to that…but my fall is coming, let’s get things DONE booty is saying let’s just do it already!!

We’ll see who wins. ;)


*I was one of the bloggers selected by True Value to work on the DIY Squad. I have been compensated for my time commitment to the program as well as my writing about my experience. I have also been compensated for the materials needed for my DIY project. However, my opinions are entirely my own and I have not been paid to publish positive comments.*

Sunday, June 27, 2010

Red, white and blue door decor!

Whew! I hope you had a FAB weekend! We had a great one!

Today we got to visit with someone our son has been dying to meet for a very long time:

Thomas

;) That would be Thomas the Train. I tell. you. what. He was in heaven. Can you tell?! (That’s his smile by the way.)  ;)

Then we started out the Fourth of July week by watching the local fireworks tonight – and we are POOPED. Happy. But pooped.

I got a very easy, cheap and quick Fourth of July crafty project done today that I had to share with you – I mean, when have I NOT? :)

The seed for this one was planted by the incredibly talented ladies over at How Does She – they made this adorable flag out of 2x4’s!:

Well, it got my mind a thunkin’. I wanted to make one, but I wanted to be able to hang in on our front door, so it had to be lightweight.

To make it a bit less heavy, I gathered some slats of wood for less than a buck each and a piece of plywood for about $3 from Lowe’s:

The plywood and the slats were two feet wide, but that was going to be just a leeetle large for the front door. So I decided 16 inches wide would work perfectly:

I used my very-favorite-I-luff-you-compound-miter-saw but you could easily use  a miter box and hand saw – the wood is so thin!

Since it needed to be fairly small, I did four longer rows, then four shorter rows on top:

Because I was trying to use what I had, I decided to just use the extra pieces of wood to make up the blue corner part of the flag. I figured out the measurements by just laying it all together like a puzzle:

010

Then I cut those down as well, and did a quick coat of navy blue spray paint, leftover from the Bub’s room redo.

I cut out the plywood backing with my jigsaw:

You’ll notice it doesn’t have to be perfect! :)

I glued down each piece with Liquid Nails. You could use just about anything as a backing – and any glue you have on hand to put it together. Even hot glue would work great!

I loved the one big fat star idea, so I used my Silhouette cutter to make a honkin’ star in white vinyl:

vinyl star

I attached some navy blue ribbon to the back with staples, then put little felt protectors on the back so it won’t scratch up the door.

The result? Cauuute Fourth of July decor for under $10!:

DIY flag decor

I bought eight slats of wood but only needed six – the two I have leftover would make an adorable mini version of this flag, so I think I may have to make another!

It’s a perfect fit for the front door:

Usually the extent of our Fourth decor is just our American flag (that’s usually flying anyway) and a few flags stuck in the flowers out front:

073

Can we pause to admire my goooorgeous petunias?:

069

It has rained like we’re in the freaking Amazon here this summer, so they are growing like weeds! :)

But now we have a nice pop of red white and blue to amp it up just a bit more and I luuurve it!:

079

Less than ten bucks in less than an hour – can’t beat it!!

So are you a big Fourth of July decorator? Feel free to link your projects up in the comments – I’d love to see! I have another red white and blue project I’m going to try out this week – this one could get interesting!  ;)

You still have time to win a Silhouette of your very own! If you haven’t entered yet, make sure to go here before this Tuesday!! Go! Hurry!! :)

**I’m adding this to Kate’s linky party and The CSI Project!:

Visit thecsiproject.com

Wednesday, March 31, 2010

A spring table

 birdyWell, it’s in the 70’s here today, and the weather has been glorious for weeks now – SO unlike the Midwest. I’m crossing fingers and toes that there is no more snow! Puhhhleaze? Considering it’s supposed to be 84 degrees here tomorrow, you’d think we’re safe.

When I showed you the cute little Dollar Tree bird in this post, I told you I had some ideas in mind for others as well. I was so sure my idea would be adorable, I drove back to the dollar store at 8:55 that night, grabbing the last few I could find. (So sorry if you were looking for them…)  ;)

My idea was to use them on the dining room table. The bowls I bought last year for the place settings (from Pier 1) have been such fun to decorate with each holiday/season!

My first thought was to nestle them into some Spanish moss, but then I had a bit of a freak out that the moss would stain the white bowls. Probably wouldn’t – but my freak out made the end result even better!

To protect the bowl, I first used crinkled up tissue paper and made a “nest” – but then it hit me. What’s natural, springy, pretty and moss-stain protecting? Burlap baby! And I already had it!:

041 083

I have six little birds total, but I am using a couple elsewhere, so I still needed to fill two place settings.

When Maryann posted her twine/jute covered eggs back in February, I was HOOKED. I am a sucker for jute. I don’t know what it is – but I love it on just about anything.

So I made some of my own jute covered eggs a few weeks ago – just using plastic Easter eggs we had and hot glue. Fareee!

Last week I found some white yarn in my craft stuff and covered a couple with that as well:

043 044 

Warning:  This cuteness takes foreva and a day to attain. I think about 15 minutes per egg. But it’s good mind-numbing activity while I watch my shows. ;)

I wanted to keep the centerpiece simple but wanted to add a little somethin’. I found some mossy “blanket” stuff at Joann’s today that was perfect to line the bottom:

068

I just cut it to fit and I love it! It was pricey -- $9 – but it is reusable.

A couple weeks ago I decided to start using a few of the candle holders as vases, so I’ve been filling a few of them:

057

If you look carefully you can see the toys on the floor…shhhhh. Nothing but the best for you all!

I had forgotten what a great deal flowers are at Trader Joe’s until my friend Kate mentioned it. (You must see her dining room. Swoon.)

Some of these have lasted for two weeks now! The tulips were $10 for 20. Hard to beat!:

070 072

 074 078 

I absolutely love how fresh and bright the table is!

064

    060 And I wuv you, you cute little birdies! Kisses!

087I  have BIG plans for our hutch – I can’t wait to get working on it. I don’t know if it’s going to work, but I’ll let you know, of course.  (And no, I’m not painting it!)

To see how I made the centerpiece, go here.

For a recap of the dining room redo, go here.