Monday, August 6, 2012

How to build built ins

Hello hello!! I’m back today with an update on the dining room redo. Remember looong ago in January when I talked about turning our rarely never used dining room into a library kind of space?

I realized today that this will be a year-long transformation. ;) It’s not been hard, it’s just time consuming. Dad and I have been doing it together, but today I finished up a big chunk of it myself. And I’m getting really anxious to keep moving on it…I can really see the light!

The last time I updated you on this room, I mentioned the bookcases that Dad and I built. They were more of a “shell” then, but I finally got actual shelves installed today so I figured this would be a good time to share the how to.

We started with a really long board that would be the top of the bookcase. The base cabinets are exactly 12 feet long (four 36 inch cabinets) so we got a 1x12x12 board.

To figure out exactly where the supports would go, we laid it down on top of the butcher block first:

That way we could mark exactly where each support would go (between each 36” base cabinet).

See the mark?:

We constructed it laying down on the floor by screwing each support into the top 12 foot board:

Here’s a little drawing that shows you how it looked when we were done:

How to build a bookcase

We marked the EXACT middle of each board and screwed a long screw in the middle of each support (where you see arrows above). I screwed them in while Dad held the “vertical” boards and watched that the screws weren’t going off to the side or something.

Then we lifted it up on top of the bases:

how to build bookcases

I secured it to the ceiling beams and the side (where it is against the wall) with more screws to keep it stable for the time being.

Then it was time to do the shelf supports. I showed you how I did these in the pantry as well:

shelf supports bookcase

The back supports are screwed into studs in the wall, and the side supports are nailed in to the vertical boards. We started out by installing the side supports with screws, but then they would hit the support behind it and mess the leveling of the shelves up. We went to long nails with the nail gun instead and it went MUCH faster that way.

The trick is trying to get each set of supports exactly even with the next:

supports for bookcase shelves

Some are not perfectly perfect, but we felt pretty good with how they ended up. Trim will cover the supports and boards eventually, so they will (hopefully) hide all sins. :)

Then it was time to grab some more 1x12’s to make the shelves. I cut them down to the right sizes (each one is a different length – this thing is not exact) and nailed them into the supports:

A piece of trim will go vertically and horizontally to hide all the unfinished spots, and a thin piece of wood will finish off each shelf underneath:

I hope that makes sense!

Like I said, it’s not difficult, just time consuming. I always find that I try to make things much harder than they need to be. Dad always knows how to break it down to the easiest (and best) solution. :)

Annnnnd this is where we are now:

how to DIY built ins

You can see that we made the bottom shelf taller, so I can put bigger accessories and books down there.

There’s still SO MUCH to do. At least it feels like it. I am painting the back of the built ins a different color, so I’ll do that next. Then we need to install the header across the top, pull the wiring through and install the lights. Then the trim will go up (basically everywhere) and after that the JOYUS job of priming and painting. :)

Seriously can’t wait for that. Yay.

Considering where we started, I guess that to do list isn’t too bad:
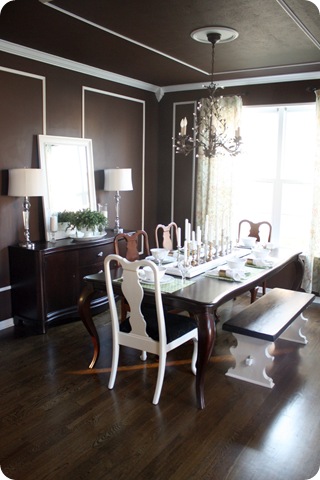
chocolate brown dining room

I’m already more in love with it this way than I was as an unused dining room:

DIY built ins bookcase

It’s coming together! It’s going to take 12 months, but it’s coming together!! It would be so lovely to decorate these (finished?) bookcases for fall! But I’m realistically shooting for Christmas. :)

I’m sure I forgot some of the details, so if you have any questions on the progress so far, let me know and I’ll answer them in the comments.

Speaking of questions, I’ll be answering them all day long (until 5 p.m. EST) over at the True Value Facebook page tomorrow!

true value blog squad

Come on over and ask away! I’ll do my best to help you out! :)

Holla!

Sunday, August 5, 2012

August Before and After Party!

Hello all! How was your weekend? We took a little family trip to Chicago for a few days of shopping, eating, Legos (the store and Legoland!) and just enjoying each other. It was just lovely. Perfect way to end our summer, cause both my boys (the hubs and the Bub) go back to school very soon.

And I told you I don’t want to talk about it!

;)

Anyway, it’s time for the August Before and After Party, and I always love to see what you’ve been up to! First, let’s check out a few of the projects that caught my eye last month.

Lina prettied up her pantry in a big way, and made it super organized as well:

I must find more things to put chalkboard labels on. They make everything cuter. Ever.y.thing.

The exterior of Erin’s townhouse got a paint job, and I LOVE how both her front and back doors are painted a bright yellow:

Yellow front doorBack porch after

How fun are they? I also love the simple globe light fixtures with the modern colors. You can see more about this big redo here.

Laura’s dining room underwent a HUGE transformation, all thanks to the power of paint. Check out the dark before and the beautiful after here:

That buffet is just gorgeous too, and the styling is divine.

Kim gives a great how-to on trying out Annie Sloan paint for the first time here. Her formerly beige dining room side table looks so fresh and pretty!:

Chalk Paint table

And again, aren’t the accessories lovely?

I’m so excited for Jenna and her staircase redo. Tearing carpet off of stairs is just about one of the best feelings ever:

Ah, so fresh! So clean! Love it! :) You can see more about this project here.

And finally, I was swooned over Jessica’s colorful living room:

The live edge coffee table, the dark blue gray walls, the pops of red everywhere – I just love this space!

(If you’d like to pin one of these projects, I ask that you visit their blogs and pin from there!)

Beautiful projects and spaces all around, and now it’s time to do it again! Remember, if you’d like to be considered for a highlight, please link to TDC using this button:

<div align="center"><a href="http://www.simplehomeinteriordesign.blogspot.com/" title="TDC Before and After" target="_blank"><img src="http://www.homestoriesatoz.com/wp-content/uploads/2012/03/beforeAndAfterButton_thumb1.gif" alt="TDC Before and After" style="border:none;" /></a></div>


Here you go – the linky will be open until Sunday the 12th!


Thursday, August 2, 2012

Red, white and blue? (Chip It powder room)

Hey hey! I’m back with an update on the plan for the powder room redo. It’s been a long time coming and I told you about the sorry state of this room back in this post.

I showed you how I used the new Sherwin-Williams Chip It! tool to find colors from this artwork the Bub painted:

It’s serving as my inspiration for this room. Thing is, the colors are definitely outside my comfort zone – they are brighter than I usually go with, but that’s kind of the point. I want to do something different in here and I think small spaces like a powder room are the perfect opportunity to do that!

To sooth my color jitters a bit, I did a search of blue and red rooms on Pinterest, and it definitely helped. :) I am going for a classic (not necessarily Americana) but fun look in this space and seeing these spaces calmed my nerves.

They are lovely!:

Isn’t that a sweet, comfy room?

This is one of my favorites – check out those gorgeous drapes:

166492517444724831_ZEtrBEBn_f

(source)

I love the way all of the prints work together too.

The walls in this space are close to the current walls in our bathroom:

(source)

My plan is to keep the light blue ceiling in here to tie everything together, and this shows me it can work!

This blue is a little brighter but also works:

And here’s yet another light blue wall with the red touches and it doesn’t scream Fourth of July to me at all:

(source)

I think this color combo is just a total classic and I’m getting really excited to make it work in our powder room!

Here’s a reminder of the colors that Chip It picked out from the artwork:

Sherwin Williams chip it

They were actually spot on – they matched the art perfectly. The Fireworks color was a little more pink than I wanted for this room, so I went to the paint chip and the next darker color was perfect.

It’s called Heartthrob and it is FUN! I thought I would test it out first to see what I thought, so I grabbed the one and only accessory I currently have in this space, my little tray I use for extra TP:

I sprayed it down with a quick coat of primer (to hide the print) and then did two coats of Heartthrob. Against the light blue wall, with the white toilet, it gave me an idea of how this color scheme will work look in this room:

I dig it. :)

The Bub’s art will go in the room somewhere, and you can see how well it works here:

IMG_2363

The Heartthrob color picks up the darker tones in the art, the Fireworks color matched the lighter ones.

So are you seeing my vision?? Maybe I’m not so crazy after all! :)

(We’ll see about that…)

You can check out the Chip It tool yourself if you haven’t already! Just drag this little button next to your tool bar on your computer screen:

Chip_It

And that’s it! You’re done! You can click that button whenever searching the net to find Sherwin Williams matches from any photo. You can also upload your own picture like I did.

I’ve already started the painting and wall treatment in here and I can’t wait to show you. It’s bold but I love it! (You can see my plans for this room at my powder room Pinterest board here.)

I’ll update you soon on the progress! Have a GREAT weekend!! Enjoy the summer, it’s slipping away! :)

Tuesday, July 31, 2012

How to pick out tile (in the laundry room!)

Hello all! I’m making little bits of progress on a bunch of rooms right now – it’s decorating ADD at it’s finest. But at least there’s (some) progress, right?

I’m SO happy with how our basement laundry room is turning out! It so fun to have a new space to work with, I’m in heaven. And dare I say it – it’s not so bad when I have ROOM to do laundry.

Yep, I said it.

Anyhoo, I actually picked out the tile for this room months and months ago, I think before the room actually had walls. ;) I had always dreamed of this pretty hexagon tile from Lowes in the space:

white hexagon tile

I wanted something a bit different, something that was fun, but wouldn’t break the bank. And this stuff was perfect. (It’s called American Olean Sausalito tile.) But as time went on (and it was closer to the time of installing it), I got cold feet.

The tile is really thin, and I thought it was supposed to be used only on a backsplash. Even the guys who have been working on the basement were worried about using it.

I was so bummed, because I had planned on this stuff for half a year. :) So I did two things – asked some bloggy friends if they had used it, and went to Lowes to find out more about it.

The first bit of info I learned was from my friend Cassity at Remodelaholic. She told me that typically tile that is made for wall applications (like a backsplash) is white or cream on the back. Tile that is made for the floor is dark or clay colored on the back. Mine was dark on the back!

I had no idea! Good to know, eh?

Then Lowe’s guy showed me indicators on the tile box that helped a ton:

how to pick out tile

It was a wealth of information! I looked up what the codes mean and found this helpful pdf from Home Depot.

First up – the grade for this tile is a one (the highest quality) and you want to use grade one or two for floors, a three for floors.

The PEI (stands for Porcelain Enamel Institute) is a three – this indicates the tile’s resistance to abrasion. This one is fine for moderate wear and suitable for home use.

The little umbrella icon is for water absorption, which is something you want to think about for a spot like a laundry room! This one falls between low and moderate absorption so it was fine for this space.

Finally, one I didn’t even consider but is nice to know – the C.O.F., which is basically the slip factor. My tile was rated at .65, and anything above .60 exceeds ADA (Americans with Disabilities Act) guidelines – which means it’s too not slippery.

I was honestly surprised to see that my pretty little tile passed every test with flying colors!

SOLD! :)

Because I have limited experience with tile, and because the mortar had to be spread as thin as possible to avoid it seeping through all of those grout lines, I didn’t DIY this project.

The room had turned into a second storage room over the past few months, so I did clean it out and get the floors cleaned up:

I went back and forth on an underlayment in here, since the tile was going directly on cement floors. I talked to about four contractor-type peeps and every single one of them said it wasn’t needed. So I didn’t do it, but I’ll let you know in time if that was a good idea or not. ;)

Because I didn’t want to worry about keeping bright white grout lines clean, I used a light gray grout color:

warm grey sanded grout

This is the product I picked out (from Lowes) and it’s a sanded grout called warm gray. I love it!!

One thing to consider – one bag was more than enough for the square footage of this room, but obviously those tiles have more than average grout lines. So we needed two bags of the grout to get ‘er done.

I am SO thrilled with the result:white tile gray grout

The gray grout will be easier to take care of, and I LOVE how it actually shows off the pretty shapes of the tile. They would be lost with white grout!

After it was grouted and wiped down, I cleaned it well one more time, let it dry for an hour, and used this sealer the guys recommend:

one hour spray grout sealer

Other sealers I’ve used in the past can’t be applied till about three days after the grout is done. This one can be applied after just an hour. It was the easiest sealant I’ve ever used – I just sprayed it down on the tile, working my way across the room.

The floor will be super wet when you’re done, so work your way out of the room. Let it sit five to ten minutes then just wipe it clean! I got down on my hands and knees with two rags and wiped as I went through the room. It says you can do a second coat 30 minutes later, but I soaked this floor so I didn’t think it was needed:

white tile gray grout

Isn’t it pretty? It turned out just as I envisioned.

Here’s the after with the tile:

white tile gray grout hexagon

This room already looks SO much different now! I’ve been busy in here and I can’t wait to show you more!

Now I’m psyched to get the bathroom tiled and I think I might try my hand at it. I think. :) I’ve never done floor tile and I’m nervous. I was planning on going light on the floors in there too, but now I’m thinking dark, which I’ll explain soon.

This tile cost more than basic ceramic tile, but I thought for the unique look it wasn’t too bad – the whole room was less than $140. I’ve seen this look for WAY more so I’m thrilled with it!

Have you tried this pretty hexagon tile in your home? Have you ever tiled a floor? Any tips?

P.S. I think I said “grout” 55 times.

Sunday, July 29, 2012

Laundry room to mud room (Oh yeah)

Hello there! Hope you had a wonderful weekend! We had a great one – I got some DIY time in, some quality kiddo time and even a date with the hubs! And it wasn’t 101 degrees – bonus! :)

I’m sharing a before and after today that’s been a loooong time coming. I’m giddy about it. Grinning like mad. Elaine Benes dance happy. It’s not anything Pinterest worthy, but let me tell you…it’s BIG. (To me.)

This weekend was momentous – the former laundry/mud room is now just a MUD ROOM.

Can I get an AMEN??

I took this picture minutes before the waster and dryer were moved out:

yes, this is real

It looked like that all. the. time. Every time thought to myself, “Self, are you sure you want to move the washer and dryer downstairs?” I would walk back into this room.

Yep, yep I do.

I tried. Tried to make it work, tried to keep it organized. It was not within my realm of…well…anything. I couldn’t do it.

This room has a long road ahead of it, and all I’ve done so far is move everything that was on the left over to the right (where the washer and dryer were), and it’s made all the difference in the world:

You can now see when I painted this room I didn’t bother to move the W/D – I just painted around them. ;) No one could tell. Till now.

I also didn’t move them to install the beadboard, so that’s coming soon. For now I moved the shelf up about a foot and took the hooks that were on the long wall on the left and hung them underneath:

in between mud room

My goal was to make this room functional before the Bub starts school in a few weeks. (Kindergarten. Sniff. No, I don’t want to talk about it.)

I feel a meeeeellion times more organized already. I feel like we can breath when we walk in and out of our house:

Doesn’t it look AMAZING????? OK, I know it’s kind of a mess still, but I have rose-colored-mud-room glasses on and I think it’s stinkin’ beautiful. ;) I am so thrilled to have such a large, open space as a mud room. (It feels HUGE to me now.)

I have big plans for this room, of course. Beadboard, paint, new trim (casing, baseboards and crown), maybe new lighting, a bench, coat storage and cabinets and storage up to the ceiling in that cubby area.

Oh, and I can take that vinyl down cause it’s not a laundry room anymore:

yellow and black laundry room

Booyah.

Best day ever!! All weekend we noticed the little things – like we can walk out of the house as a family instead of lining up single file. It’s fantastic. :)

I’ve been trying to decide on a wall color for months and I think I found it this weekend. Right now I’m just really excited to put baseboards back in here. See, the little things – it doesn’t take much to make me happy.

Do you have a dedicated mud room? Do you love it? If you don’t have one, have you figured out a way to make your main entry more organized? Do tell!


**You can see how I changed out the ugly metal utility doors here and how I installed the peel and stick tile here. And if you’d like to see how this room looked after it’s first redo, check out this post from way back when. ;)

Thursday, July 26, 2012

The new laundry chute!

Hey hey! How are YOU? And you? :)

I’m back with a project I’m SO SO SO excited about!! You may remember that as a part of our basement finishing process, we decided to move the washer and dryer to the basement.

I know, some people think I’m a little cray cray for doing it. I get it. I talked about our reasoning here. And let me tell you, I am counting down the DAYS till it gets moved down there. It will be the best. day. ever.

Anyhoo, one thing I wanted to do if we were moving the washer and dryer down a level was to install a laundry chute -- we made that part of the “finishing plan.” Laundry chutes are kind of like basements for me – I just think they are the coolest. At first I thought there was no way we could do one in our house, but when we decided to finish the basement, I started to really think about where we could put one.

I did some sleuthing for a few weeks – a lot of walking up and down the steps, taking measurements, figuring our where things were. At first I thought we could put a chute down from the floor in our master closet. Then it was the upstairs bathroom linen closet, but I realized a while later that I was waaay off in my measurements.

So I sat on it some more and finally figured it out. The idea only came to me because a former decorating client of mine did just the same thing – she had a chute installed in the bottom of a bathroom vanity.

And the day I figured out we could do the same, I did a happy happy dance of JOY! JOY! (Name that cartoon.) The start of our laundry chute is at the very right, under the vanity in our bathroom:

maple bathroom cabinets

I didn’t get a pic of the inside because I ran out of daylight and our bathroom has horrible lighting. Anyway, that’s where it starts.

It goes down through our powder room closet, and then into the basement. Now I thought about doing this myself, but I’ve never cut through floors before (egads!) and didn’t have the tools to do so. I was also scared to death of cutting into something major, like electrical, plumbing, whatever.

So I asked the guys who have done all our basement work if they were interested and if they thought they could do it. They were all into it and then came up with a brilliant plan to make it happen.

I have to say, these guys have been around a ton over the past seven months and we get along awesome. It was SO fun to see them so excited about this project. They were practically giddy with their idea.

And that idea was, instead of framing out a chute and then building it up with walls (that would have to be ultra smooth – metal or sheeting or laminate, but nothing that has any rough edges so it would grab clothes – they were going to use PVC pipe.

Like this:

Thing is, the original plan I had thought up was going to require them to rebuild our linen closet in the powder room off to the side (long story, but the chute was going to take up a ton of room). This idea made it so they could run it through the closet, build new shelves around it and we’d save the cost of building a new linen closet.

The pipe is not cheap – I think it was $20 a foot? So we paid a bit more in materials, but a lot less in labor. Especially since no new closet was needed.

We ran into a snag going up in the bathroom upstairs (hit a water pipe) that they had to rework, and then going down, we were too far over into the basement. The clothes would have landed on a cement wall and studs in the basement.

But they guys came up with a solution, and that was to get fittings that curved the pipe, so it landed in an open spot into the basement. It was only a few inches over but it was PERFECT:

DIY laundry chute laundry chute pvc pipe

You can see that they were able to rebuild the shelving in there (done the same way I built the new shelves for the pantry) so I am still able to get necessities into that closet:

pvc pipe laundry chute

I did a bit of a purge, so even though I lost about half of the storage, I still only had to move a couple baskets down to the basement. And eventually we’ll have mud room storage, so I’ll be able to use that if I want to keep the stuff upstairs.

I still need to fill holes in the closet walls (from the old wire shelves), paint the wood shelves, and I may even paint the pipe. I wonder if paint would stick? How funny would it be to make it a fun color or something?

I think it is hilarious when I open this door now and see this huge sewer pipe. HILARIOUS. It just make me giggle uncontrollably. Seriously.

The chute ends in the basement and the guys made a little box with a door:

I’ll fill the holes, caulk and paint it and you won’t even notice it!

They used latches to keep the door secure:

And it works! The pipe is wide enough I can send towels or even throw rugs down no problem. The great thing is the inside is a smooth as a babes bottom, so everything sails right through, even with the little angle. Nothing for anything to get caught on!

There’s a few things I want to add, just for safety reasons. Some consider laundry chutes to be a safety concern when it comes to fires – if a fire started in the basement, it would have a straight shot upstairs. But from my research online and talking to folks, the same could be said for staircases, so opinions vary on that.

To be safe, I’m going to order a fire safe metal door to go in the basement (instead of the wood door). I’m also considering using some of the leftover PVC pipe and extending the chute down a bit more into room, then framing that out, so it’s closer to the floor.

If you have young kids, there’s things to think about, obviously. I’ve heard some stories about things and people (??) heading down chutes! Our kiddo is too big to fit in this of course, and he’s just not the type that would try to actually go down the thing. But just to be safe (with smaller kids in the house occasionally) I plan to put a child lock on that bathroom vanity door. The guys made a lid for the chute, and I’m going to install a lock on it so only we can get the lid off.

I cannot tell you how WICKED COOL this thing is!! We are just tickled by it. :) It’s got me soooo ready to get that laundry room going – so hopefully I’ll have more to share on that soon!!

So did you have a laundry chute growing up? Or have one now? Any fun stories to tell? :) My grandparents have one and I always thought it was just the coolest thing. I would open it up just to look down into the basement every chance I got – just because I could. ;)