Hey all! Good Monday to ya! I’ve missed you! :)
We had a lovely spring break just staying around home. We didn’t do half of the things we planned on doing and the weather just got really beautiful yesterday, but it was still a great week.
I had grand plans to get a ton of DIY done last week and instead I took naps. It was so, SO good. ;)
I did get some done, including a really big project I’m almost done with and I can’t wait to show you! But really, I only got one project completely done and it was little one.
But I LOVE love love it so I figured I’d show you and do a little tutorial along the way.
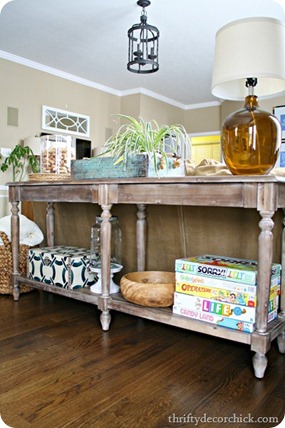
I shared our new sofa table about a month ago:
I still love it. I need to fix the one drawer still, but more pressing matters were at hand -- the hardware. :) It didn’t really need anything more, but I wanted a little something more. I knew the right handles on the drawers would finish off the piece just beautifully.
I actually got some hardware at Lowe’s the other day, but then I was shopping at Target with sis and the BFF on Saturday and saw these:
Hallloooo (said in my best Franck voice) – they were PERFECT. Usually when I walk through Target I’m on a mission and walk right past the hardware. But you know how it is when you’re shopping with friends – you linger, walk through the whole place, take your time. It’s GREAT.
These were the exact same finish as the other handles I had picked out, but much more interesting.
So here’s where I throw in a little DIY and one of my favorite tools. I think I’ve covered this before on the blog, but I’m like 900 posts in now so forgive me if I am repeating.
If you are ever, ever EVAH going to need to install hardware, I beg of you to pick up this little gadget:
I’ve seen them in different colors and sizes but they all do the same thing. ROCK.
Seriously, why didn't I think of this??
You take your hardware and hold it up to see the spacing of the holes, like in the pic above.
Then you figure out the middle of the drawer (both width and height!) – mine was just over 26 inches so I went 13 inches and a smidge:
I used a pencil to mark where center was. Do this. You’ll thank me. (If you don’t you’ll remeasure at least five times because it moved.)
Then figure out where you want it to be height wise. I like to measure the height of the drawer and then kind of eyeball where I want the handle to go:
Then mark the holes where you want them. Sometimes you need to move the guide around up a little bit – the holes aren’t always right where you need them to be height-wise.
Then double and triple check that they match up:
Even though I used the guide this one was off a bit so I adjusted.
Now it’s time to drill. And sweat. Hold your breath a little:
This is why you triple check. :)
I like to start with a smaller drill bit for the initial hole and then use a larger one to open it up a little bit more for the screw. No reason really, it’s just the way I do.
Then you just take your screws (most of the time they will give you two different lengths – keep the ones you don’t use!) through the back and screw them in to the hardware on the front:
You can now stop sweating. Well, if you're holes are even you can. ;)
I made some labels on the computer with a cute font:
And I realllly love how they look:
Yes. He is always sitting there.
Many of you asked about the corks – I just put a big chunky candle inside a glass holder and filled around it with wine corks. I’ve had them for years and I love how they look. And when I open a new bottle I just toss a new one in there. ;) The round mats are our IKEA placemats.
That trunk was from a Joss and Main sale and then a few weeks later I found them for half the price at TJ Maxx. :/ The Bub’s kitchen stuff that he likes to “serve” us on is in there.
I kind of just put stuff on the sofa table when I got it in place, but I actually like it and don’t know if I’ll change much. The games are still there:
I think I could do a whole post on these – hide them or not? I prefer to have them out now. Easier access and I’m just one who loves things to function, sometimes that’s more important to me than form. ;)
And one day I will look back and miss having them around, I’m sure. So for now they stay out.
Here’s a full shot – I think the hardware is the perfect finishing touch!:
And here’s the before and after – with and without the handles:
Now you can actually see that those are drawers – I love that extra little detail. :)
Sometimes it truly is the little things that make a difference. Love it!
Have you made a little change you loved lately? Have you used the hardware gadget I showed? Doesn’t it rock??


No comments:
Post a Comment