Friday, August 31, 2012

Decor steals

**This giveaways is now closed. Winners have been emailed. Thanks!

Hello there! We are amping up for a weekend of RAIN here…and lots of it. The remains of Isaac are on their way and we can still use it after a horrible drought this summer. I hope everyone affected by the hurricane is now safe and dry!

I’m back this weekend with a GREAT giveaway from Decor Steals, formerly Wuslu.com. It’s been awhile since I’ve had a giveaway and that’s because I’m getting picky about those that I share with you. I’m always excited about this one because I’m a HUGE Decor Steals fan.

decor-steals-LOGO

I love this site and if you haven’t heard of it you’ll want to hang around and check out some of their home decor items. Decor Steals is a site that offers one fantastic decor item every day…for a steal. (Totally couldn’t resist that.) Each one goes live at 10 a.m. EST daily and they now have extended deals that stay on throughout the week as well.

Here’s just a few of my favorites pieces of late…

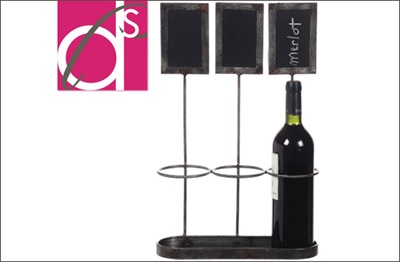
I love this idea for a party – this wine stand has small chalkboard labels so you can easily show everyone what’s being served:

bottle holder with chalkboard

I think that would be cute with a few flowers lined up in vases too. :)

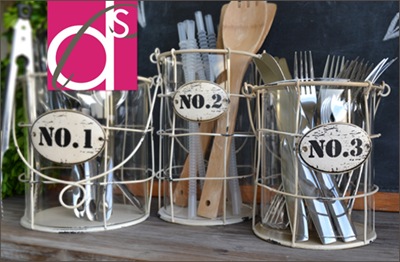
I love these little holders and the idea of using them for utensils:

numbered storage containers

I would keep those out all the time! You know, for when I can’t be bothered to open the drawer for a spoon. ;) They’d also be cute in the bathroom for cotton balls and make up brushes.

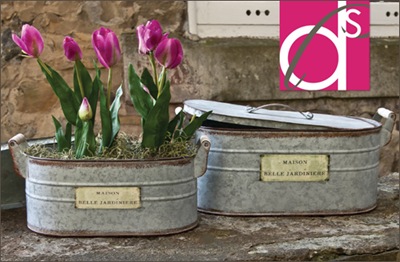
I love these galvanized tubs and think they would be a GREAT item for a spot like above the cabinets or on a plant ledge:

glavanizedtubs

They would also look cute in a bathroom – maybe with towels rolled up in them?

Did I mention that every item, no matter what the size, is only $5 for shipping? (In the 48 contiguous states.) FIVE bucks!!

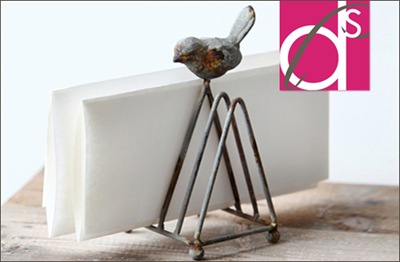
We all know if you put a bird on it, it’s cuter. And that goes for this mail sorter as well:

rustic metal mail holder

I think I would use it for our napkins on the kitchen table.

This typography bamboo rug was a HUGE hit on Decor Steals, and I can see why:

typography bamboo rug

Isn’t that cool? I would totally frame and hang that one. Wouldn’t it be great art?

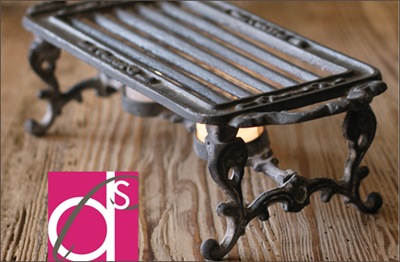
And finally, but certainly not least, I love this iron warming grill:

warming grill

How cool for a party or just to keep dinner nice and toasty? I’ve never seen one so pretty!

The fine folks at Decor Steals have created a video to show how they their site works. It’s pretty darn cute:

I love when the lady screams at the computer when her item is gone. Totally me. And by the way, I do not get $5 credits for this post. ;)

Here’s the best part  -- the lovely folks at Decor Steals are giving away $100 to one lucky winner and $50 to a second winner to spend as you wish on the site! Oh. yeah.

Here’s how to enter to win one of two credits ($100 and $50) to Decor Steals:

1. Leave a comment here. What do you have planned this Labor Day weekend? We have a wedding and a concert, and although I’m pretty sure the concert will get rained out, I’m OK with it because I love cozy, rainy weekends so very much.

2. Visit Decor Steals here and check out their pick steals page. Which item do you want to see offered in the future? Come back here to let us know in a comment.

3. Visit their Facebook page and “like” it here. Let us know you did in another comment.

4. Subscribe to their email list here (you’ll get notices about the new deals) and if you do (or are already on the list), leave one more comment here.

* You can enter one, two, three or four times – it’s up to you! All options are not mandatory to win.

* Remember if you comment anonymously or you have a private blog, please include your email address in each entry, and spell it out with “at” and “dot” to avoid any spammy emails coming your way.

This giveaway is open to the contiguous US only. It will be close this Monday, September 3 at 9 a.m. EST.

I hope you have a lovely holiday weekend! ENJOY and stay safe!

Wednesday, August 29, 2012

DIY nailhead trim

Hey there! I’m back today with a quickie update that only took me a YEAR! You think I kid. ;) OK, the project only took a few minutes, but getting there took a year.

When we made some changes to the family room last year I found a new chair at HomeGoods for the space:

homegoods chair

The chair is different for me – kinda funky and I love it. It doesn’t look it but it is so, so comfortable – I curl up in it almost every evening. :)

I always thought it could use a little somethin’ though, and when I saw Courtney’s post last summer I knew exactly what I wanted to do!

I even bought the supplies last year – a few packages of furniture trim from the hardware store:

nail head trim for furniture

I got mine from True Value and it’s the only place I’ve seen this nickel color in this size. Everyone else has other colors (bronze, black) in this larger size, but not this nickel color.

And then the nails sat in the garage for…well. A long dang time. ;) A year now? I am ON IT!

Last night I got a wild hair and decided to just do it already.

I started out by eyeing each nailhead piece and then quickly realized that’s not the best idea. They were all wonky and I knew the wonky would drive me crazy.

So I came up with what I thought was a brill idea:

adding nailhead trim to furniture

I just took the tape measure and marked off inch spaces with a pencil. The pencil erased right off if I needed to move one. Smart huh? Well I looked back at Courtney’s post today and just realized she did the exact same thing. Maybe it was in the subconscious all this time? Who knows? ;)

Anyway, I used her brilliant idea and it went super fast after that:

how to add nailhead trim

Just place them on your pencil mark and use a hammer to tap them in:

Make sure to hammer them in well so they get into the furniture frame – it creates a nice “tuft.” And when they are in they are nearly impossible to get out…believe me. :) I had to move a few of them along the way.

They are SO very not perfect. But they look much better than when I just eyeballed them. This side was a little iffy:

nailhead trim to dress up chair

But if you stand back you’ll never notice.

I think the front looks pretty good!:DIY nailhead trim

I always thought you had to use the long strips of nailhead trim in order to get this look, and when I’ve looked for those at fabric or craft stores in the past they’re either out of stock or it’s not cheap.

This took four packages, about $7 total I think? Not bad for a little bling update!:

DIY nailhead trim

This project took me about 15 minutes total – once you get the marks on there it goes really fast.

Now I’m trying to figure out where else I can use this trim – I like the bronze version I’ve seen as well. I think they’d be cool hammered into a frame or wood or something. My wheels are turning. :)

P.S. You can see more about the rug in this space here and the candlestick table here!


I was one of the bloggers selected by True Value to work on the DIY Squad. I have been compensated for my time commitment to the program as well as my writing about my experience. I have also been compensated for the materials needed for my DIY project. However, my opinions are entirely my own and I have not been paid to publish positive comments.

Tuesday, August 28, 2012

Scraper sites

Well, if you read a bunch of DIY/decorating/crafting blogs you’ve probably seen the scuttlebutt over the past few days about the “scraper” sites stealing our content and what we’re trying to do to prevent it.

When I say scraper site, I mean a site that takes content from other blogs and pulls it onto it’s own…basically taking my posts and putting them word for word on their blogs. (Here’s more info on them.)

It’s been happening for a while now, but in the past six months, and especially in the past three…it’s gotten absolutely out of control.

I get two to three emails a week from bloggers who have found my content on another site. And it’s never the same site twice. :) When that happens I have four options – email the “owner” of the scraper site and tell them to stop stealing my content (which is always through a comment because they don’t have any contact info on their site). Or I can pay a lawyer to contact them, report them to Google, or ignore.

I’ve done all of them but one – I found out how much it would cost to pay a lawyer to keep up on this and about spit. I’m talking hundreds if not thousands a month (and that’s just for the ones I know about.) This is because the first contact usually results in nothing – it’s going to take more than one email to make them stop. And these blogs are made up entirely of stolen content – so unless they’re being forced, they’re not going to go through and delete hundreds of posts they’ve stolen from my site.

I’ve tried emailing the jerks who do this and that’s a joke. I’ve tried reporting it to Google and if you’ve ever tried that you know it’s just not worth it – it happens so much I can’t even imagine how many of those they get just in one day. (And when someone is stealing hundreds of your posts this option is impossible anyway – you have to link to each questionable post.)

I’ve also tried ignoring them. But lately the rate at which it’s happening is staggering, and it’s not just me. If you’re a blogger and have been blogging for a while now, you’re content is probably being stolen too. I don’t say that to freak anyone out, it’s just a fact.

Thing is, they are getting traffic. I only hear of them because a blogger searched for a project I did and the scraper site came up instead of mine. And if you’ve linked up to one of my linky parties in the past few months, if you look into your analytics you’ll probably find traffic coming from a few of them. These people take the entire post, including 400 links from you all and put them on their own site. (The entire July Before and After Party was taken.)

So. I tell you in all honesty I’ve done what I can to stop it and I’ve come to a decision I’m not happy about, not in the least. If you read my site through Google Reader, after tomorrow (Wednesday) you’ll have to click the title of the post in reader to come to my site. It’s called truncating the feed, and although I hate truncating posts (and never plan to do them on the actual blog), it’s the only solution I’ve found -- at least right now.

This prevents (or at least makes it MUCH harder – so hard I hope they’ll give up) for these scraper sites to take my content. I try to be as transparent with you all as possible and wanted to let you know before I did the switch because I know it will affect how some of you read my posts. I am fully aware that some of you who read TDC through Google Reader will not want to click over, and I get it. But I do hope you will.

I’m nervous as all heck about this because I never want to make it hard for someone to read my posts, but as a business owner it’s a call I had to make. I know I’ll lose some readers and that kills me…this is not a decision that was made lightly. I just don’t have any other choice right now – a fellow blogger told me the other day that I should get an award for the number of sites who have stolen my content this year. Nice. :)

So bear with me…it sucks for my Reader followers I know. But I have to do something and this is all I know to do for the time being.


By the way, if you don’t read TDC through a feed, then you won’t notice any change at all.

If you are a blogger and would like to see if your content is on some of the scraper sites out there, send me an email and I’ll send you links to them. I’m not about to link to them here so they get even more traffic. :) And if you’ve seen my posts somewhere else, I would love it if you would send them my way.

Thank you to those who continue to send me emails about the ones that they find, I really appreciate it. As always, I am so thankful for my readers and am grateful to each of you who choose to spend some of your day with me.

Wednesday, August 22, 2012

Late summer window boxes

Well it’s been the weirdest summer, weather-wise, that I can remember in a long time. It started out absolutely GORGEOUS, with lower temps and humidity – it was fantastic. And then Mother Nature went into fits and mid-summer was full of intense drought and wicked hot temps. I know many of you had the same.

The past couple weeks it’s been lovely again – almost like September instead of August but I’ll take it! But the nice weather came too late for a few of my plants. We were under a water ban here for most of the summer, and although I could still water some plants, some of them I just could not keep up with. I almost lost a few bigger bushes, so I focused on those instead of the annuals, like those in our window boxes:

Sad, just sad. We were the envy of the neighborhood with those, we were.

When there’s not a drought, they usually look like this:

So I decided to do something about them, but the thing was, this was early August – I didn’t really want to do petunias again (and doubt I could have found them?) but I love the way they spill over when they grow out. But I knew I wanted something fluffy and spilly and low maintenance.

So I took a trip to one of my favorite nurseries, which is actually the one at the True Value I visit:

I love that they use lattice across the top – it’s like a little oasis out there. I don’t know why, but I always find different options here than I do at the bigger hardware stores I frequent. I’ve purchased quite a few plants here I don’t see many other stores. (This location is in Pendleton Indiana for you locals!)

One thing I couldn’t find anywhere else was asparagus fern:

asparagus fern

I knew I wanted to try it and this True Value had a plenty of it – at least until I got there. ;) I’ve never used this stuff before but I loved it’s delicate, spilly (yes I made up that word, go with it) look. Keep in mind how small those were – you won’t believe how fast they grow!

I picked up some coleus as well, which I’m gathering is a good option for late summer because I see them out more starting late July. I’ve used this stuff in the past and love the variety of colors and how full and hardy it is.

I hear planters need some “thriller,” as well (I had the filler and spiller) so I grabbed a few red geraniums for the back of the window boxes. A few weeks later and I cannot even believe how well these plants are doing in this spot:

asparagus fern coleus window boxes

I have always wanted to try mixing a few different plants in these boxes and never have for some reason – I just don’t feel like I’m good at figuring out what works when it comes to this stuff.

But I’m quite pleased with how they’ve turned out!:

late summer window boxes

Ack! I love all the spillage!! Looking at them now, I don’t even know if I needed the geraniums – but I did want a little punch of color.

Here’s the thing – I love the idea of using the green flowy plants and want to do it again, but they don’t offer much contrast against the azalea bushes that we have out front:

window boxes curved shutters

I guess it’s that I’m so used to having a huge pop of color there with the petunias. Maybe I’ll continue to do both every summer, who knows. I’m pretty much obsessed with how these have filled out and spilled over though. Love it!

I installed these window boxes about six years ago, maybe seven, and they’ve served us well. But this is the last summer for them, for sure:

They are barely hanging on. ;) Luckily you can only see that from the side, since the spillage hides so much.

Next year I want to go bigger with the window boxes – definitely longer and maybe deeper too so I can keep stuffing them full of lovelies like this. Our current ones are actually very small and it’s hard to put much in them.

I’m hoping the fern and coleus will do OK into the fall, because I’d love to just keep these through till the winter. I will fallify them a bit, maybe with some pumpkins and kale if I can cram those in. ;)

By the way – we have finally gotten some rain around here but I have not watered these much otherwise – just a couple times right after I planted them. They get partial sun and do GREAT in this spot – the maintenance is pretty much nonexistent!

I did a quick search to find some other examples of window boxes using these three plants – check out this gorgeous one using coleus:

coleus window box

(source)

Holy spillage! I die!!

This one is simpler but still a big impact:

coleus window box

I love the red tones in the coleus!

This one I loved because of the boxes, but mostly because of the windows:

window box with coleus

(source)

Can you blame me?

And hold on to your seats – this one is freakin’ me out it’s so awesome:

Window box with coleus, sweet potato vine and caladium

(source)

Look at all the potato vine too! Just amazing!!

This window box shows how delicate and pretty the asparagus fern is:

Asparagus fern for shady window box

(source)

I love those brackets by the way – that’s the look I’m going for when I replace our boxes next year.

Forget about the geraniums, check out that iron window box!:

geranium window box

(source)

OK, I’m totally cheating -- this isn’t a window box, but it is too cute not to share:

old wheelbarrow as planter

(source)

And finally, one more that truly incorporates the “thriller, spiller, filler” combo, WOW:

window box spiller

(source)

Those geraniums are HUGE! I’m gonna need MUCH bigger window boxes next year. ;)

So do you have window boxes? I think they add SO much character to the front of a home – for very little money (I’m pretty sure mine were under $20). I’m determined to get a little more creative with mine in the future. And in no time at all we’ll be dreaming of fall-themed planters – like, maybe…yesterday? ;)

I was one of the bloggers selected by True Value to work on the DIY Squad. I have been compensated for my time commitment to the program as well as my writing about my experience. I have also been compensated for the materials needed for my DIY project. However, my opinions are entirely my own and I have not been paid to publish positive comments.

Tuesday, August 21, 2012

Pinterest-inspired: DIY jewelry cleaner

Hey hey! I’m back today with a Pinterest-inspired post that I’ve been meaning to share for a while now. My plan is to start writing more of these posts – taking simple projects or helpful tips I find on Pinterest and showing how they turned out for me.

This one is super simple and cheap (free if you have the basics on hand). I found this DIY jewelry cleaner while pinning months ago and it’s actually from a food site here. Which is fitting because all of the “ingredients” are from the kitchen:

DIY jewelry cleaner

You’ll need one tablespoon each of salt, baking soda and dish detergent. Also, one cup water, a piece of aluminum foil and a bowl.

Just stick the water in the microwave for one to two minutes (I do two to get it nice and hot) and while it’s heating use a piece of foil to line the bottom of the bowl:

When the water is ready, pour it in the bowl, add the tablespoons of baking soda, salt and detergent in and watch it fizz:

That’s the fun part. ;)

Then you just place your jewelry in the bowl for five to ten minutes. The ingredients eat away at the grime and dirt and my rings come out sparkling! It’s amazing!

I feel like I commercial for dish washing detergent with all the SPARKLE but it’s true – this stuff really works well. I used to use jewelry cleaner from the store, but the brush that came with it fell apart after the second use. Since then I’ve used a soft toothbrush but I find I don’t really need to use it with this recipe.

If you’ve got some major gunk on there you may still need it. When I take my rings into my jeweler to be cleaned they look at me like I have three heads and ask WHAT IN THE WORLD I have been doing. I guess the spray paint, saw dust, paint, glue and all the other DIY messes stick around. ;)

This homemade version eats away at all that stuff and makes them absolutely shine. Love it. And the ingredients are so basic I always have it all on hand. If you are cleaning a bunch of jewelry you’ll want to make a new batch each time, according to the source.

I’ve also used this on more delicate jewelry like an opal ring – it worked beautifully. Some of the reviewers on the site I linked to mentioned it messed up sterling silver jewelry, but then others said it cleaned up their silver beautifully, so try it for silver at your own risk. Check out that link for reviews before you try something you are hesitant about!

I’m thrilled with it and highly recommend it – I’ll take an easy, cheap solution any day! :)

So have you found any great tips on Pinterest lately? I hope to share some of mine with you more often – good results and the bad. Cause it’s nice to actually DO something I’ve pinned on Pinterest, you know. ;)

Monday, August 20, 2012

Show us your family spaces!

Good Monday to ya! Hope your weekend was lovely! I’m kicking off the week with our next room in the Show Us Your House series of linky parties – this one is family rooms and I’m really looking forward to seeing these links!!

First up, I’ll share our space. This is one room that just did not work for us for years…and it’s completely my fault. ;) When we built our home I chose a corner fireplace instead of the normal spot between two windows. I’ve gone on and on about what an AWFUL IDEA THAT WAS, but I won’t blabber on anymore about that. You’re welcome. ;)

I finally figured out a way to make that corner fireplace work better in the room last year and I am SOOOO much happier with it: wood treatment above fireplace

Last summer we also moved the TV stuff to a different spot in the room and that one change opened up the room tremendously.

We finished paying off an insane amount of debt early last year (I can’t believe that was only last year!) and our first real purchase (paid for with “cash” of course), was a super nice sectional from Arhaus:

small sectional

This is hands down one of our best purchases ever…if not the best. This sofa is so darn comfy and has held up great! The cushions aren’t flat, spills wipe up easily…it’s fantastic. I swear it looks like the day it was delivered!

You can see by that pic that I put the Rugs USA rug back in the family room – that old rug was in such awful shape I decided to try this one again. At first I didn’t think the drapes and pillows worked with it, and I still don’t think the drapes work great…but they are fine for now, I’m not worrying about it. I wasn’t about to try to rework the whole room for the rug. Maybe later, but not now. :)

I found a couple new pillows from Target (earlier this summer) that incorporate a lot more of the colors of the room. Before I had solid red pillows in here – these pull in the rug much better. I also pulled some knit pillows from our bedroom, because let’s be honest…we all know I never make our bed. I mean…really.

So at least they are being used in the family room instead of sitting in a pile next to the bed:

contemporary rug blue gray

Last summer our fridge went kaput (almost exactly a year ago!) and when it went kaput our laminate floors went with it. So insurance paid for new floors and we kicked in a little extra for real hardwoods throughout our main level:

jacobean stain floors

OH MY GAH, I love them so very much. So. very. much. There’s no way we would have been able to do this without that lovely fridge melting down on us, so now I’m not nearly as upset about it. ;) Living in a mess for two months was not so fun at the time though.

When we moved the TV stuff last summer, I turned a Craigslist dresser into our entertainment center:

dresser as entertainment center

(That rug is showing as bright blue there and I’m not sure why, it’s really more of a charcoal blue color. See pics above.)

The components under the TV work great by the way! I LOVE having them out of the way. I loathe electronics and cords and stuff…I am always trying to figure out ways to hide them if possible.

I do have some plans for this room – new art, new paint and perhaps a new wall treatment? I’ve got the color picked out but I’ve been mulling over the wall treatment for awhile now. It will happen as soon as I want to do all that work. Which could mean about a year. ;)

I love how this space has been transforming over the years but my favorite part is how much more open than it used to be. Moving that TV (it used to be to the left of the fireplace) over across the room has made a HUGE difference.

You can find all of the posts about our family room here!

Now let’s see your family spaces, your living rooms – whatever you call the room where your family chills and relaxes!

Don’t forget the schedule for the rest of the year!:

September (basements/rec rooms), October (bedrooms), November (foyers), December (mud/laundry rooms)

I ask that you link back to TDC in your post, especially if you’d like to be considered for a feature in a recap:

Show Us Your House
<div align="center"><a href="http://simplehomeinteriordesign.com/" title="Show Us Your House" target="_blank"><img src="http://www.homestoriesatoz.com/wp-content/uploads/2012/03/image34.png" alt="Thrifty Decor Chick" style="border:none;" /></a></div>


Go ahead and link it up and have fun!


Friday, August 17, 2012

They’re back! (Fall linky parties)

It’s that time again! Can you even believe it? I have been counting down the days to fall. ;) And these parties are gonna ROCK!

We’re back with another It’s Fall Y’all linky party series!:Fall_Link_Party_Badge_2012

Layla and Kevin at The Lettered Cottage will kick it off with fall tablescape ideas on September 18, then Rhoda at Southern Hospitality will celebrate with outdoor decor on the 20th. The week after Kate from Centsational Girl and I will join in with fall mantels on the 25 and easy, quick fall decor here at TDC on the 27.

I’m so ready!!:

I’ve already been thinking about ways to add fall touches to the house this season. Last year I didn’t do much since we had the whole water/floor issue which I was really bummed about.

One thing (things?) I know will be back:

martha stewart mice silhouettes

I love my little mice, yes I do. They are a fall favorite around here now. :)

So mark your calendars, get ready, cause it will be here before you know it!

I’ll be back later today with an update on the basement laundry room!

Wednesday, August 15, 2012

What I did on summer vacation

Hello!! Well, it’s official – I’m the Mama of a kindergartener. :) It went off without a hitch and I surprisingly haven’t (really) cried yet. Tears have welled up a few times, but I’m holding it together and keeping myself busy.

I always feel like a slug during the summer, and I did especially so this summer. I was just so focused on soaking up the last days with my boy home all day every day, I didn't want it to pass me by. So I know things have been lighter around here lately and that’s why. But I am super excited about the fall and projects and posts, so stay tuned!!

I haven't done a month in review all summer, so I’m catching up all at once today. I have to say, looking back I don’t feel nearly as sloth-like as I felt. ;)

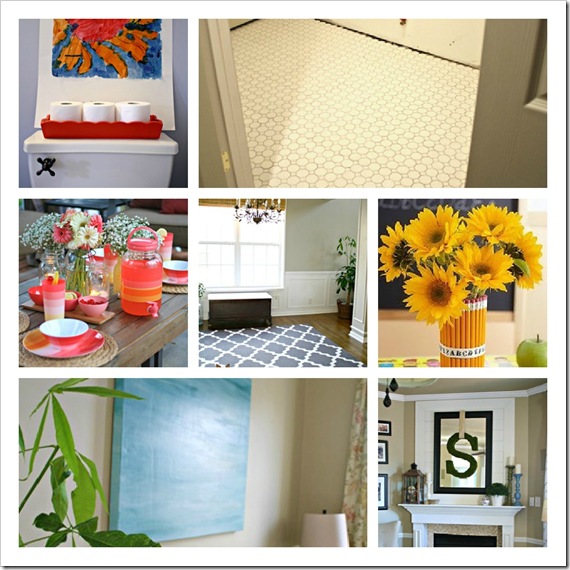
I’m linking to a few of my favorites under the collages – take a look and check them out if you missed any:

From left to right, top to bottom (sorry I had to add “here” for the link on each one – Live Writer hates me today):

1. Simple summer touches (here)
2. How to DIY built ins (here)
3. Trying out Annie Sloan paint (here)
4. DIY ORB light fixture (here)
5. How to stain butcher block (here)
6. Vintage rolling (storage) crate (here)
7. A (round) laundry chute (here)

1. Plan for the red, white and blue powder room (here)
2. New laundry room tile (here)
3. A pretty summer tablescape (here)
4. New paint color! (And it’s not pink, WHOO!) (here)
5. Back to school ideas (here)
6. DIY painted canvas art (here)
7. DIY wall treatment above the fireplace (here)

I almost forgot one of my favorite projects! My DIY sunburst mirrors made for just $10 each.

Oh, and the basement was finally finished (mostly) and we had a bit of drama (water issues) just a week after the carpet was installed. Water issues THREE times. But I’m not bitter or anything. ;) All is well now, (it was due to plumbing we had never used down there and getting it working right) and I can honestly say I’m still thrilled about having carpet down there – carpet can be pulled up and dried out super fast. Now I know. :)

I did some DIY this summer, but I mostly slept as much as possible, enjoyed having my hubby and son home and played, a LOT:

It was probably the best summer yet. They are growing on me. ;)

Now that school is underway I am so excited about this extra time I’ll have to dedicate to blogging and the house! I’ve already been on the computer for three straight hours today – longest stretch practically ever.

I am hoping to post more often now, and will have some recurring themed posts that will pop up here and there. I’ll tell you more about those soon. And the biggest change I think most of you will notice – after four years of publishing my posts late at night, I’m going to try to start getting them done during the day. It’s a BIG change for me but I’m looking forward to it. I want to focus on business stuff during the day and have my evenings free for my son and my husband. First time for that in a loooong time!

So this is my first. I’m hoping to get them written earlier in the morning than this one, but this is new for me, bear with me. :)

And now I can officially say it…BRING ON FALL!!!! Whooooooooooo! (First football game this weekend!!)

Monday, August 13, 2012

For the love of labels

Hello! How was your weekend? Ours was just great – it was our last “free” weekend before school starts for my hubby and the kiddo so we took advantage of it and had a blast. :)

Have your kiddo’s started school yet? Thanks for hanging in there while I blubber on about my boy starting kindergarten this year – your comments and emails about this post made me smile. :)

I mentioned last week that I planned on purging and organizing a bit this weekend and I did get a lot done. I have a few more spots I want to tackle tomorrow and then I’ll feel really good about the start of the school year.

Today I had to label a few of the Bub’s school supplies and it got me thinking…thinking about how much I LOVE TO LABEL. It’s such a lovely feeling to stick a good label on something, anything. (I try not to get ridiculous about it. But it’s so so hard.)

I was more than happy to pull out my dear friend, Dymo the label maker:

I couldn’t find the Sharpie marker and I figured this would be the next best thing. (Dymo carries both plastic and paper labels – sometimes I find the plastic sticks better, sometimes the paper depending on what you’re sticking it to.)

This little machine is a little bit of an investment initially (around $25), but I’ve had mine for years and years and it’s the gift that keeps on giving.

Labels. To me. :)

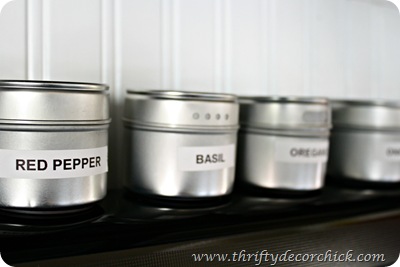
I’ve used this one in the kitchen to label the spices:

labeling spices

I just print out the expiration date for each one and place it on the back.

I also use them to label storage bins in our linen closets:

But I love making labels too – a cute one pretty much sends me over the edge. ;)

I made some for the binders in my office with a couple paint chips:

paint chip tags

You can find out more about those here.

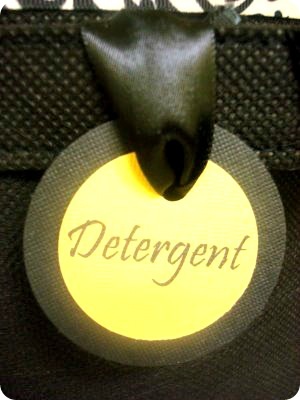
I used some craft paper I had around the house and my craft puncher to create a few for our old laundry room:

Did I mention all of these were FREE?

Sometimes I use vinyl to point out the obvious:

labeling pantry itemslaundry soap in jar

I also used black vinyl (cut out with craft scissors) to make cute labels for our cereal:

glass jars in kitchen chalkboard label

And by the way, that’s not chalkboard vinyl, just regular black vinyl. No need to spend extra money on the chalkboard version -- with a chalk pen it works just as well. ;)

I used a cheapy, unfinished chalkboard from the craft store to label some of the books in the book nook:

closet book nook

I just drilled holes into sides and secured it to the box with twine. Totally cute for a couple bucks!

And sometimes I don’t use words at all:

That little bin in the Bub’s room holds…well. Airplanes. (Smarty I am.)

That’s just a sampling of my labeling love. I’m sure I’ve got more examples around this place but I’ll spare you the rest for now. Do you label or do you live on the wild side and love not knowing what you’re grabbing for in the linen closet? ;) Do tell!