Thursday, March 31, 2011

(Not) Doing it all

Every once and awhile I like to pause and show you the “real” around here. Sometimes I show you in pictures, but today I also want to tell you how very much I don’t have it all together. :)

I’ve mentioned a few times that our house rarely looks perfect. OK, let’s make that never. Well, OK, maybe about five minutes before a party, but that’s it. So that would amount to about 15 minutes a year.

Fifteen minutes a year, it looks pretty darn fantastic. ;)

But the other 525,585 thousand minutes it’s just…normal. I’ve shown you our normal:

image

Uhhh…you don’t have a toilet seat sitting in your bedroom?

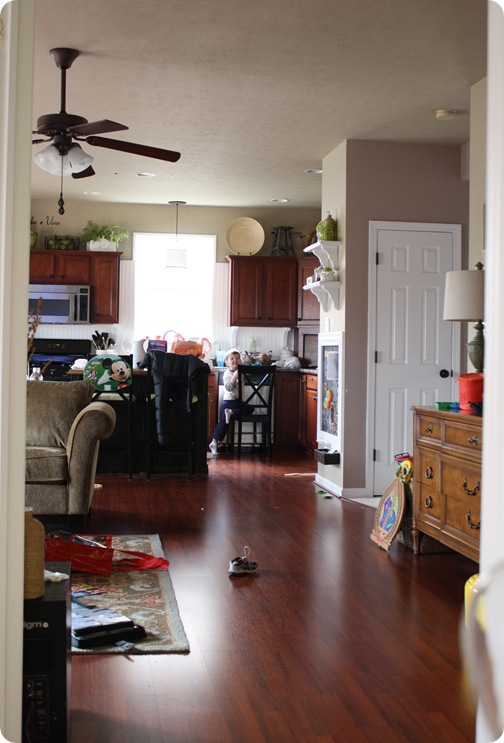
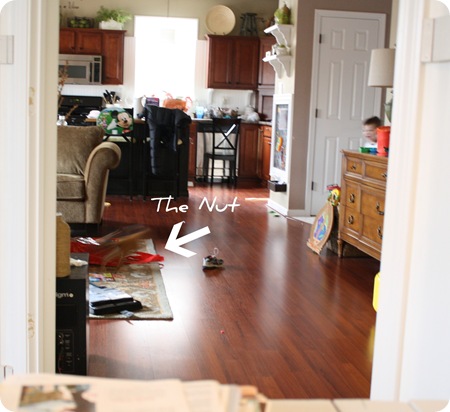
I was sitting in the office working on bills today, and this was my view:

IMG_3736

Not awful, cause there’s a cute Bub smiling at me. ;) Just normal. This is actually pretty clean, really. The floor is cleared enough for us to walk through the family room.

What you can’t really see are the cluttered countertops, the island covered in shopping bags I haven’t emptied, two in-between projects on the windowsill (where else would I keep them?), the coffee table covered with toys and a pizza box. You can’t see the damaged spot on the floor, the messed up drywall on the ceiling from a leak in an upstairs bathroom.

I wanted to write this today because I neverevereverNEVER want anyone who visits this blog to leave feeling inadequate – that breaks my heart. But I certainly understand it -- even I read blogs and feel that green monster raising it’s ugly head. I wonder if the house is always that clean, the toys are always put away. How she does it all, with more kids, a bigger house, a full time job. And I’m lucky to keep one room completely clean for a day.

I’m here to inspire. I want to show you how you can transform your home and make it your haven. But I want to be real about it at the same time. Of course, I chuck the stuff out of pictures – and that’s just because I figure most of the time, you want to see pretty, not cluttery.

But beyond the not-always-perfect-house, I wanted to let you all know that there are so, so, SO many days where I feel like I am barely keeping my head above water – trying to do it all. Keeping the house picked up, let alone clean. Dealing with five animals – a fish, three cats and a puppy. Being a good Mom, an attentive wife, a supportive friend. And trying to post as much as possible here on my beloved blog, which has become my business. (Best. job. ever.)

At least once a week, I feel like an bad friend because I haven’t returned an email or a text or a phone call fast enough. There are days I walk into our house and just feel completely overwhelmed with all that needs to be done. Some days I wonder how it’s possible, as a stay-at-home Mom, I can’t keep our home and lives perfectly perfect all the time.

IMG_37422

And then I’ll realize, yet again…dear LORD, it’s normal. As much as I want to do more projects and post more than I do, I choose not to. I don’t do it all – I don’t want to do it all. I crave a better balance in my life, but I’m guessing, hoping, praying this is normal? All mom’s feel that way at times, right?

But when I say I wouldn’t have it any other way, I truly mean it. Our sometimes messy home means I have a sweet four-year-old running around. It means I take time away from cleaning to work on a DIY project – my passion. It means I get to blog and share and write and (hopefully) inspire…as I am doing right now, with my feet propped up next to the pizza box on the coffee table. ;)

So I guess I just wanted to take a minute to say, I don’t do it all,  and sometimes I feel like I really stink at what I do do. :) But I love my life, all of it’s imperfections and messes. I’m just so completely happy to be doing what I’m doing. With the people I’m doing it with – including you all.

I wanted to let you know that. I never want you to think I’m capable of doing any more than you can do. I just show you the pretty more often than not, because for the most part, I like to see pretty on blogs and magazines and TV. I’ve got enough of the real at home. ;)

But I will keep showing you the messes here and there, cause it’s the truth. We’ve got the pretty and not-so-pretty around here, just like every home. :)

And I luuuurve it!!

Sunday, March 27, 2011

The PAPER, organized

Hello all! Hope you had a fabulous weekend! It was absolutely FREEZING here. Ugh – spring is such a tease. :) I guess the planting will have to wait till next weekend. (Crossing fingers.)

If you remember a couple of months ago, I showed you how I was starting to get control over the paper in our house – once and for all. I had let it get waaay out of control, and it was time tame the paper monster around here.

It involved a lot of shredding – make that an INSANE amount of shredding:

But I prevailed people, I prevailed!! I have ridden (ridded?) our home of all the old paper that was creating clutter, found a home for the rest of it, and (pretty much) kept up with what has come into the house since then.

I think I’ve finally figured out a process that works for our house, so I wanted to share it with you. :)

The first couple of steps are total DUH moments, but they’re the ones that were the biggest issues for me in the past. Most days, I get our mail in the car – cause I’m lazy like that.

And that caused my first problem – the mail was piling up in my car daily. Cause I’m lazy. :) I littered my car with it and created a pile I had to catch up with when I did take it inside.

So my first tip for you – get control of how much mail you’re getting. Over the years we’ve changed many of our bills to paperless, so we get emails instead of mail.

I luuurve catalogs like you wouldn’t believe, but sometimes we start getting one we don’t care for and those add to the paper clutter quite a bit. About three years ago, I found a site called Catalog Choice, and so far we’ve unsubscribed from about six catalogs. Love. it. (Cause it works.)

One of my readers mentioned a site a couple of months ago that’s already made a huge difference – Opt Out Prescreen. It allows you to opt out from credit or insurance mail offers (that you have not initiated). It has really cut down on our junk mail, and it only took a couple of weeks for it to kick in.

My next step was to figure out a way to corral all that mail in the car, for the lazy days when I didn’t want to address it immediately. I grabbed an old laptop bag and now it sits next to me every day.

It’s not super large, so once it starts to get full, I know it’s time to address it and take it inside. It’s SO much better than having the paper strewn all over the front seat. My friends and hubby appreciate not having to move a pile of paper when they take a ride. ;)

The next step is to address as much as possible before I get in the house. I’ve had trash bins out in the garage for the mail for over a year now, but I wasn’t using them.

So I put our monster shredder out, next to the the bins:

Part of my paper issues were because I’m a bit of a freak about what we shred -- basically everything. :) I tear our address off of catalogs, prescriptions, junk mail with our address – everything.

So the shred pile was always HUGE. Now, I deal with it before I even walk in the door. It’s SO awesome to walk in with one piece of mail instead of five. ;)

Every Monday I empty the shredder and put the shredded paper and other to-be-recycled items and take them to our local recycling center.

I’m doing it!! I’m actually keeping up with the paper! WHOO HEW!

Next up is getting it taken care of inside. Anything that needs to be addressed but-I’m-not-going-to-address-right-now is put into a decorative box on top of the dresser in my office.

(Cutie little box was from HomeGoods!)

Right now it’s full cause I’m going through magazines and have a ton of inspiration pics to file. Normally, once it gets about half way full, I know it’s time to address it.

Anything left (invoices, utility bills, etc.) that I need to file goes into a bin in the top drawer to be filed in the basement:

But there’s always items I want to keep upstairs, easily accessible. I had tried wall mounted organization before, and they never worked for me. It all seemed to be just another “pile” of papers.

There were three different subjects I needed to keep organized – my inspiration pictures from magazines, stuff for the Bub (notices from school, game instructions, toy assembly) and general household stuff I didn’t want to keep downstairs (instruction manuals, phone numbers, receipts).

And when I saw the cover of Better Homes and Gardens a few months ago, it hit me. paint chip tagsThey had the prettiest, simplest binders and they were exactly what I had been looking for all my life.

Or at least what I had been looking for all of a few weeks. :)

I found them at Naked Binder and I LOVE. But they needed a little somethin’. Some honeysuckle blingity blang. I’ve been adding little touches of that beautiful pink color through the office here and there. Just a smidge. A skosh.

I wanted to label the binders without labeling the binders, you know what I mean? So I busted out my Silhouette and and made some cutie new tags.

I picked out some paint chips in the pretty pink color and used my Silhouette to make images of a house (for the house binder), an idea “cloud” for the inspiration binder (couldn’t decide between the cloud and a lightbulb, but thought the cloud was cuter), and an “E” for the Bub’s binder.

I just cut my tags out of the paint chips like I showed you here, and then glued two back to back, and put my little images (on vinyl) on top:

And they are just the cauuutest (free!) tags I ever did see!:

organizing paper

Precious! :)

The last step of my paper process is to take the to-be-filed box from the drawer downstairs every few weeks or so. I completely reorganized all of our hanging files after I went through all of the paper. Everything is filed by the most basic titles (credit – old credit thankyouverymuch), house, medical, etc.

I wanted to make sure the filing was as simple as possible – no standing there for five minutes trying to figure out where to put each piece of paper.

The hanging folders are organized alphabetically, the taxes by year.

I also have a couple magazine file holders on hubby’s desk down there, near the scanner. I keep the Bub’s artwork in those that I want to scan…eventually.

And finally…I’m DONE. Whew!! :)

Yes, it’s lots of steps. But it’s what works for me. I finally learned that I am NOT a get the mail, take it in, sort, shred, deal with, file it immediately kind of girl. I’m just not. When I was trying to force myself to be that, it didn’t work. I ended up with piles everywhere.

Now I still have piles everywhere, but they’re organized and they have a purpose. Solutions for taming the paper monster are different for everyone – so this may not work for you. But if you’re a procrastinator like me, it may work great. ;)

When I posted about my paper dilemma a couple of months ago, some fine folks from Sentry Safe contacted me about their Fire File:


Which was freaky weird, because while I was in the process of getting our paper under control, I was planning on purchasing this exact product.

We wanted a heavy duty safe for important files that would be fire safe and had a lock, and they read my mind!

They graciously sent me one to use, and I love it. It’s so heavy and sturdy, it’s fire safe up to half an hour, and it comes with a key for security:

If you keep your important documents like insurance info, birth certificates and social security cards at home, this is an ideal place to keep them.

The great news is the fine folks at Sentry Safe want one of you to have one as well!

All you have to do to enter for your own free Sentry Safe is leave a comment here – I’ll leave this open for the week, till Friday the 1st at noon. Remember, if you comment anonymously, please leave your email (write it out using “dot” and “com".)

Hope my crazy getting the paper under control process, or at least a part of it, helps some of you organize the paper insanity in your lives! If you’ve figured out what works for you, are you the git er done kind, or a break it into a million steps kind of chick like me?

I love hearing what works for you! (And it may help someone else!)

Thursday, March 24, 2011

Stuff I like

Hey all! Thanks so much for the all the sweet comments on the board and batten in the office! I haven’t touched it since I finished – my shoulders still cry out for mercy every time I step in the room. :)

Every once in a while, I’ll find a new little doodad or product, and if I like it, I’ll think – “This (insert cool thing here) is so nifty, I need to tell my Squeezies about it!”

I think about you often, I do. ;)

But one little cool doodad does not make a post, so I thought I would show you a few of them all at once. Some of these we’ve been using for years, some just a few weeks.

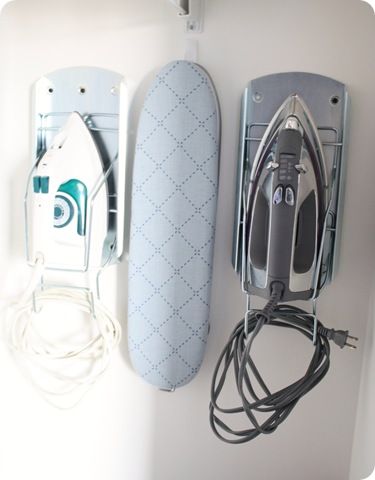
First up, some super saahhhweet organization from my pal, your pal, everybody’s pal -- IKEA. I picked up these on a recent trip and love LOVE them:

iron storage

They hold your iron on the wall, all tucked away nice and organized. I know, it’s the little things. It doesn’t take much. I’m easy to please. I told you, IKEA makes me happy. :)

I think they were $3.99 each. The mini ironing board (for shirt sleeves) I hung with a Command hook (love those too).

I got two holders for our two irons – one is for hubby’s work clothes, and one for my drapery projects. I use hemming tape and there were some unfortunate hemming-tape-residue-on-the-work-pants incidents. So now we have his and hers irons. His is the manly dark one, mine is the dainty light one. So cute.

And did you notice the little cord holders? Um, that put me over the edge happy, cause you know cords give me the heebs.

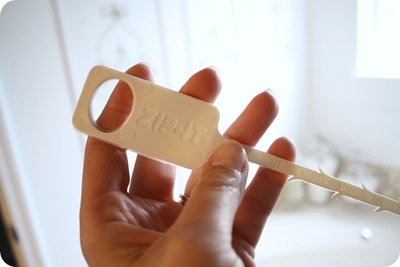
Next up, a knock your head against the wall cause I WHY didn’t I think of this, the Zip-It:

zip it

Oh my glorious, this thing ROCKS. I love this little $2 jobbie – you just put it down your drain and pull up. All the nasty comes up with it. You’ll thank me for not showing you – I’ll let you experience that for yourself.

I found it forever ago, and I’m never going back to the nasty chemicals to unclog our drains. I have this thing about Drano. It freaks me OUT. Every time I’d use it, I’d turn on all the fans, open every window, close the doors behind me, and leave the house for three days.

A little bit of an exaggeration, but not much. :) I don’t remember where I got our Zip It, but I’ve seen them at Target, and you can find out more at their website here. (If you have a weak stomach, do not watch the video on their site. For reals.)

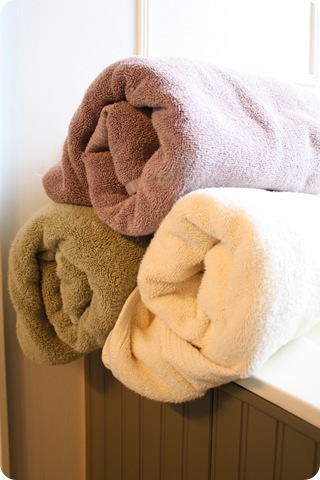
A couple of years ago, we found the BEST, fluffiest, softest, more absorbent towels EVER. And we found them at Meijer of all places.

I am gaga over these towels:

I kid you not, I adore them. They are hands down the best towels we’ve ever owned. We’ve spent good money on much more expensive brands and these beat them in price, quality and comfort any day of the week and twice on Sunday.

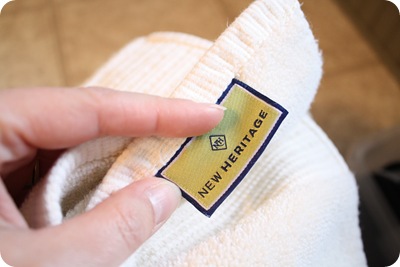
They’re called New Heritage, and I believe the large towel is $9.99:

new heritage towels

I’m not kidding you – they are luscious. I’ve washed them meeellions of times and they hold up amazingly well. They’re softer than the day we bought them, they don’t snag, and they get you dry.

We love them so much, we got rid of all of our older towels and only use these now. They come in about seven colors I think, but no white, which is kind of a bummer.

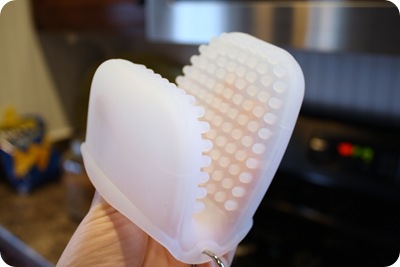
The last of my cool stuff is for the kitchen. I found these oven mitts at Crate and Barrel last year:

crate and barrel silicone mitt

I got my first one with a gift card (they are $9.99), and loved it so much I went back for another. Eventually I got rid of all of my other oven mitts, they are that great. They’re grippy enough that they hold on tight to pans, they wash so easily (I rinse them or put them in the dishwasher) and they take up so little storage space.

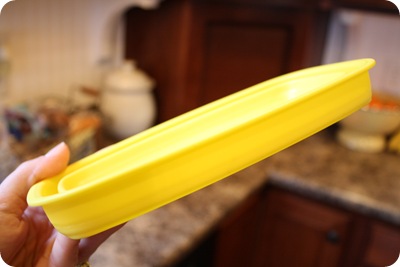
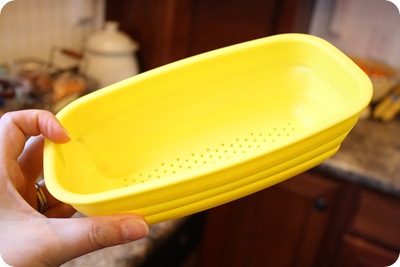
Speaking of silicone (this stuff is amazing, eh?) I found this little strainer ($5.99 I think?) at TJMaxx last summer:

Doesn’t look like a strainer huh?

BOOM:

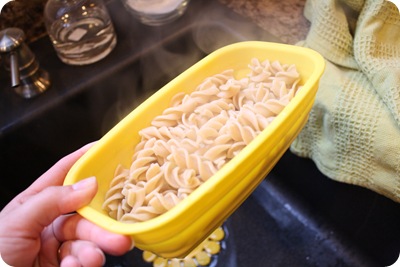
It pops out. I don’t know why, but this thing gets me all giddy. Ingenious.

This one is pretty small, and it still hold a good amount:

pop out strainer

It washes so easily, and takes up a sliver of storage space in the drawer. I’m on the lookout for slightly larger versions as well.

I guess they make storage containers like this too now. The brilliance out there astounds me. Again, WHY doesn’t my brain think of this stuff? Don’t you love how you see something like this and you’re all DUH…but you would never think of it?

At least my head doesn’t. :)

So there. you. go. My favorites doodads of late. Nuggets of awesome. Good stuff. Stuff I like. Anything you’ve found lately that you love? Trinkets, tools, stuff that works? I love hearing about things that work and hold up for moms and families.

P.S. I’m not getting paid by any of these companies, I just like their stuff. So I share. Cause they rock.

P.P.S. If you can find the bag of Cool Ranch Doritos in a picture above, you get a gold star.

Tuesday, March 22, 2011

PROGRESS (board & batten) in the office!

Can I just start out with a WHOO?!

And a WHEW!! Cause I’m exhausted.

:)

It’s been two months since I’ve addressed my office redo, and I’ve had the mdf for the board and batten treatment on the walls for about that long. It’s been piled in the garage all that time…and every time I’ve stubbed my toe, tripped over them or watched them gathering dust since January, I have thought… I MUST get that project done.

And I just kept thinking. No doing. :)

I was hesitating because for this space, I really, really wanted to pull out the baseboards in the office before I installed the B and B treatment. I wanted to install fat, thick ones like in the inspiration picture I showed you a while ago:

So I hesitated. And worked on purging. Did a little change in the living room. And took a couple trips to IKEA. :)

I hesitated because as I’ve mentioned before, our baseboards are SUCH a pain in the booty to remove. I’ve done it in a bathroom and our laundry room, and oh. my. good. NESS. – they are so hard to get off the wall. It’s just crazy. I’m talking two inch, thick nails holding those puppies in.

Every time I’ve done it, I end up damaging the drywall, which has been OK because I’ve installed beadboard. But in the office, I was sceered. I knew some damage would be covered by the boards, but not all. But I was also afraid to not take them out – would it look wonky? Unfinished? Wrong?

Well, I was looking at the blank walls of the office yesterday morning and just decided to take a risk and just install the stuff already. I wasn’t going to rip out the baseboards -- I would just install the mdf boards right over them. I knew it wasn’t going to be perfect, but none of my projects are. They all have little imperfections and quirks – that’s how I roll. Why stop now? :)

I just wanted to get it done and said to heck with perfect. I was going to get my vision up on the walls!

And once I started, it was hard to stop. I got everything done yesterday and today. I started with my primed boards from Lowe’s:

They’re 3 1/2 inches wide, 3/4 inch thick and came in 12 foot lengths. I had them cut in half so they were easier to work with. I would have had them cut from a sheet of mdf like I did on the staircase, but I really wanted primed mdf for this project.

There’s a LOT of wall space to cover this time. And to paint. :)

I started by nailing the boards along the bottom over the baseboards:

And I wasn’t horrified. :)

I used my nail gun and two inch nails to install all of the mdf. I wanted something thick enough to get through the boards, the drywall, and into the studs (where I could get them).

Then I figured out how tall I wanted the treatment, and started putting up the vertical boards. I cut a 13 inch board and used it as my spacer between each vertical piece, then put the boards along the top:

I was loving how it was coming along, but I wanted a little more character, so I added a some detail by adding another line of boards:

I went ten inches down from the top boards. I waffled between ten and 12 inches, and wish I would have thought about the light switch before I decided on the ten:

:) Again, SO not perfect. But with some caulk, spackle, and some paint, you won’t even notice it in the end. Pinky swear. The lamp in front of it will help too. ;)

I was so in love with how it turned out! But I still wanted to add a little somethin’ -- it was the detail I had seen in my head all these months, and I knew I had to do it.

So, it was back to Lowe’s we went to grab some more primed mdf, but this time it was the 1 1/2 inch width:

I took the smaller mdf and created a shelf around the top of the board and batten:

I just nailed it down into the 3 1/2 inch boards that went around the top. It’s super sturdy – I didn’t even use glue. 

I found that small trim (looks like mini-crown molding) to put along the bottom, under the “shelf.”

The hardest part in the room was this area by the doors – the corners took 22.5 degree cuts instead of 45’s;

They just took a few extra practice cuts. ;)

You can see how they came together where it hits the window:

It’s gonna look fantastic once it’s all painted!

The imperfections are everywhere – I spaced the boards around the room based on light switches and plugs, but I completely forgot under the windows. So when I went to add the boards under the sills, I realized the measurements were way off.

I figured since I’ll always have drapes up, I decided to wing it and just put one single board right in the middle of the window:

You won’t see the empty space where there should have been other boards, because it’ll be covered by drapes. *ThankyouLordforfabric.*

Because I was working around a plug, I ended up not having enough room for a whole board in one corner. I went ahead and put it up, so one section is about half an inch smaller than the others:

Can you tell which one it is?

Wait, don’t answer that! Just say you can’t tell. ;)

I had to do that in a couple spots, but I’m about 150 percent sure I’m the only one who will notice when it’s all painted. And even if they do notice, I’m quite sure I’ll be the only one who cares.

I finished it all off by putting up the trim around the windows:

framed out windows

Most of that will be covered by the drapes too, but I just love the look!

And now, the room is finally coming together!:

It only took 43 foot boards, which ended up being about 118 cuts, 150 trips in and out of the garage, and climbing up and down something like 624 steps.

Or so. :)

Needless to say, I haven’t needed to work out this week.

It’s far from complete, but I can finally see my vision coming to life:

That’s my DIY memo board leaning there – I need to figure out how I’m going to hang it with the addition of the ledge. I think I’ve figured it out.

Next up – caulking, spackling and sanding. If that’s not enough to make you cry a few tears, after that it will need a couple coats of paint. Whimper.

(Yet again, I have not followed my own advice of painting before installing.)

But I’ve gotten this far, I know I can DO THIS people!

Then I can get moving on the drapes, accessories and art:

I didn’t want the ledge to stick out too much, but I wanted it to be just wide enough to hold frames.

Here’s one of my favorites, waiting on the perfect spot:

It’s soooo dreamy. :)

But for now, our garage looks like a sawdust bomb went off:

And my shoulders are practically screaming at me. :)

I showed you some of the board and batten installation details in a video in this post. It isn’t hard – I swear to you. It’s time consuming, but not hard. I use a nail gun and compound miter saw for this project. You can do it by hand, it will just take you a lot longer and you’ll need a few more shoulder massages. ;)

I used 19 primed 3 1/2 boards, 12 feet each, and the total cost for those and everything needed for the ledge ended up right at $200.

I can’t believe how far this room has come – the before:

office before

And now:

board and batten treatment

Can you believe it’s the same room? I can’t, and I live here. ;)

And you know what – I don’t even notice my whack baseboard/mdf board combo. It really doesn’t bother me. I took a risk at having it less than perfect and I’m so glad I did.

I’m linking this up to my friend Nester’s Take a Risk Day party! Have you taken a decorating risk lately? 

Sunday, March 20, 2011

This little ($5) light of mine

Hello there! Can you believe spring is HERE?! Whoo HOO! Hubs grilled out our first steaks of the year tonight and they were SO good. If this keeps up I’ll be picking out flowers for the window boxes any day now.

We had lovely weather -- perfect for spray painting. ;)

We have a light at the base of our stairs that I changed out a few years ago. It used to be the most builder basic brass light, and I replaced it with one that was a little more up to date:

It’s been so long, I have no idea where I got this one – it was most likely Home Depot or Lowe’s. It was waaay better than what we started with, but even with two 60 watt bulbs inside, it barely let off any light.

It drove me a little batty, because this is the one light on our main floor that I have turned on the most – it’s right in the middle of everything.

Well, on a trip to Habitat for Humanity ReStore a few months ago, I found a $5 fixture that had TONS of potential for that spot:

ReStore light before

If you have a Habitat ReStore near you, you MUST go! I love that place – but I go (mostly) for the light fixtures. There’s such a great selection of brassiness just begging for a redo!

I got my craft room and master bedroom fixtures there:

Ours is downtown and a drive, so every time we go to the Indy Children’s Museum, we do a little side trip to the ReStore on the way home. ;)

So anyhoo, I was totally thinking of this when I saw my latest find:

pottery barn gothic lantern

That would be the Pottery Barn Gothic Lantern. Mine had more sides, obviously, and it was nine inches wide instead of 12, but it was the same height. And with a cleaning and some spray paint, I knew it had loads of potential. 

So I started taking it apart to spray paint it:

spray painting light fixture

It looks intimidating, I know. :) But it’s not – just remember how it started out so you can get it back together again. I take pictures of the details just in case I can’t remember at the end.

Most of the time, you don’t have to take a fixture apart to paint it, but this one had parts inside the glass that I needed to get to.

I wanted to keep the glass, so I started the seriously annoying necessary job of taping off it all off:

taping off glass

I didn’t get it exactly perfect, because I knew I could use my trusty razor blade to scrape off the excess spray paint if needed.

I took everything outside and started spraying light coats of Krylon oil-rubbed bronze (from Walmart, about $4 I think?) on everything. No primer here – since it won’t be handled I don’t worry about that for light fixtures.

It was when I started spraying the glass part above that I realized I needed to cover the glass on the inside of it as well. ARGH. Duh.

So I did an even less perfect job on the inside. ;) Whatev. It worked.

And I continued my coats, taking breaks inside to cuddle with my three guys -- hubby, the Bub and this little bitty one:

Peanut

:) He’s so stinkin’ sweet. And he’s a cuddle bug for sure.

Anyway, can I say a quick hollaaaaa to the spray paint peeps for making this stuff dry so fast? LOVE it. You need to let it cure for a little while, but especially right over metal, it dries SO fast.

I got it up in no time and I absolutely love it!:

Pottery barn knock off

I love how it throws the light on the ceiling too! (See more about my love of painted ceilings here.) And the glass acts almost like mirrors, so I swear it makes those three bulbs even brighter.

It is seriously about ten meeeellion times brighter than the old one. Really, it lights up the whole main floor.

So the next project is to install a dimmer switch. You know I’d love me some dimmers! I’d rather have a bright light I can dim than to have one that’s always dim. ;)

I love our new Pottery Barn-ish light, and I especially love that their version is $270 and mine was $5.

Uh…YESSSSS:

I LOVE it!!

(Ignore the half done photo wall back there. It’s been half done for about a year now. There’s no finish in sight.)  :)

Have you found any great ReStore finds? Spray painted a light lately? Any oil-rubbed bronze goodness in your house? For some reason it’s gotten harder to find this spray paint – I’ve found it at True Value stores and Walmart. Have you found it anywhere else?

My friend Melissa found an almost identical $5 light! She took the glass out of hers and I love it!